
4 Essential Steps To Learning Almost Anything
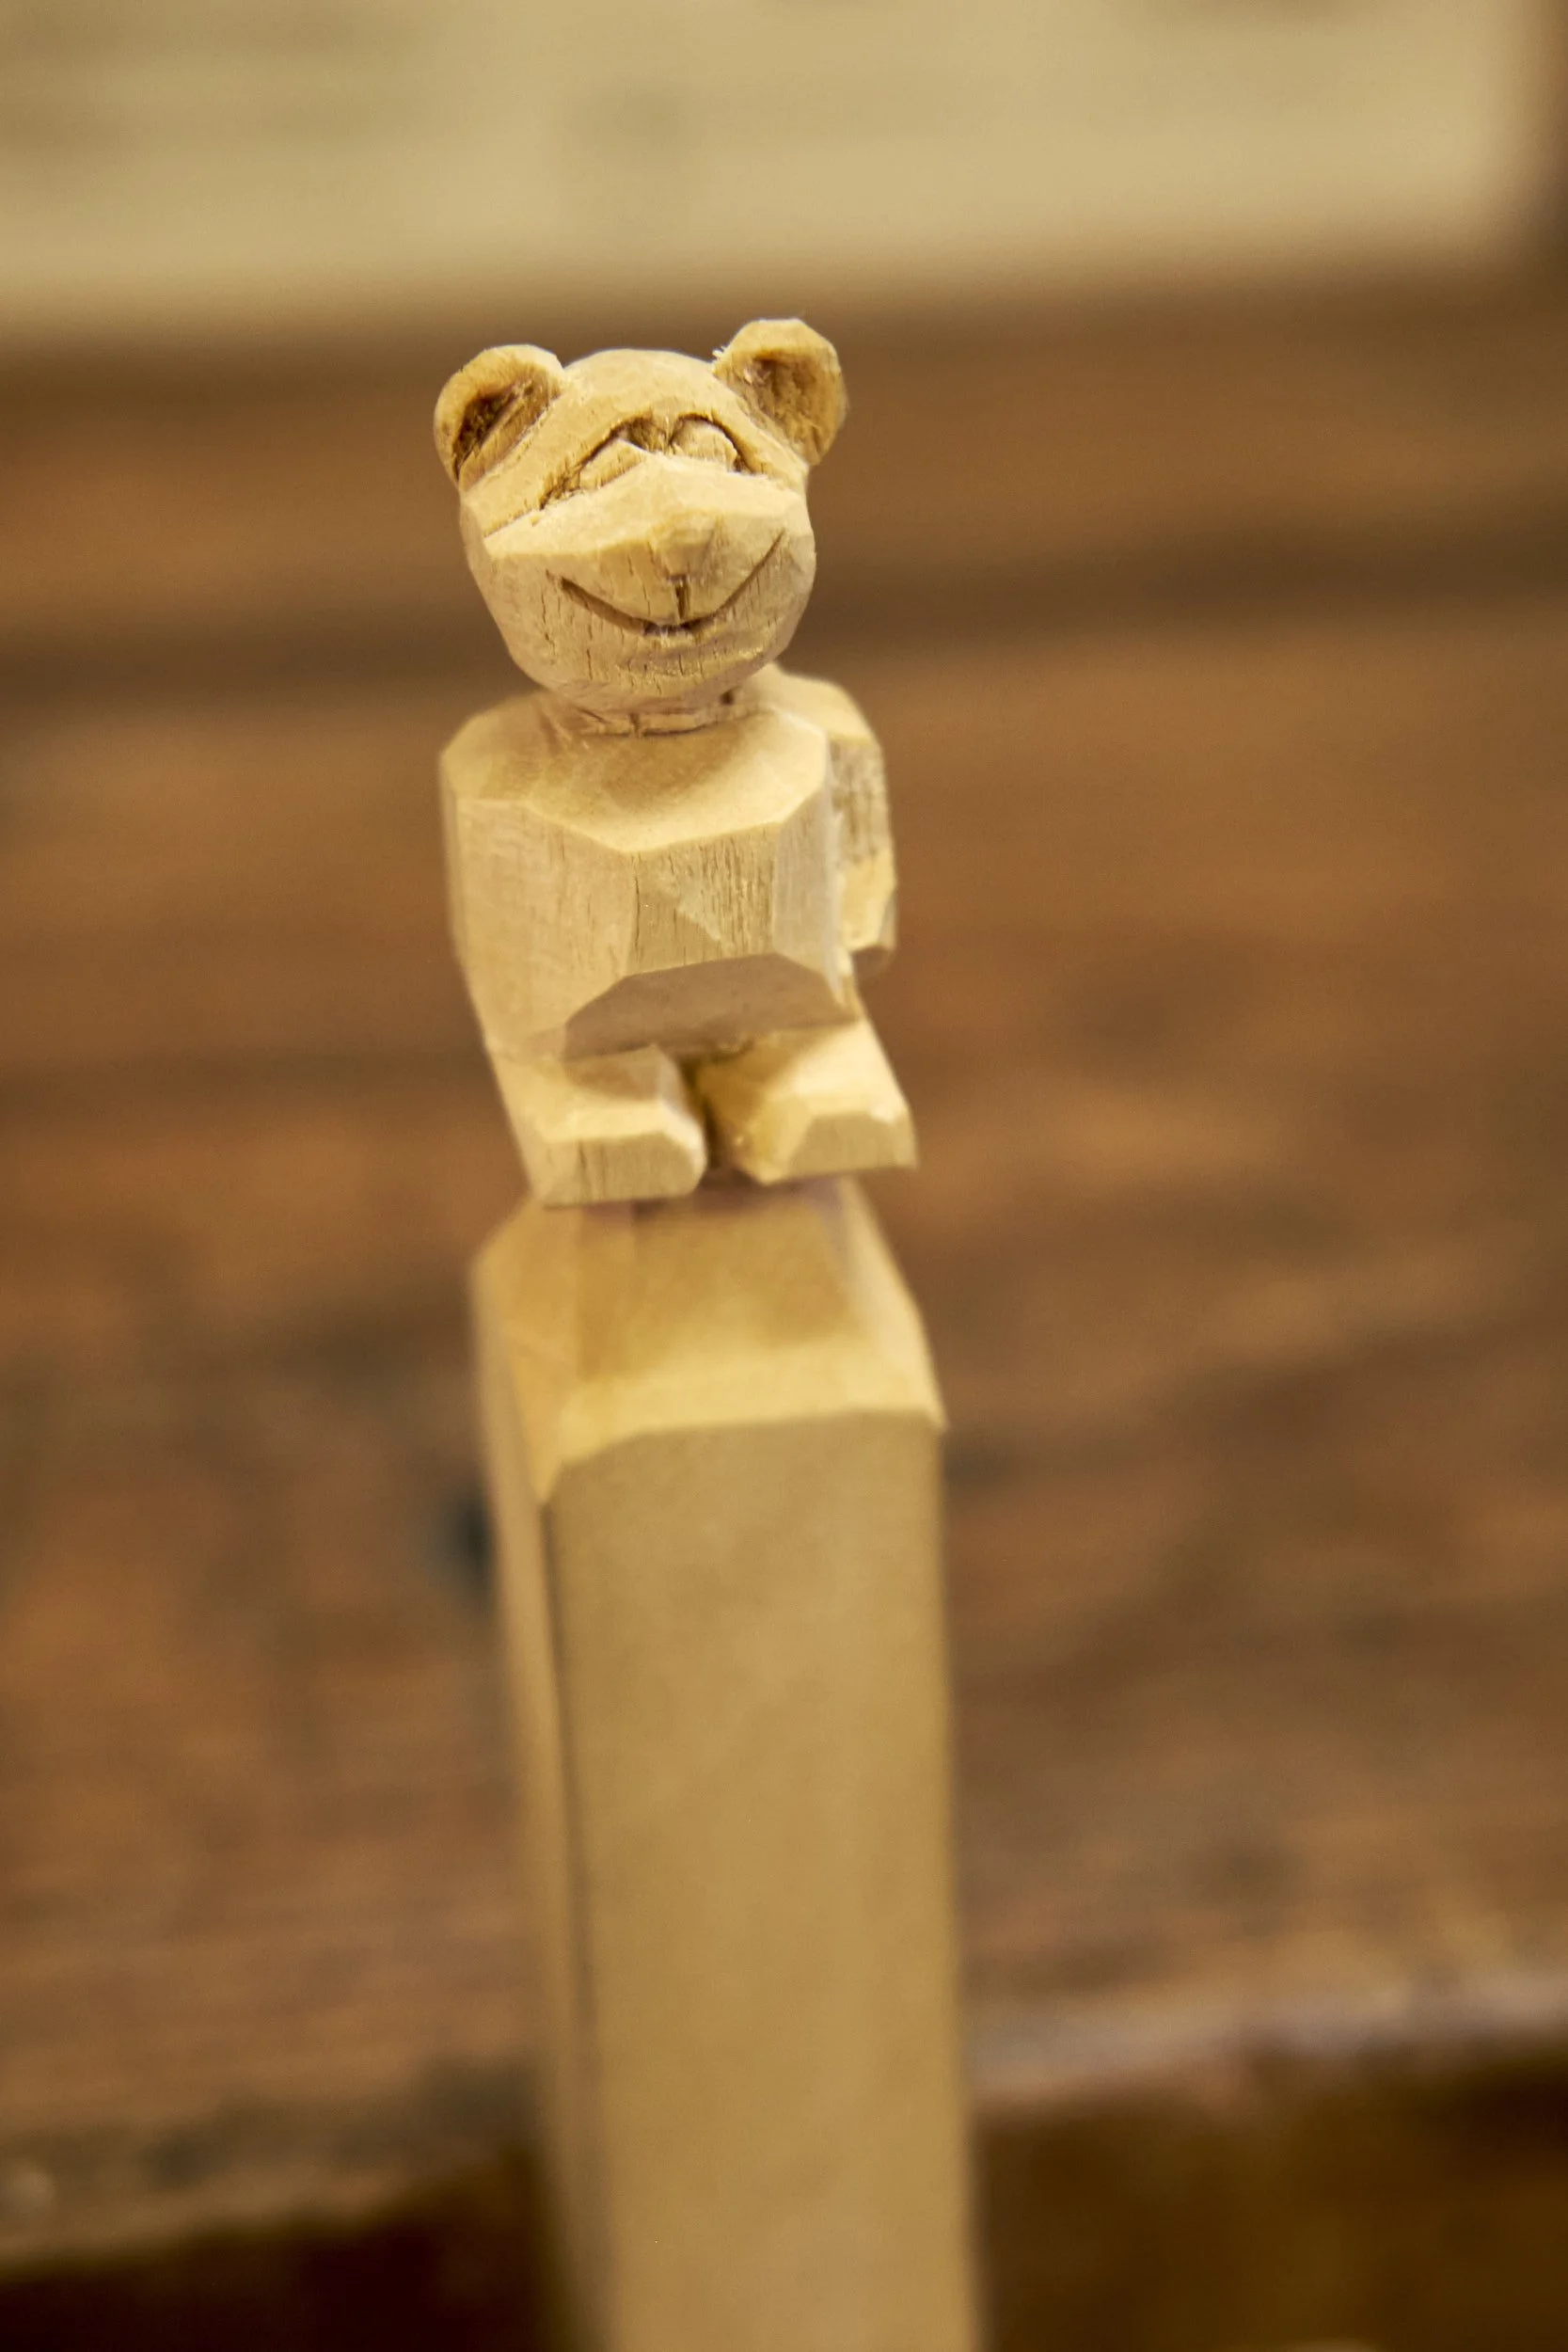
Or in this case at least, whittling.
There are some things that I know that I didn’t teach myself.
Honestly I am writing this article for the simple selfish reason of trying to make sense of a process that has been until now an automatic response to subjects that happen to tickle my fancy and the list of self taught skills acquired in this manner is so long that I might come across as arrogant should I mention all here.
My loving wife may argue that I have waaaaay too many interests and hobbies, and the online marketers will say that I need to find a single niche!
Here are just some self taught skills I’ve managed to acquire, starting with one that I am likely most proud of and that will be typing. All of my professional life I’ve been a two finger typist and during covid I taught myself how to type on a QWERTY keyboard using all my fingers and without looking at my hands. I won’t break any speed records but man has it made a difference when it comes to writing articles!
More skills on the list would be woodworking, photography, 3D design and a myriad of others not only limited to beer brewing, bread making and fly-tying.
In short, I love learning and especially so when it is something I am interested in.
On the list at this time, would be learning how to whittle and make stick chairs. You will likely see more on the subject of chair making before the year is out but I can say that I am busy building chairs numbers 3 and 4 as we speak.
One thing I still need to learn is how to shorten my intros but I am working on that one!
Anyway what I’ve realised is that I usually go through the 4 phases or steps I am about to list in my own pursuit for learning. Maybe your’s looks the same?
Step 1: Immersion
Here comes the biggest surprise in all my research for this article. I looked up the meaning of the word and guess what is the definition?
“A deep mental involvement with something”
I couldn’t say it better myself! On to step 2 then.
Ok, ok I’ll elaborate. When I come across something that I am interested in I literally immerse myself in it using any and every means possible. This will range from watching an inordinate amount of YouTube videos on the subject to reading anything that anyone has written on the subject and doesn’t happen to be ranked at #117 or lower on Google. No particular reason for giving that number but I don’t spend a lot of time reading lower ranked articles when I should be using that time trawling YouTube videos
YouTube’s algorithm loves me by the way.
Why whittling? It’s easy, I love art and of all forms out there I particularly love sculptures. I am fascinated with the process of making a 3D object from something that looks nothing like the final result to start with. I also have a ready supply of Jelutong and I know how to sharpen a tool so it was a natural progression to get into “a state of deep mental involvement with whittling” so to speak.
The fact that I happened across Doug Linker’s YouTube channel one Sunday afternoon helped somewhat to get the ball rolling and I find his channel to be one of the most informative sources on the subject.
Immersion thus commenced and I found myself watching most of Doug’s videos with the algorithm introducing me to other sources of information as time progressed. At some indeterminate point immersion gives way to the next step of the process which I call research and is usually marked by the fact that I start making notes. It is also at this point that I know I am getting serious about learning a new skill, however only when I move on to Step 3 does it become obvious that I may actually commit funds to the project. More on crossing that line in a bit.
It would be remiss of me not to mention that I may sometimes remain in a state of immersion on some subjects either because learning this skill may result in a total change of profession or financial ruin! Case in point Blondihacks’ channel is one I particularly enjoy but space, time and budget will simply not allow going down that rabbit hole.
I think heaven may be a place of unlimited resources and time to learn all I want………
Step 2: Research
There isn’t a clear line demarcating the crossover point between research and immersion, but there are some signs that I may be moving into Step 2. The first is that I start using specific search terms when looking for information and the second is that I sit down and start taking down notes of the information I’m finding relevant to the subject at hand.
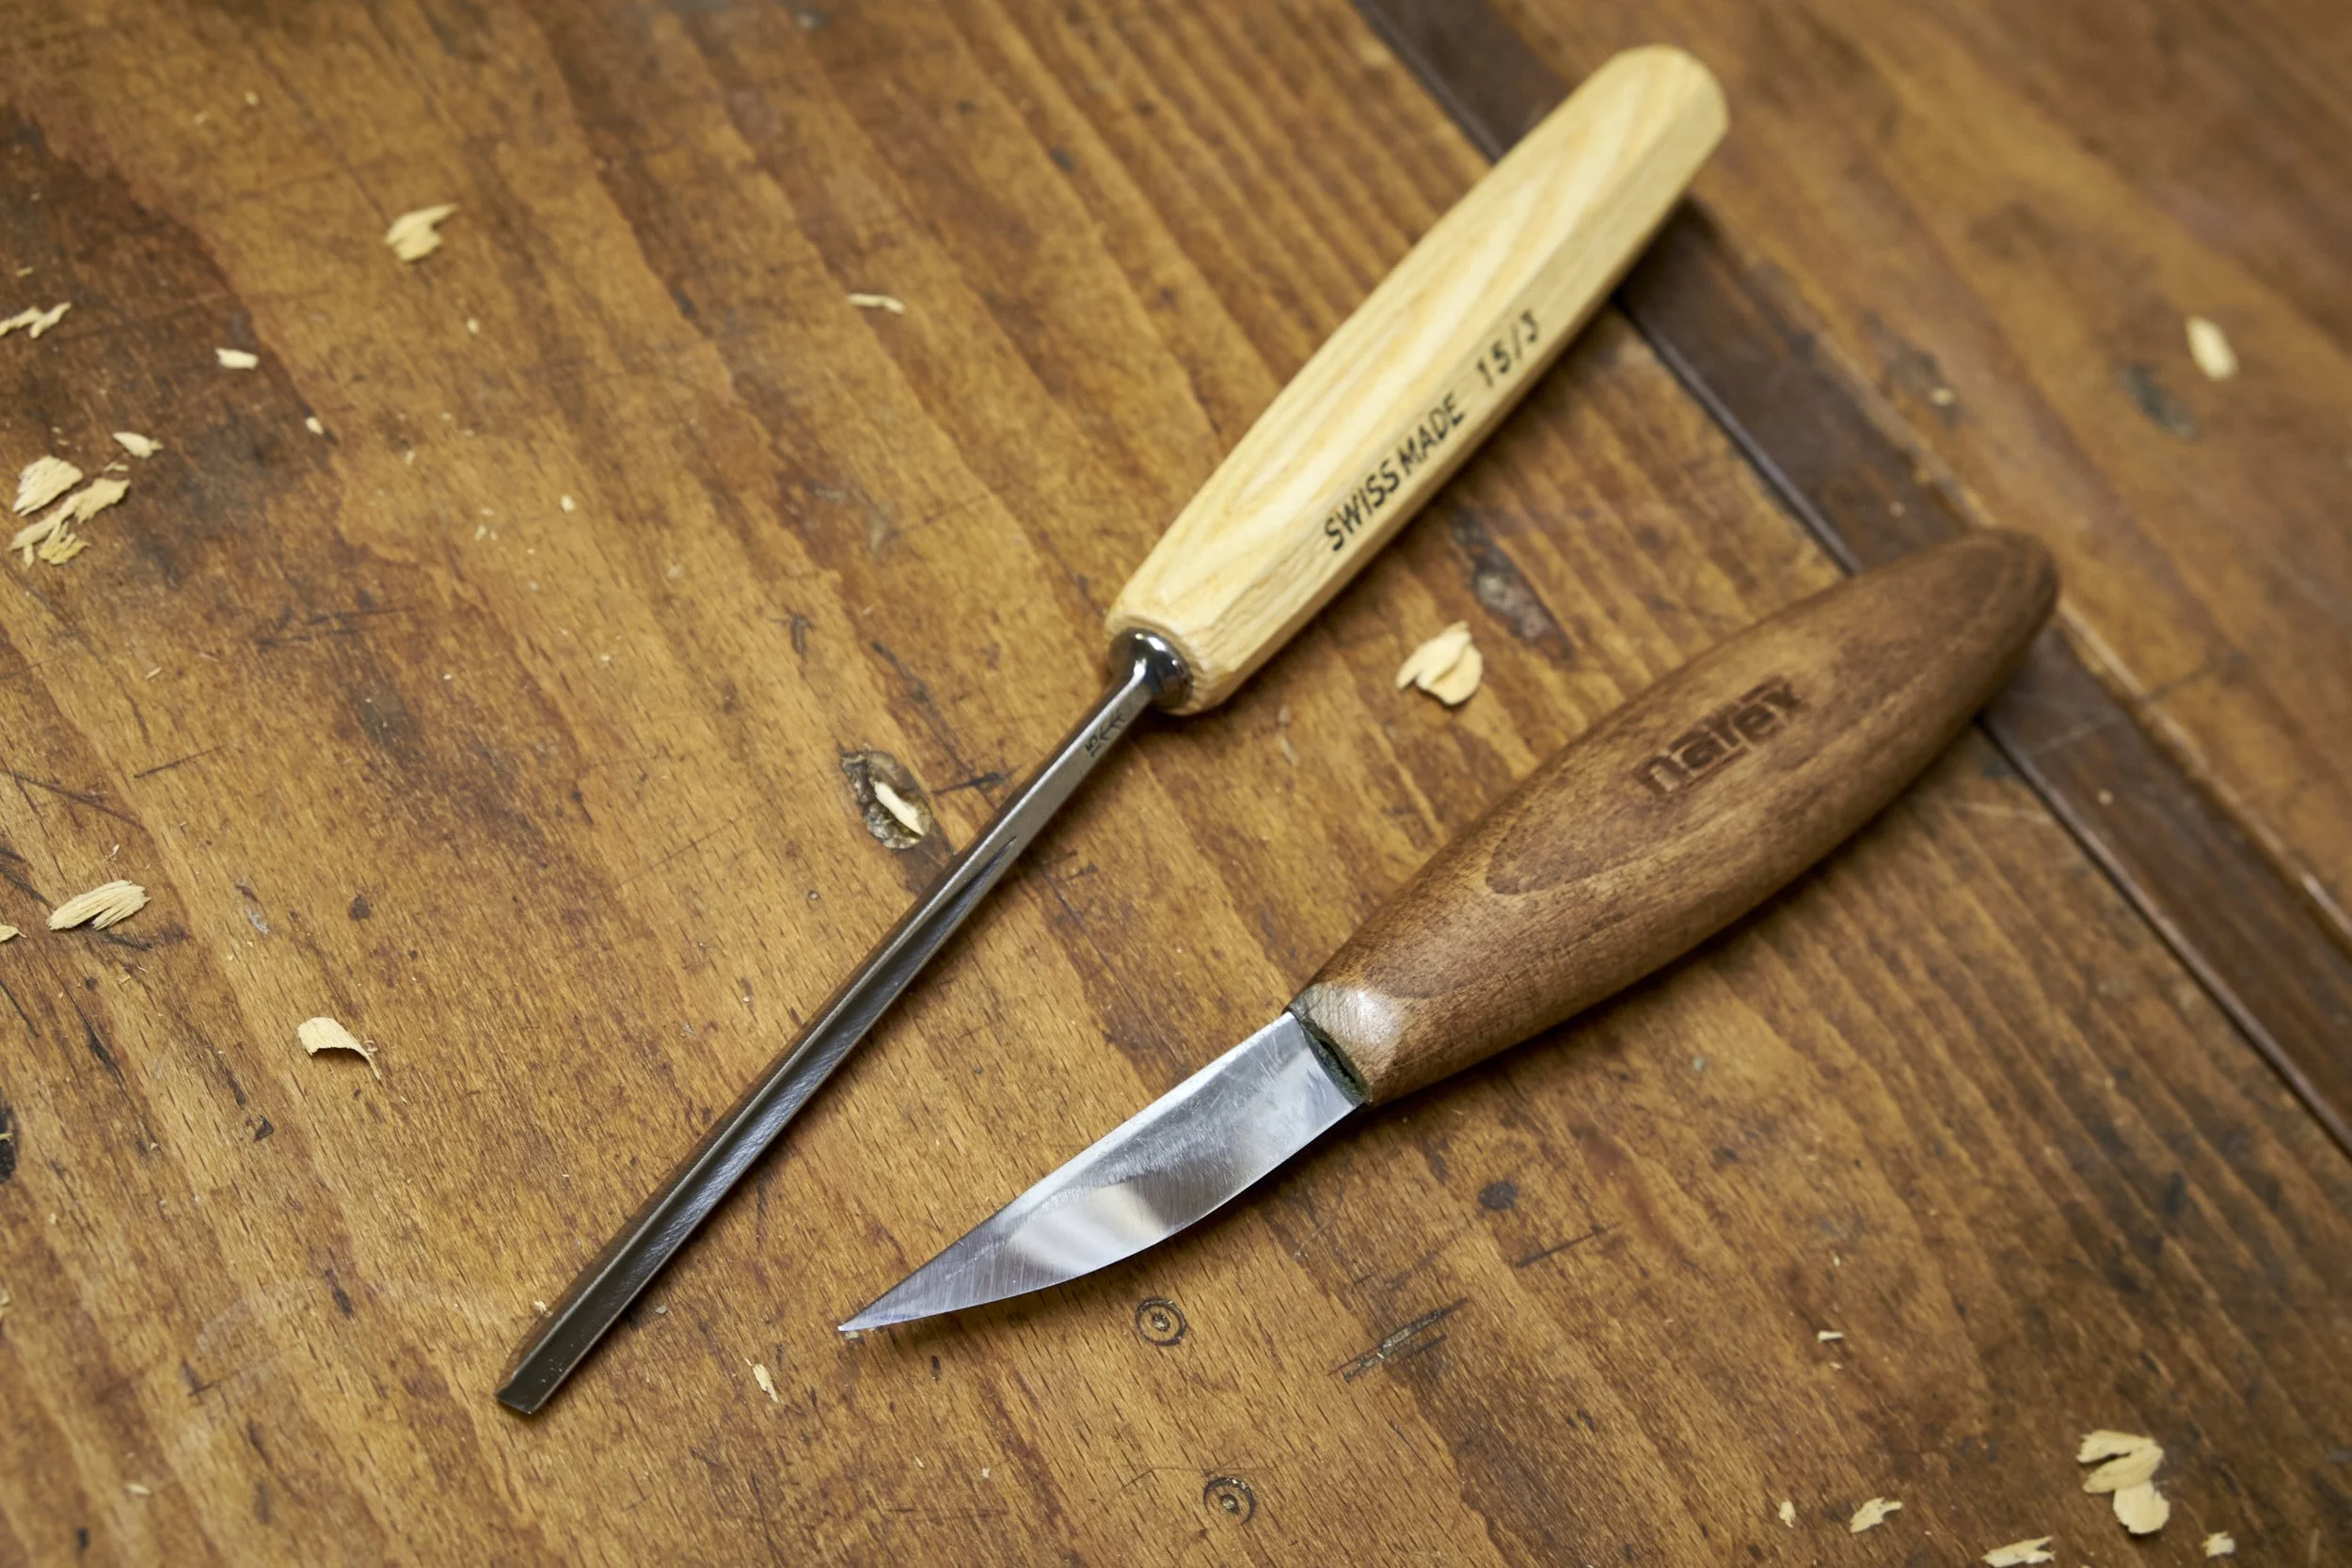
In the case of whittling I started searching specifically for information around carving knives and sharpening techniques. Again this process is similar to immersion in that I go deeply into each search term but instead of just consuming what is on offer I actively begin to absorb information and in almost a subconscious fashion, I start comparing the information offered between various sources. It is also here that I start deciding which source of information seems, to me at least to be the most relevant and accurate. At the same time I also develop a preference for which specialist’s approach I like the most. Of course having favourites also lays the foundation of who I tend to return to every time I need particular information. I will often save information covering specific topics to re-read or re-watch when I need clarity on some techniques.
As the saying goes “you don’t know, what you don’t know” and the research step is where I get exposure to information that I might not even have thought I needed. Case in point, some whittlers focus on knife work most of the time but once in a while they will use another chisel like a v-tool for instance, I then start looking into other chisels that I may need and in turn that opens a new branch of research such as when and how to use a particular tool or how to keep it sharp. I will often leave the current topic I’m on and head down a rabbit hole with the next before circling back to the original search term.
I did say that the YouTube algorithm loves me, didn’t I?
If there is a lot of information on a particular topic I will start making notes of the things I learn and it is at this point that I know I am hooked and will likely move on to Step 3 in short order.
Before moving on though, I need to mention that if any equipment is required to learn a new skill, I will start looking at the availability of these products. In my neck of the woods, which happens to be South Africa it often feels as if it’s on the other side of the universe as far as the availability of tools go. “Hey, just pick up the ___________ (insert brand name here)” does not work down here at the tip of Africa!
Research into tools and equipment usually centres around what my favourite source of information uses in their own workshop followed by lots and lots of reviews.
Step 3 often starts when I find a source for what I need and I present my credit card!
Step 3: Experimentation
This is where the real fun and frustration starts, it is also by some margin here that I spend most of my time, thus the longest part of this article!
The experimental phase almost never looks the same between projects and is supremely dependent on what I am trying to learn.
Do I want to teach myself a new joinery technique? If I have the equipment in my workshop I will experiment to find out which method suits my skill and resources best. Let’s use cutting the humble rebate as an example. I will compare using the standard blade on the table saw to make multiple cuts against my dado stack against using hand tools against using a router. At the moment my favourite is the dado stack followed by hand tools. I particularly dislike the router and since getting the dado set the single blade, multiple cut method on the table saw doesn’t even feature.
The important thing though, is that I can use any of these methods depending on what the project requires.
That’s one scenario.
The next is when I acquire a new tool for a specific reason and I stress it a bit to check what else it can do. The Festool Domino is one such machine, I now routinely use it to cut slots for the z-clamps that I use to attach table tops frames. Not my idea, got that one somewhere on YouTube but I needed to experiment to find the best settings that would work with my source of z-clamps.
That’s the second.
Lastly I experiment when the ideal tool for the job isn’t available in an attempt to see if I can get by using the alternative.
That’s number three and also the one I found myself in, in this case.
I mentioned earlier that we sometimes have a shortage of specialty tools available for some techniques. Whittling is one of those, we do have access to general carving tools in the from of Pfeil and Narex but nothing specialising in whittling. Pfeil comes close with a set of chip carving knives but they are not ideal, both in blade geometry and the shape of their handles but they are readily available to me at a local supplier and I know that they are made from good steel based on other tools in their lineup that I already use in my workshop.
I had no idea about the blade geometry and handle yet and realised those shortcomings later through experimentation which is the purpose of this phase anyway.
In spite of a less than stellar review of Pfeil tools I found on YouTube, I headed off to the shop and acquired an example of the Rosenmesser - I do wish someone at Pfeil would provide a description of what each knife is used for rather than just a German name.
As soon as I got back into the workshop I applied the cutting edge to a section of Jelutog a commonly available wood here in SA that has become the mainstay of local carvers (another thing not available around here is Basswood which is readily used for whittling in the US). Here I ran into the first issue and that was that in spite of being very sharp the blade was hard to push through the wood. Upon closer inspection I saw that the blade had a very small micro bevel along the cutting edge and even with a sharp blade it was hard to penetrate the wood during a cut. I stropped the blade and tried again with the same results and it became clear that the micro bevel was the issue as it was at an angle that pushed against the wood fibres rather than allowing the blade to slice cleanly.
At this point my research came in handy.
Few sources actually pertinently mention bevel angles but what I saw on sharpening videos was that knives often had a single long bevel right up to the cutting edge, I think it’s called a scandi grind. This called for a re-shaping of the blade and fortunately I am no stranger to spending time at the sharpening stones. I’ve become comfortable changing blade geometries, especially after screwing up an edge while practicing hand sharpening and having to fix it afterwards.
I also happened to have had access to a brand new course diamond stone at the time and I was able to grind down the sides of the blade in no time so that the micro bevel was removed, allowing the sides to meet at a much shallower angle at the cutting edge, in turn making the knife much better at slicing once I had it honed and polished.
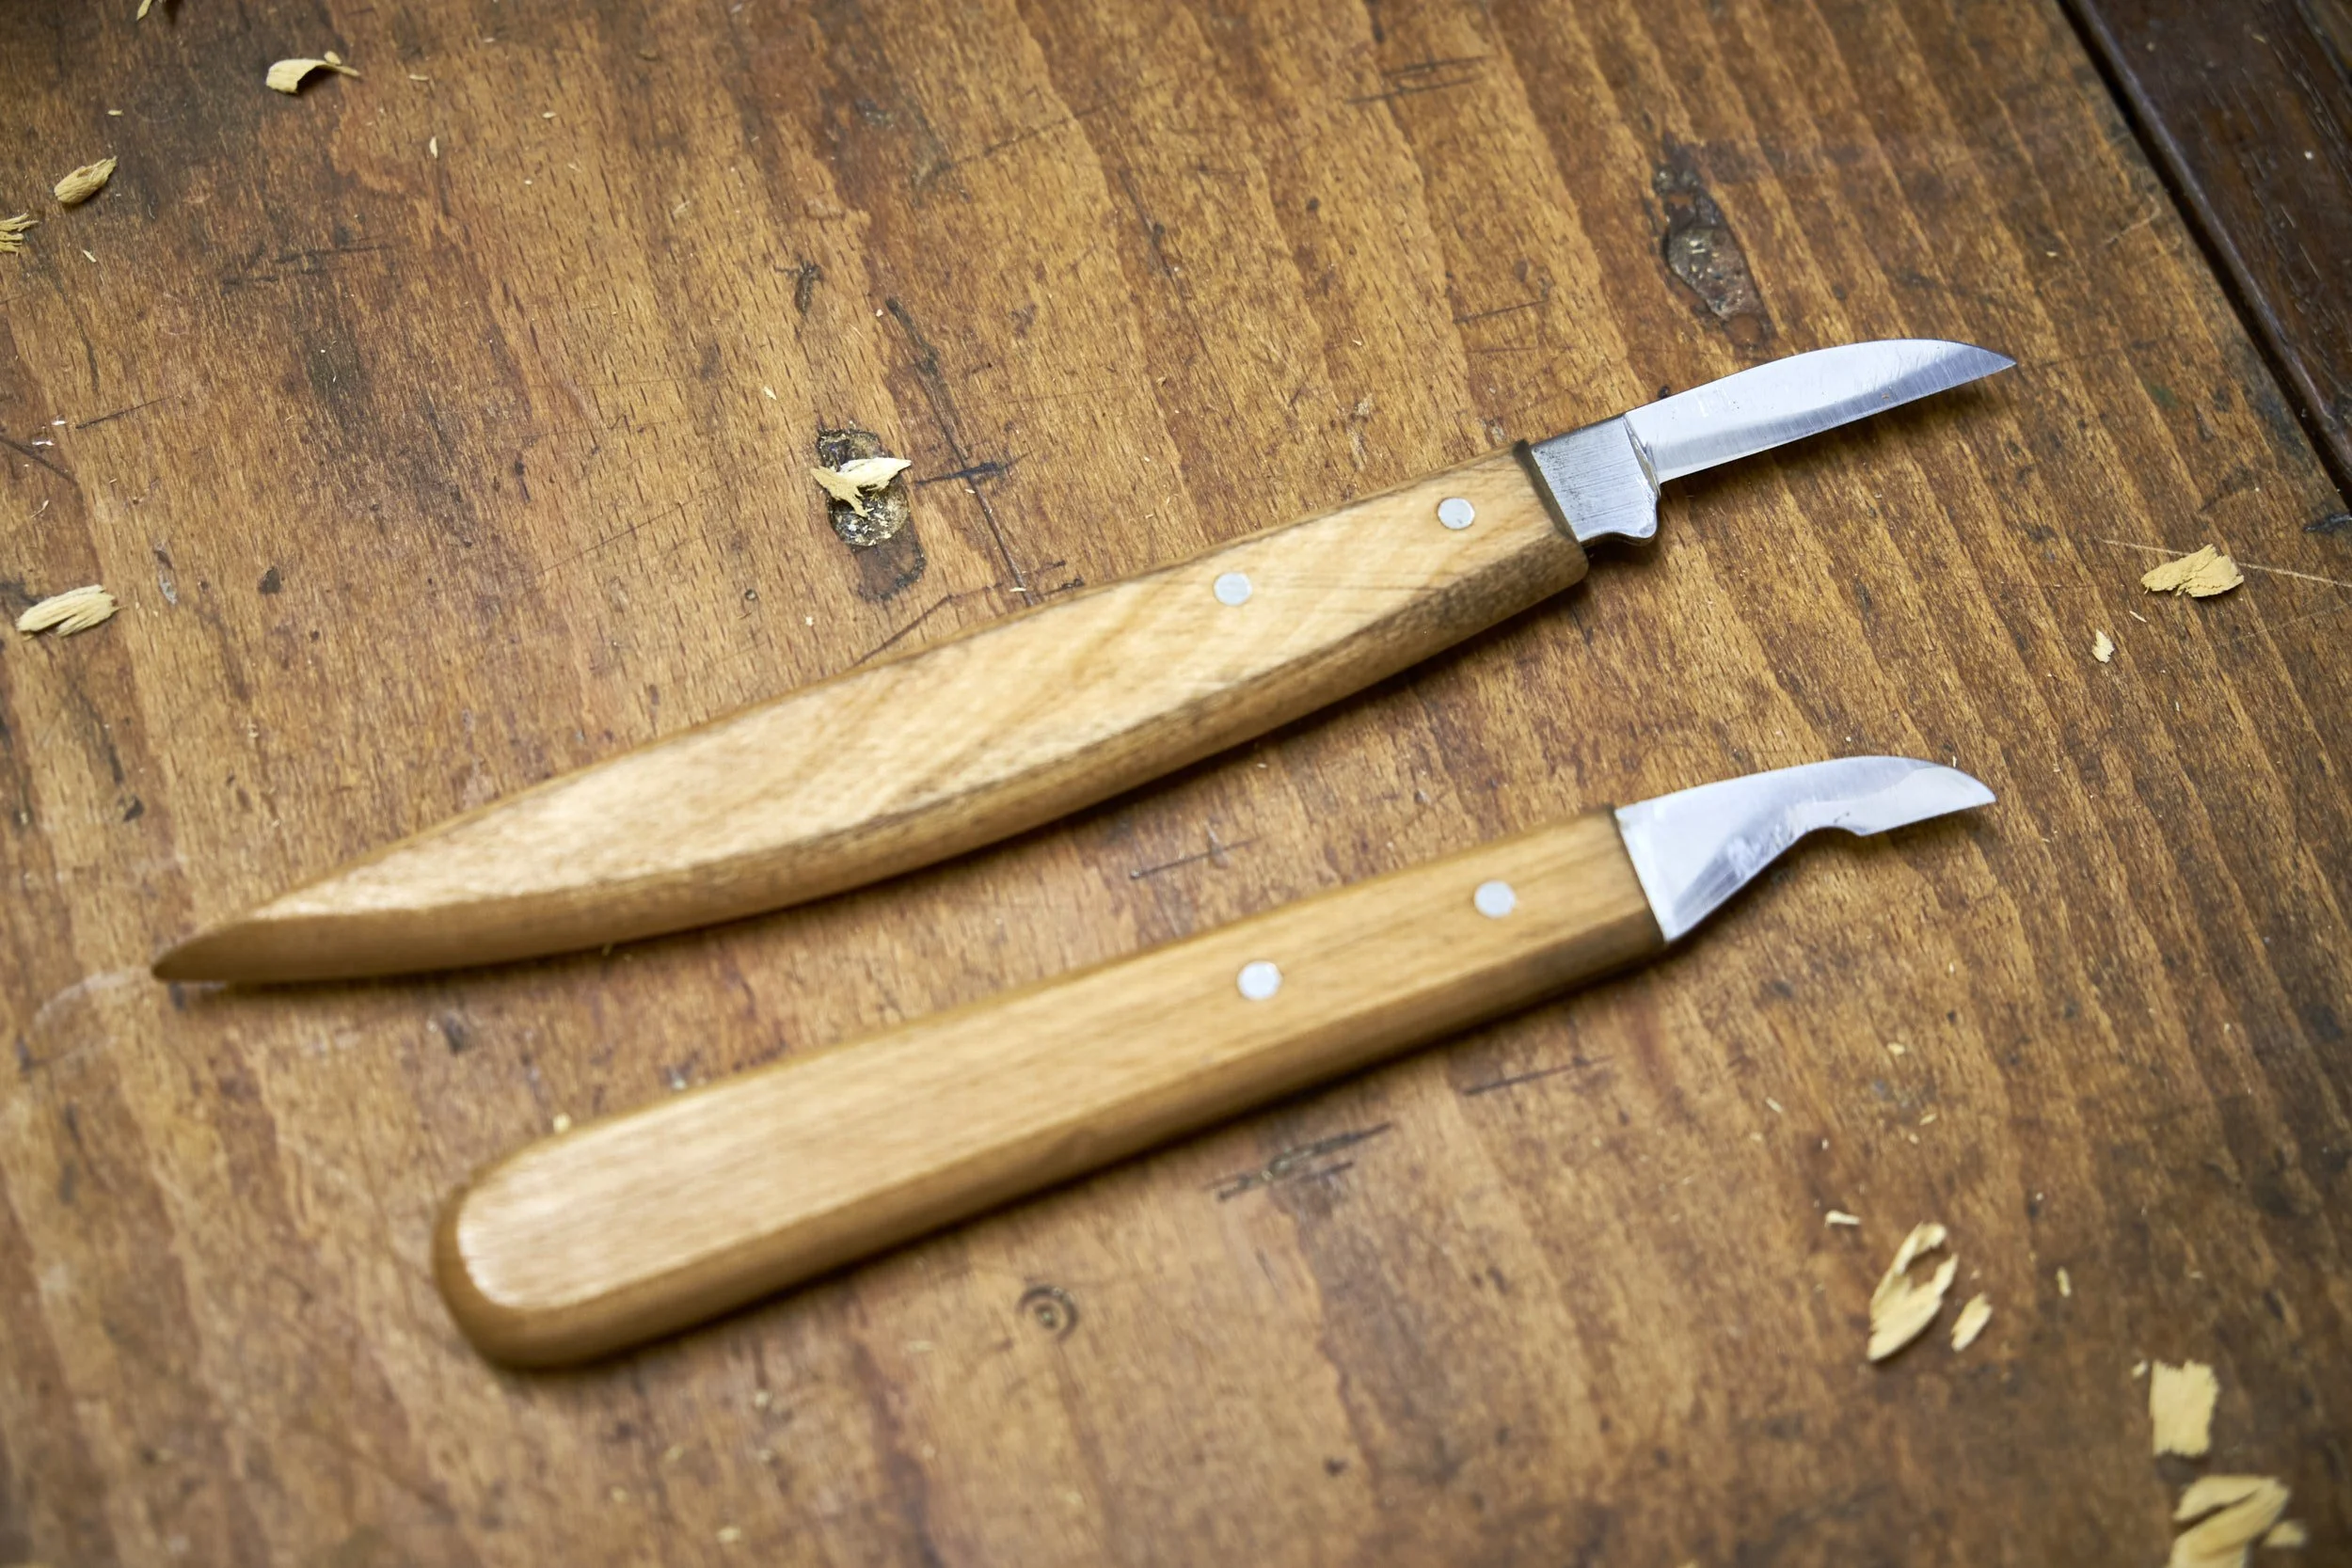
Hi had a workable knife.
It was time for my first whittle and seemingly on to Step 4, that of practice, however the experimental phase was not quite done with me yet.
My first subject of choice was a little bear from Doug Linker’s 1x1 series. I wanted to carve one of he’s bears since first becoming interested in whittling thanks to this video of a larger bear. It also happened to be the very first video on the subject that I had ever seen!
My first whittle came out surprisingly well and the picture heading up this article shows this handsome little guy shortly after my wife’s desk became his new home.
The main lessons learnt during this first attempt was that the knife’s handle wasn’t the most comfortable for long carving sessions and that the tip of the blade wasn’t ideal for some of the finer chip cuts required to get clean surfaces when shaping the eyes, mouth and ears. I had to find an alternate tool to perform these cuts and my credit card accompanied me on another visit to the Pfeil stockist and a came back home with a new knife, this time with a Konturenmesser. At least this time the name made some sense as its close enough to contour to know what it is used for and being Afrikaans speaking we use the word “kontoer” to describe the same thing.
Got home, tried the cut and we had a winner. Still some resistance in the cut and closer inspection showed that this knife, like the Rosenmesser had a micro bevel at the cutting edge.
Easy fix, change the geometry.
I took it to the sharpening stones, and spoiled the tool in the process!
Turns out the sides of the knife are much thinner than that of its sibling and after grinding them down the cutting edge was left too thin and weak, I also lost the sharp point at the tip of the knife that made it effective in the first place.
Spending money on a tool that doesn’t work is hard, spending money on a tool that is spoilt when trying to improve it is harder!
Lesson learnt but between the two Pfeil knives I had a solution that would work somewhat to get into carving but they weren’t ideal.
Back to the net.
When I started looking at carving I wanted to carve spoons - long story - so I looked into getting a sloyd knife. The Narex version happened to be available in the country so I got one, received the shipment and promptly broke the tip of the blade while making a cut, no fault of the blade it was all me. Anyway in spite of having lost the tip I’ve kept it sharp and only recently used it to score my first baguette loafs before they went into the oven, hey, they said I should use a sharp blade and it worked better than any kitchen knife I’ve ever had!!
I digress.
While doing research for a sloyd I came across BeaverCraft tools and they seemed to get OK reviews on the net. I trawled both their site and Amazon for days trying to figure out which knives would be the best to buy and finally settled on three which I believed Doug would approve of and before you accuse me of being a fanboy of Mr. Linker, Alec LaCasse actually reviewed and uses a BeaverCraft detail knife and I find his opinion just as reliable as Doug’s.
Amazon doesn’t ship BeaverCraft to our neck of the woods though but BeaverCraft themselves do, credit card in hand I placed an order for a detail, big roughing and a small cutting knife. I threw a spoon knife into the mix for good measure and upon entering my shipping address I was met with a message stating that they didn’t ship to my address.
I was devastated.
After a few deep breaths I reached out to their help desk. My message to their help desk set the ball rolling on one of the most pleasant and efficient customer support experiences I have ever had, I mean EVER! Suffice to say I had the knives in my workshop shipped all the way from Ukraine in less than two weeks, I was 1000 KM away in the Western Cape on holiday when they arrived but my knives were at their new home awaiting my return from a well deserved break.
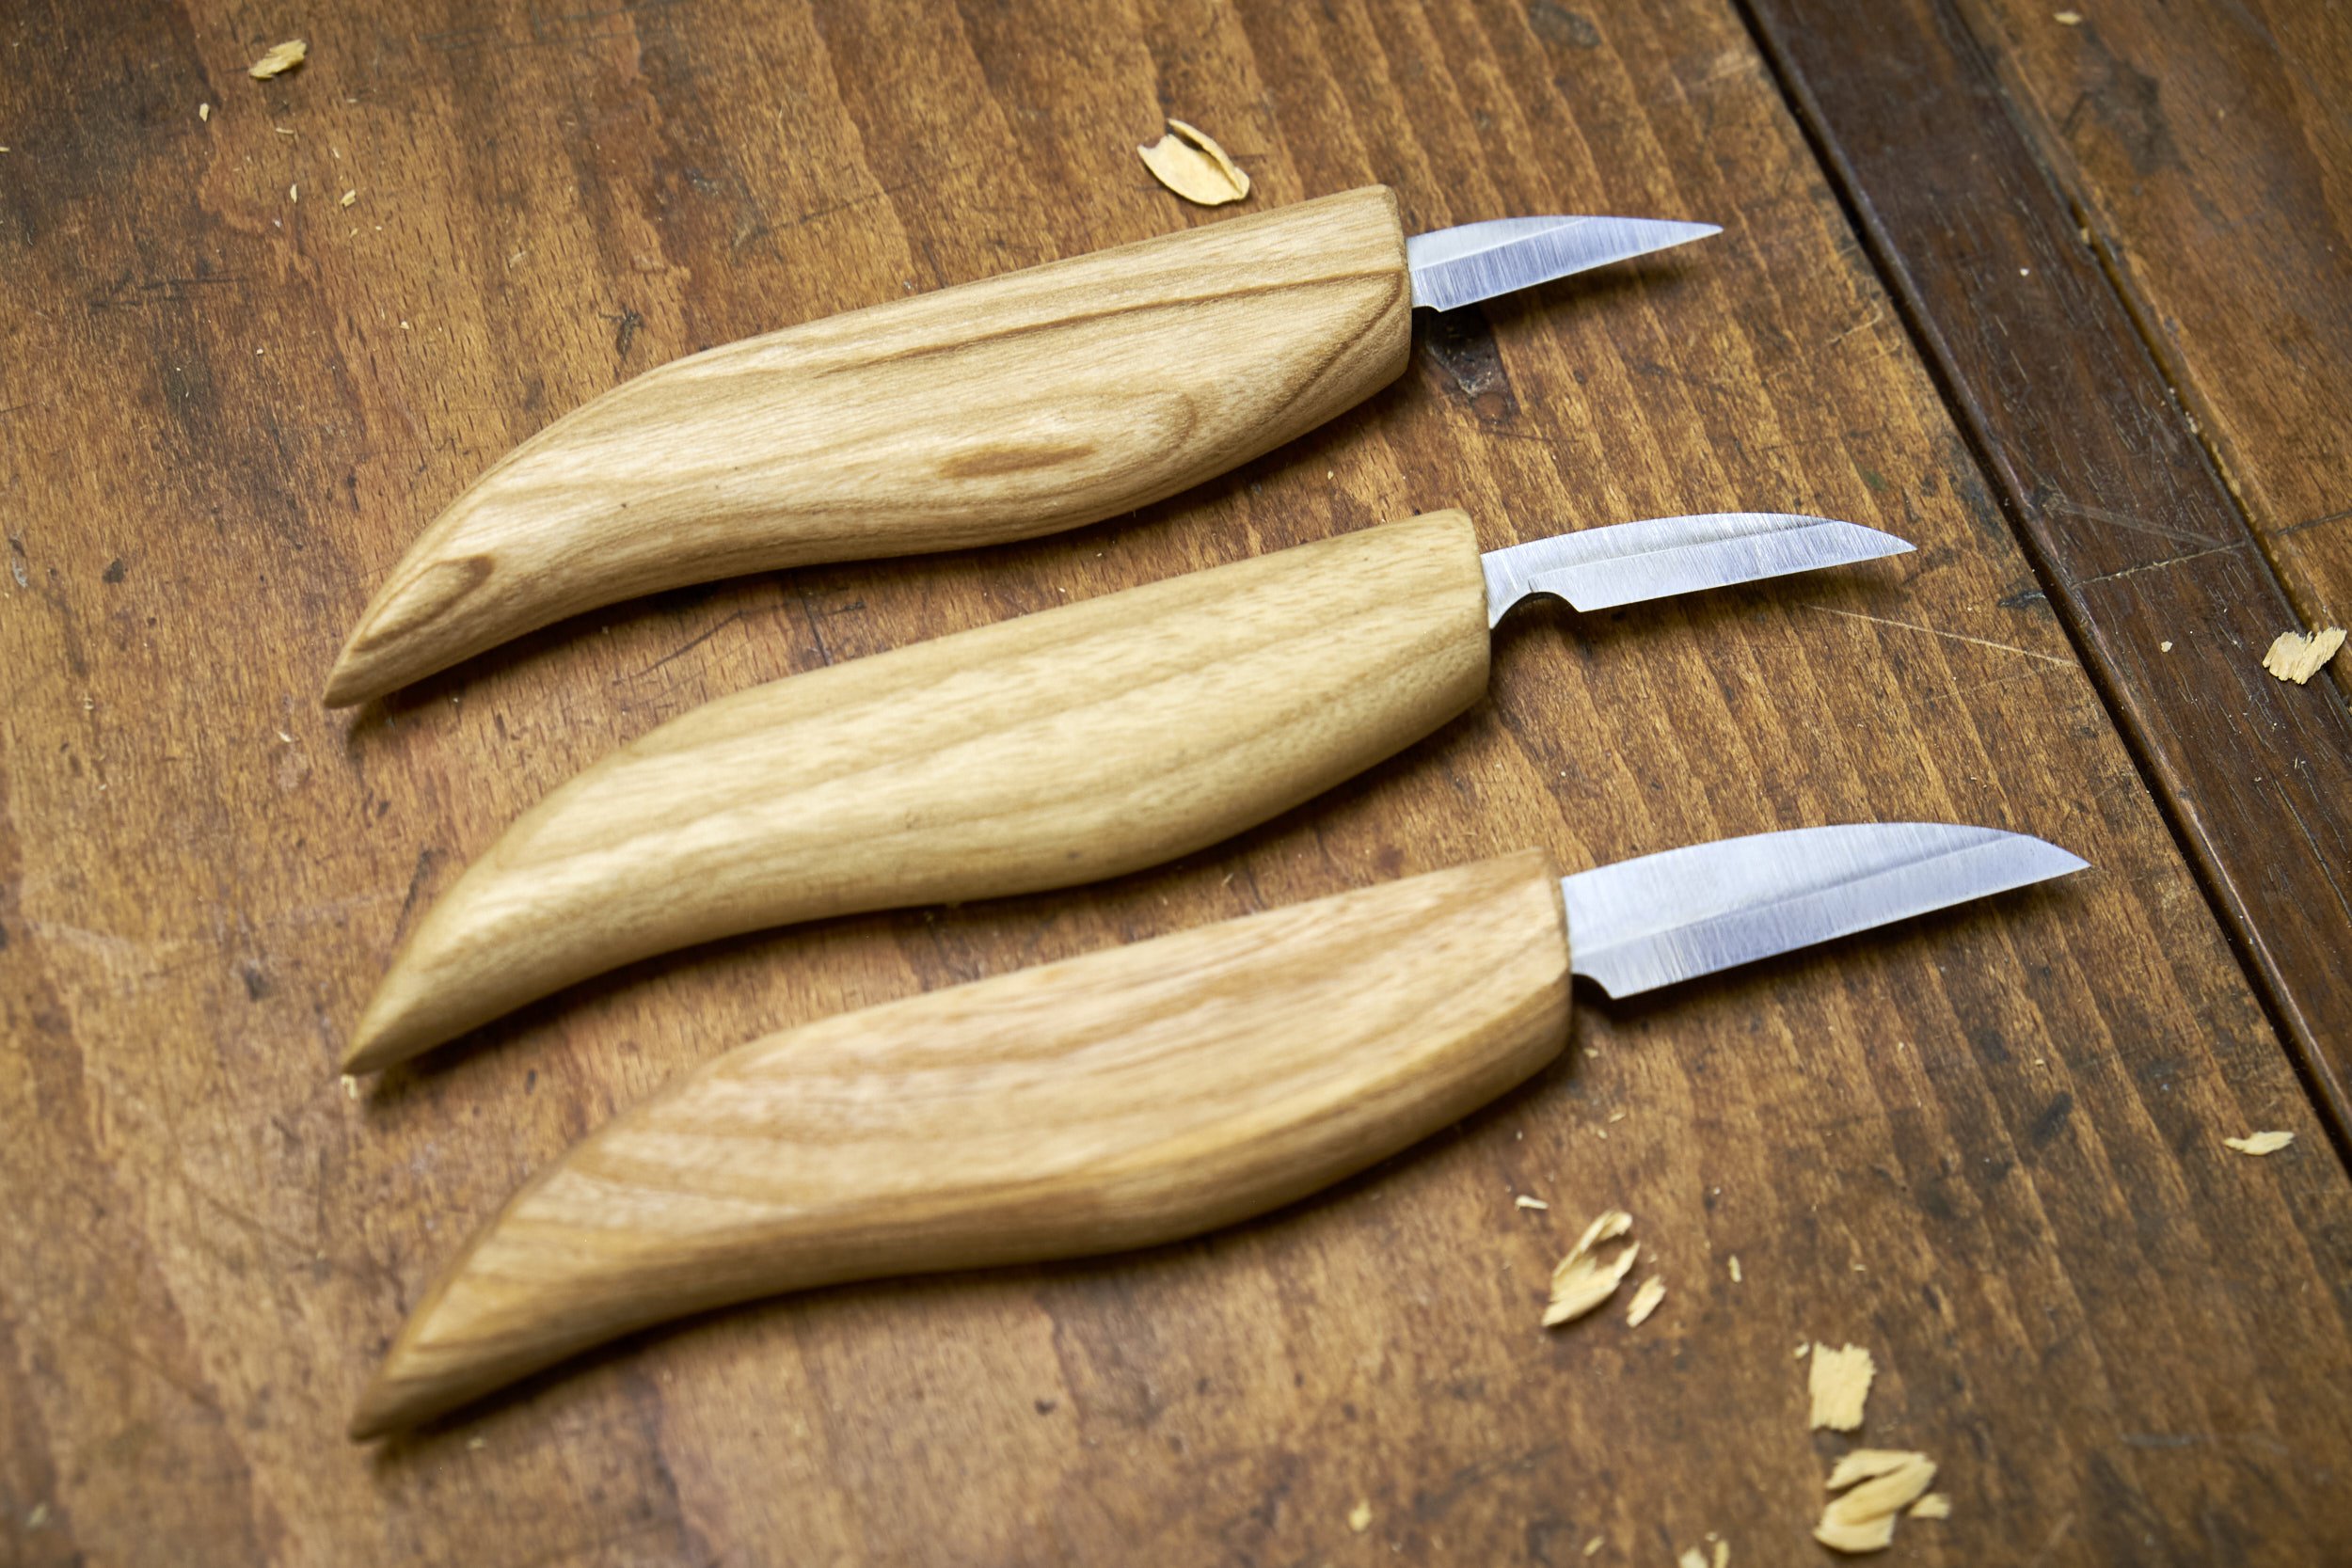
Experimentation started as soon as I unpacked the car and my wife was off to the shops to stock the fridge after our trip. The three knives were sharp out of the box and after a few exploratory cuts their edges were a doddle to hone back to a very high level of sharpness. A little hard to get deep cuts with a little more resistance in the cut than I would like but what do I know, I’m only just starting on my carving journey.
The spoon knife on the other hand was a different matter altogether.
It came sharp out of the box and once I got my head around using it, it made clean cuts in my test pieces. When I tried to hone the edge though, the tool lost its edge to the point where it would barely make a cut, let alone a clean one.
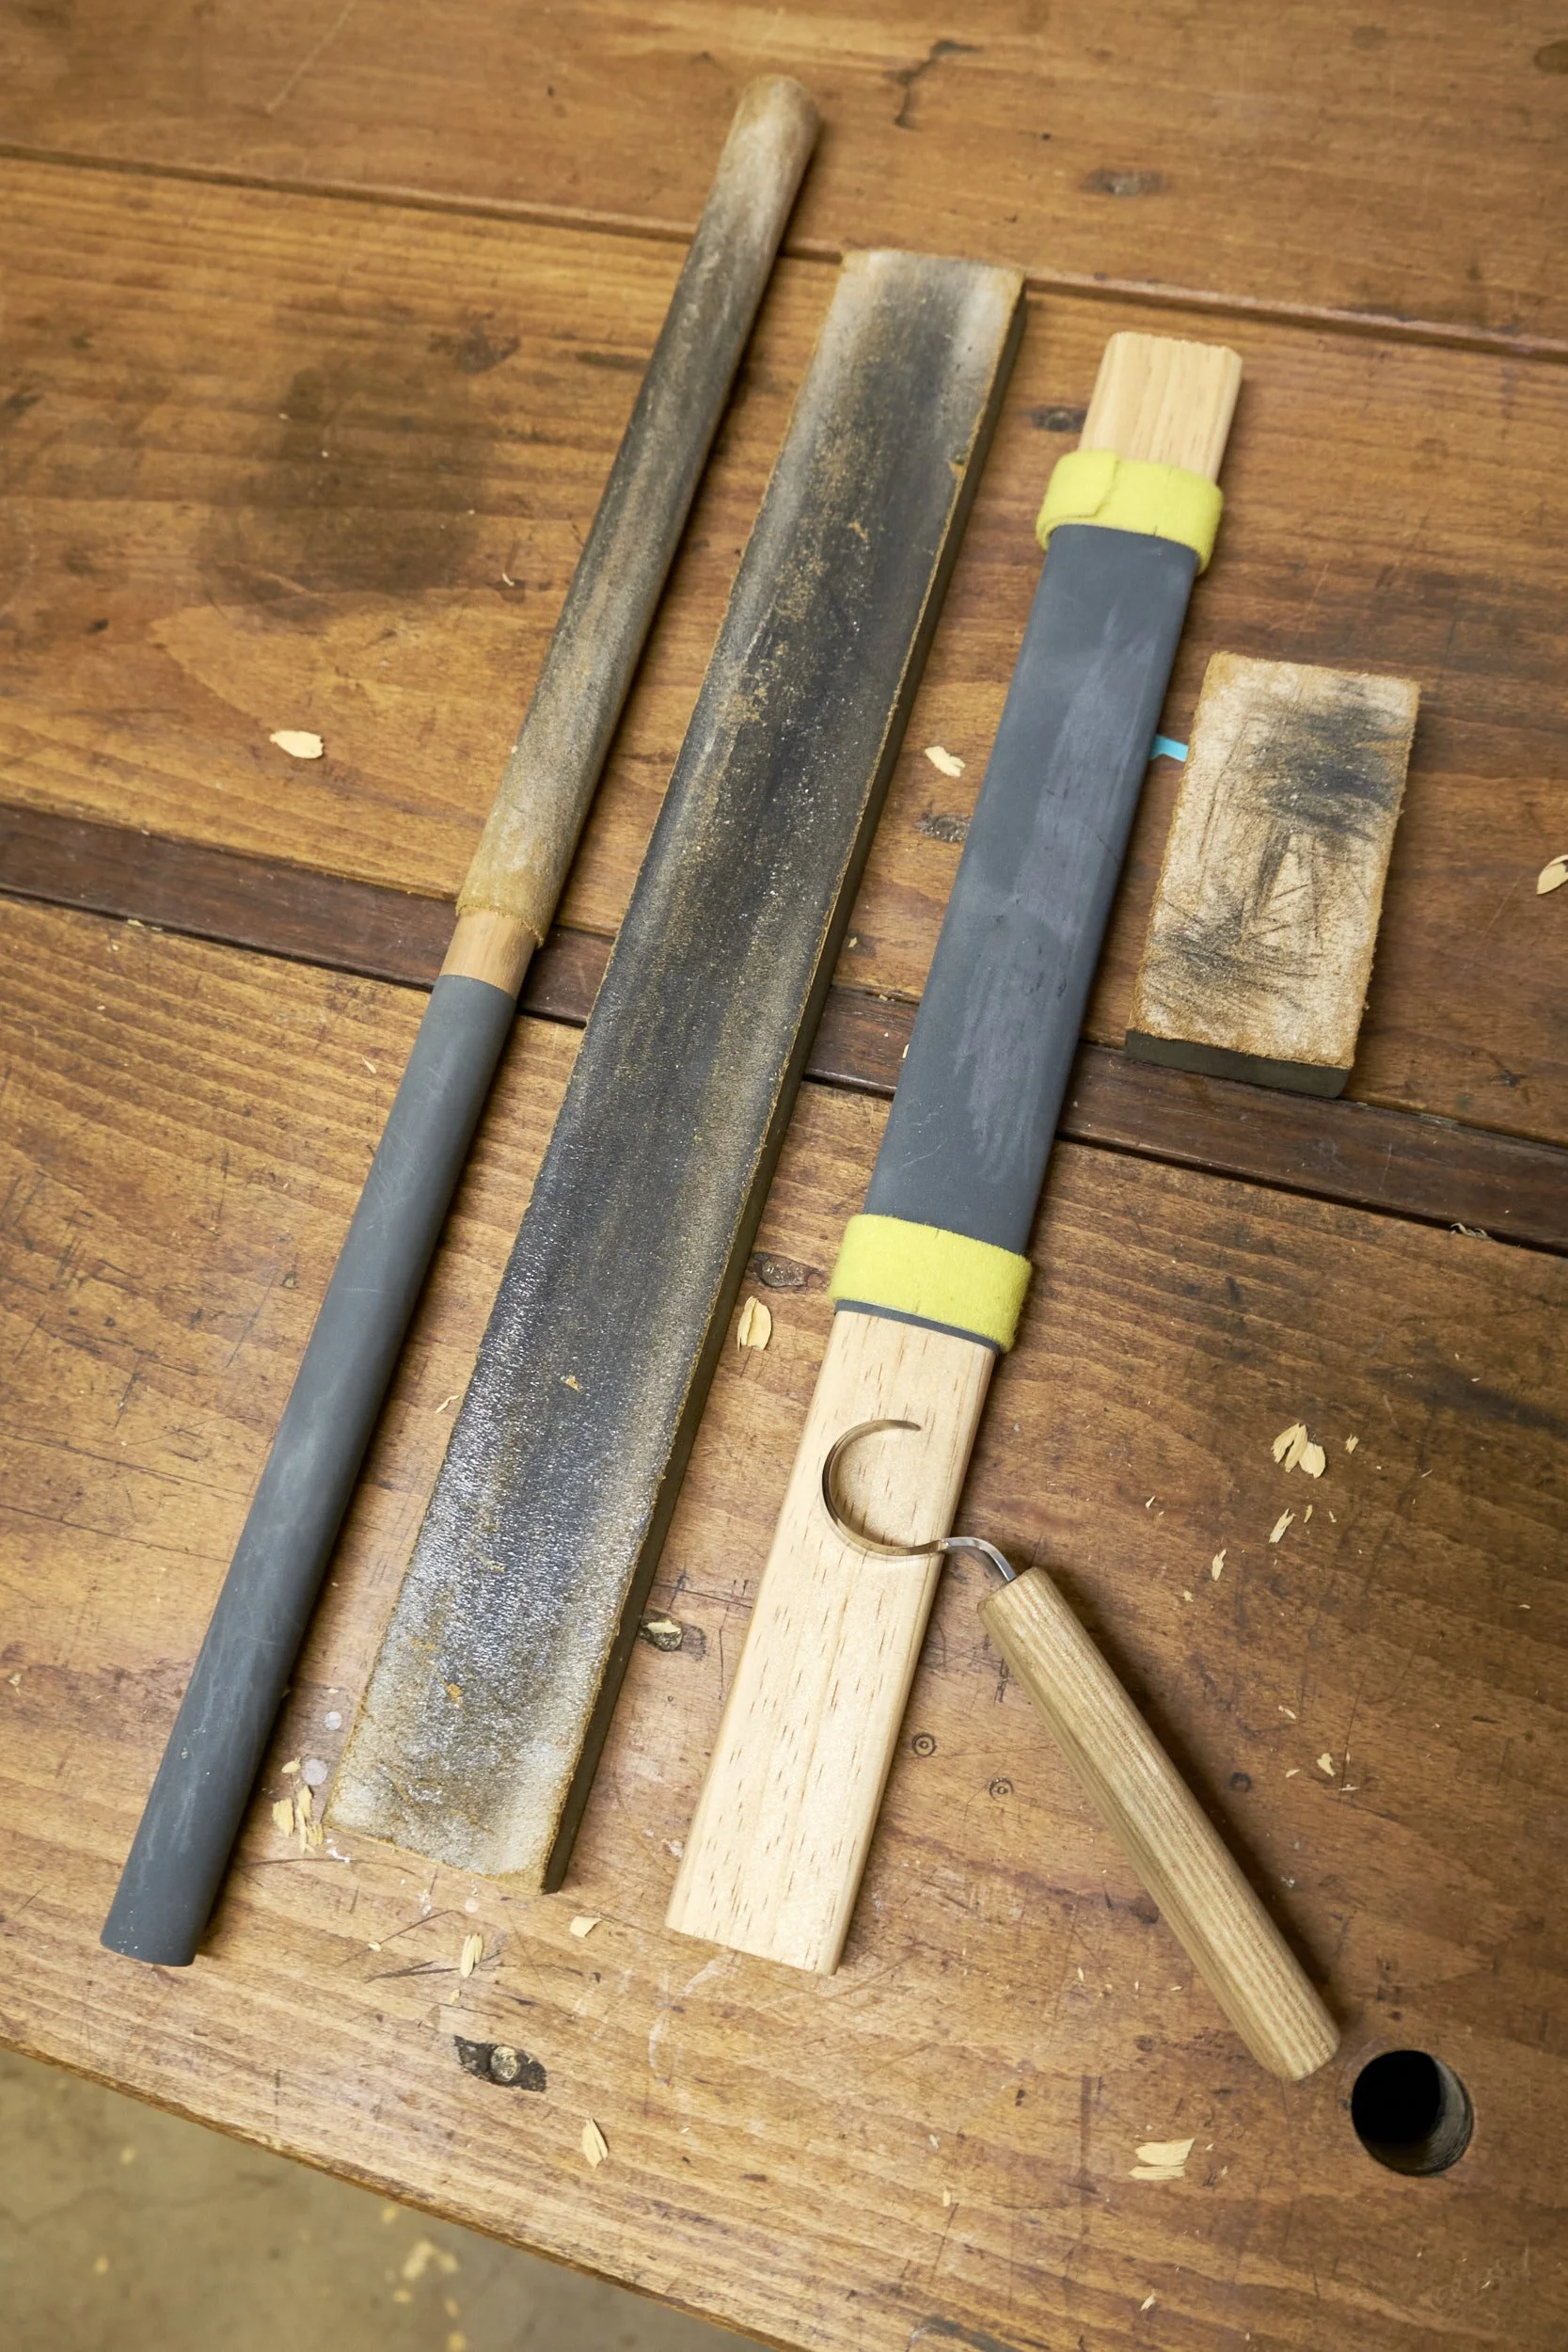
Before I continue I need to take a step back and mention that I had made a sharpening stick with 1200 grit sandpaper on one end and leather on the other before even making any cuts with the knife. I made this specifically for sharpening the knife once I started playing with it. The outer bevel would be sharpened using the narrow strop I made for my carving knives when I first started playing with the Pfeil tools.
Sorry, experimenting with them, these are serious matters after all.
Ok, where was I?
Losing the edge, the knife’s not mine, at least not yet.
I quickly came to realise that the cuts became slightly better after using the 1200 grit side of my stick on the inside bevel but as soon as I used the leather to strop on the same bevel, the quality of the cut would again deteriorate. I turned my attention to the outside bevel using the knife strop to check if that would make a difference and that immediately made it worse!
I am proficient at hand sharpening to the point where I train others how to do it but curved blades had always gotten the best of me so the fear of having spoilt another tool and one that had come halfway across the planet and could not be readily replaced, was real.
So it was off to YouTube again and after about another hour of research (Step 2). I came back with some idea of how to sharpen the spoon knife but none the wiser as to what might be wrong with mine. As a start I knew I needed a more aggressive abrasive to work on the outside bevel. I had seen a few guys work the bevel with sand paper wrapped around a paddle so I found a suitable candidate in the scrap bin, planed it flat and rounded the edges before wrapping it with the left over sanding paper from the stick. The paddles I saw in the videos were radiused so that the flat part of the stick could be used on the outside bevel and the edge on the inside meaning that you would need only one tool to sharpen the knife. One problem, my paddle came out too wide and it wouldn’t fit into the inside curve of the blade so another lesson learnt.
I already had the stick for the inner bevel so onward it was.
Based on my experience thus far I decided that I needed to work on the outer bevel so that I would be sure that both bevels actually met and formed a burr when they did so. A burr had been absent during all earlier sharpening and honing attempts up to this point.
I took a deep breath to calm my nerves before painting the outside bevel of the knife with a marker to show where I would be removing metal. I then carefully started working on the bevel with the paddle wrapped in the 1200 grit paper, making sure I was removing metal evenly up to the edge. As soon as I felt a burr I worked the inside bevel with the stick and then tried to take another cut, no luck.
I think that although the paper removed the marker ink, it wasn’t aggressive enough to work the bevel down. It was time to get out the big guns.
I have a set of course, medium and fine credit card diamond plates and after colouring the outside bevel again I set to working on the outside bevel with these. Once I felt a burr form while using the course stone I moved on to the medium and finally on to the fine stone, remembering to colour the bevel black between each grit to keep track of my progress. As soon as I had finished on the outside bevel I removed the burr on the inside using the sand paper side of my stick. I then honed both bevels using the stick and flat strops and then tried another cut and boy did it cut! The knife removed wood in thin even shavings and left a surface superior to my first tests straight out of the box.
To say I was relieved at this point would be an understatement.
Well, after that short description of how I used experimentation as part of my learning process as it relates to learning the new skill of whittling we can move on to Step 4.
Step 4: Practice
It may be obvious but it needs saying that as much as the lines are blurred between Steps 1 and 2 it is even more the case between this and step 3. In effect by experimenting with cuts and sharpening in an effort to suss out the tools and techniques used in whittling, I am in effect also practicing.
I do define Step 4 as the point at which I attempt my hand at actual projects. One would think that at this stage these would be low risk projects in that there would be little harm to my ego or pocket should any fail. This is not the case, and my mind likes to convince the rest of me that Step 3 has served sufficient purpose of both experimentation and practice and there should be no issues whatsoever when applying my new found skill to an expensive piece of lumber or a customer commission.
My mind usually wins.
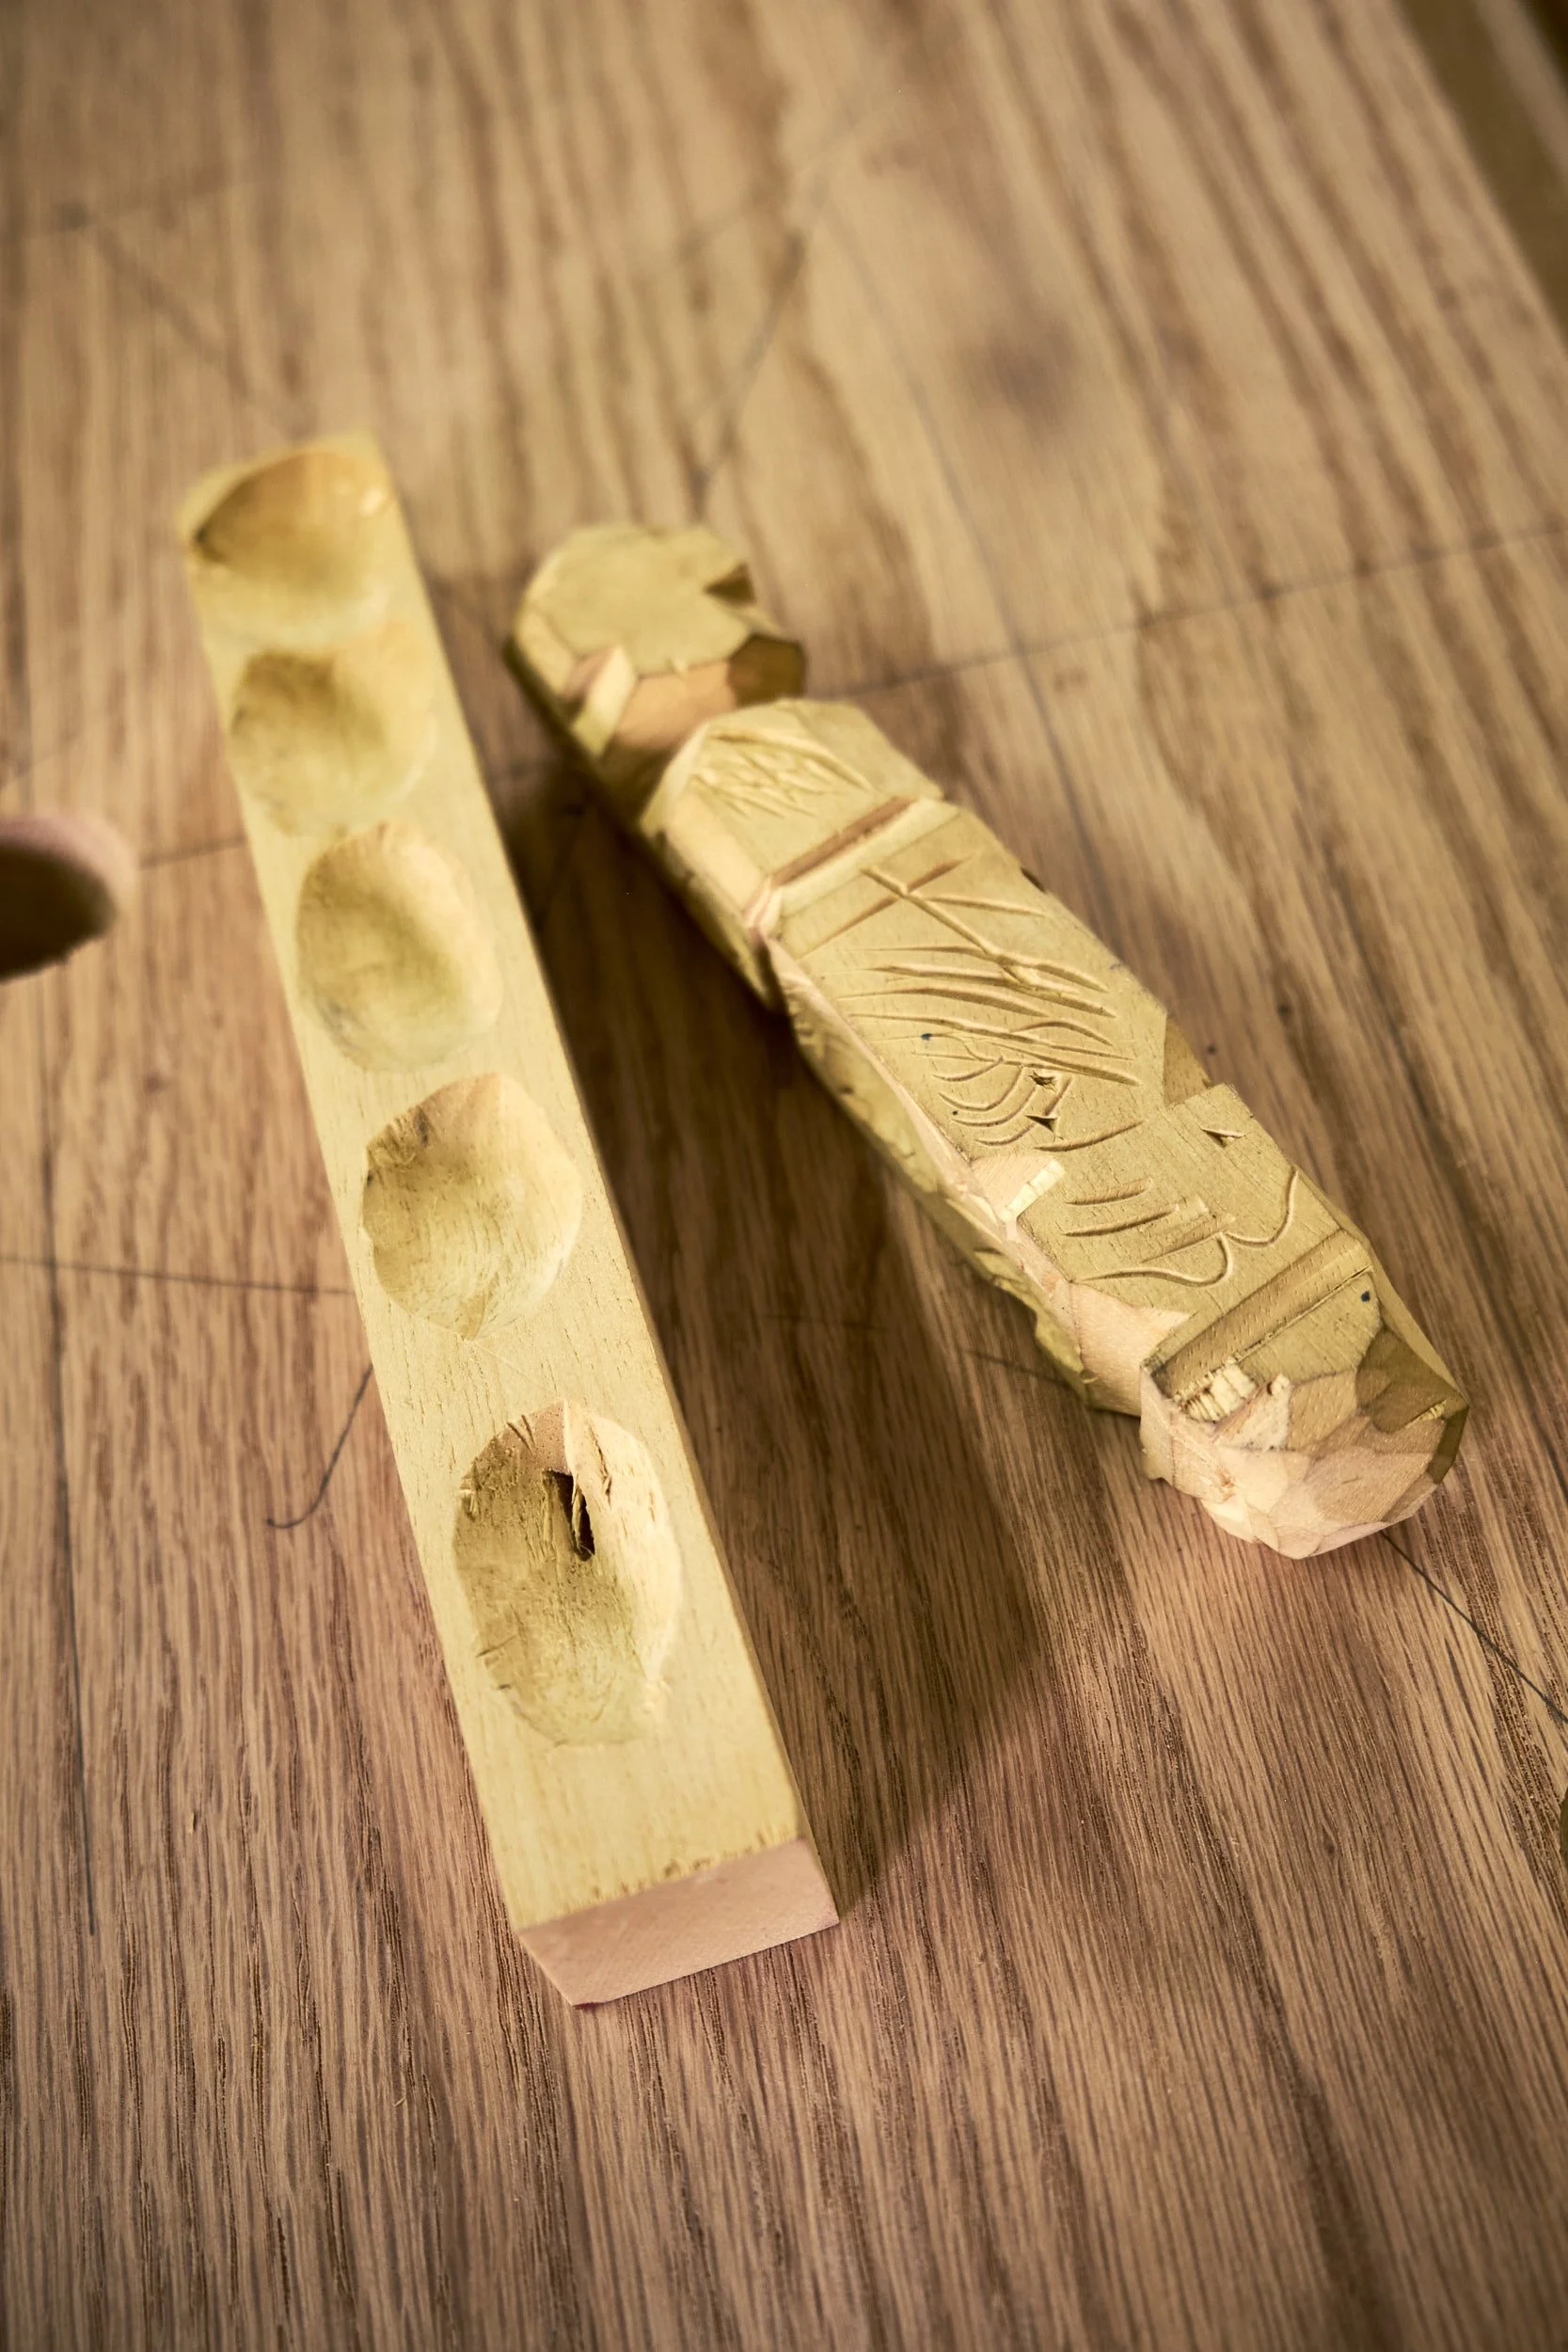
I am happy to report that up to this point I have not experienced any serious boo-boo’s or loss of customers as a result of premature implementation of newfound skills. I’ve become proficient at fixing mistakes though and this is likely THE one skill that I have learnt by practice alone.
What about practice and whittling?
Sheesh, give me a break! I’ve only just started carving and I’ve spend almost three days working on this article!
I skip a week and everyone wants to know why I haven’t posted anything so I’m getting my priorities in order. Also the three other attempts I’ve made at practicing, two to carve the same 1x1 bear and one try at an Easter Island Head, also from the 1x1 series, have all ended in disaster.
Experimentation apparently seems to indicate that Jelutong is more brittle than Basswood and it is prone to splitting along the grain when applying too much pressure on the knife. Good when you want to remove wood, bad when you lob off an ear but runny CA does come to the rescue as long as you can find the chopped part of the ear on the workshop floor.
I need to spend more time in the practice phase.
As with all things in life nothing ever follows hard and fast rules so it will come as no surprise to the reader to that the lines between these steps or phases of learning can be exceedingly vague and that the process may not be as clear cut as 4 simple headings in a long blog post. I do find in general that my own journey to learning follows the path as marked above, but with regular, shall we call it “reviews” along the journey.
Writing about the process was most certainly not simple, what was planned to be a post of around 2000 words has turned out to be a 4000 word beast!! I was considering pulling out large sections detailing my experience with the tools and just keep it to basic descriptions of the steps but Google says that long form content is making a comeback and according to them you, the reader, would like to see longer content.
You can count your lucky stars though, they suggest that posts that are as long as 7000 words are the most popular. The thing is that I am running out of words on this topic, also, I need to get back to practicing with my new knives as well as make two new stick chairs so that I have something to write about next week.
I am curious how you the readers of my writing are experiencing a blog post of this magnitude. Is it too long, too short - please don’t let the latter be the case - more detail, less? Please feel free to leave a comment below or reach out to me via my contact page with suggestions.
If you haven’t done so yet please consider becoming part of this community by signing up at this link. If you do, I will send you a link to my FREE woodworking project plan page.
Finally, as we say in Afrikaans, “fluit, fluit my storie is uit”.
Be safe in the workshop and go learn something new, see you here again soon.