
Mastering the Art of Scraper Sharpening
The humble scraper is a simple yet effective woodworking tool, but knowing how to sharpen a scraper is often a mystery for many woodworkers.
In this guide, we’ll discuss card scraper sharpening techniques that will allow you to achieve a sharp and precise edge.
Honestly, one need not run for the hills at the mention of this humble and immensely useful metal sheet. As with many tools in the craftsman’s quiver a lot depends on how the tool is set up, and as is the case with most tools that need to be sharp the card scraper is no different.
There is much out there about how to sharpen the scraper and this post will make no attempt to revolutionise the practice of setting up and sharpening the scraper, but rather show the reader how this individual preps and sharpens his own and he hopes that in the process he may demystify the procedure to the point where others may become more comfortable with the tool at hand as well as proficient in its use.
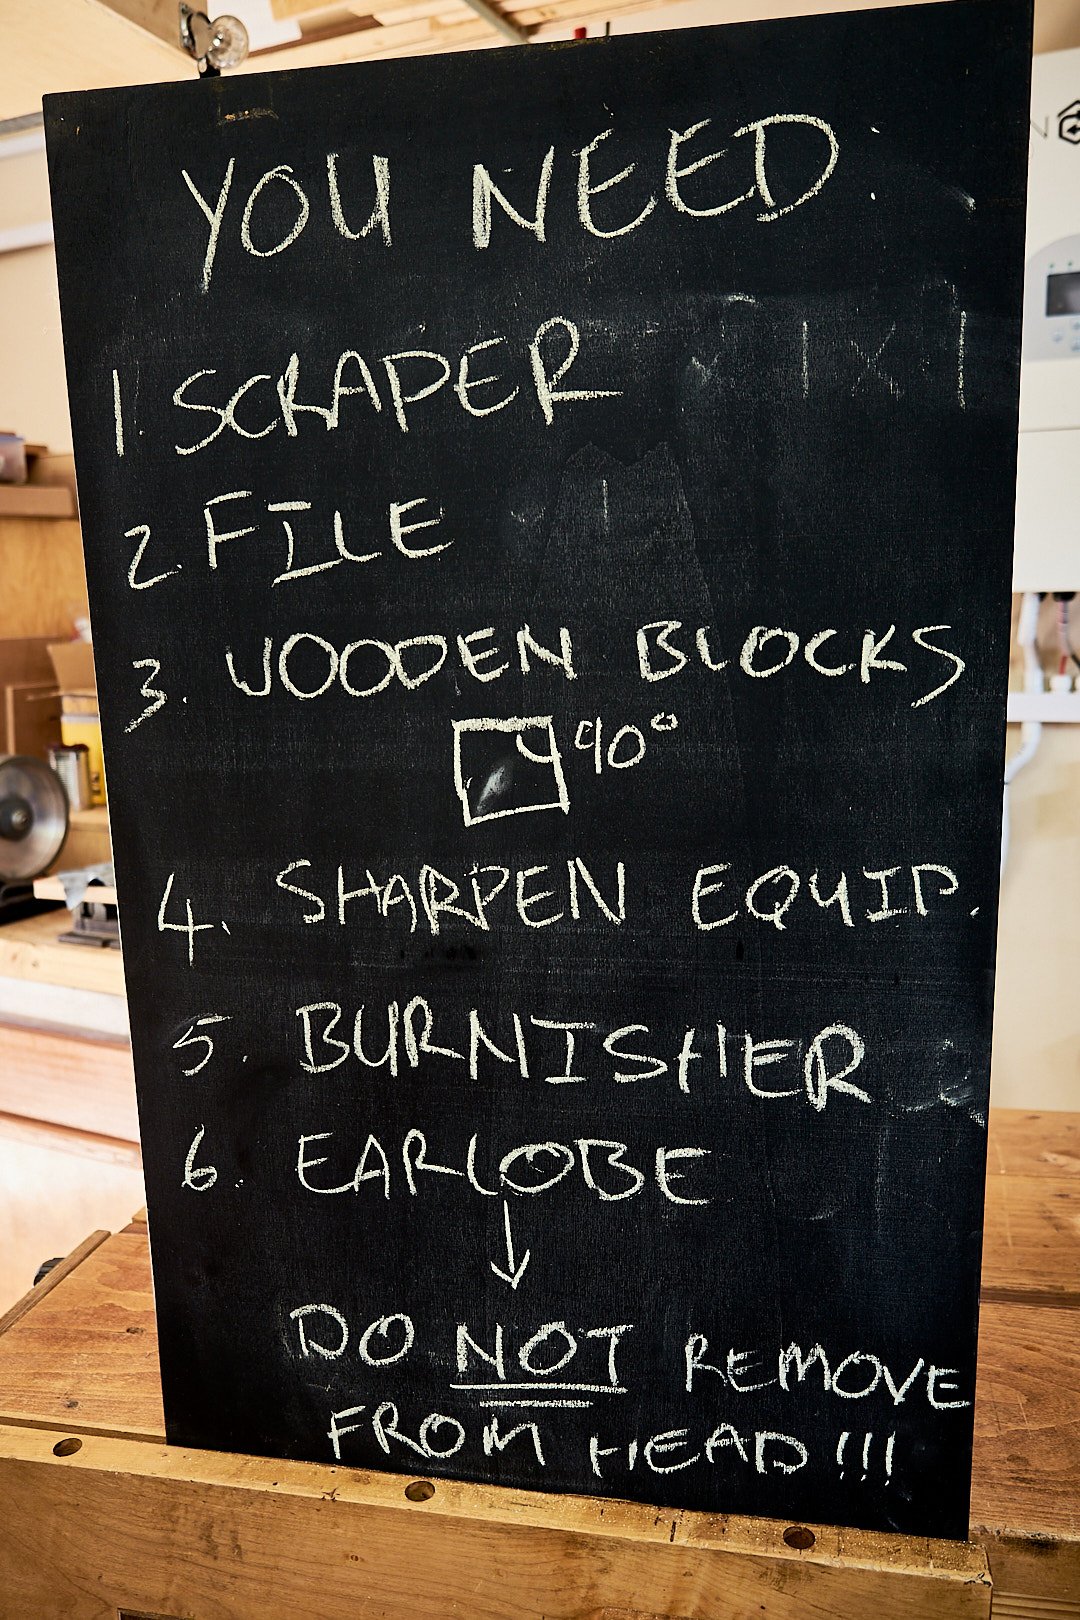
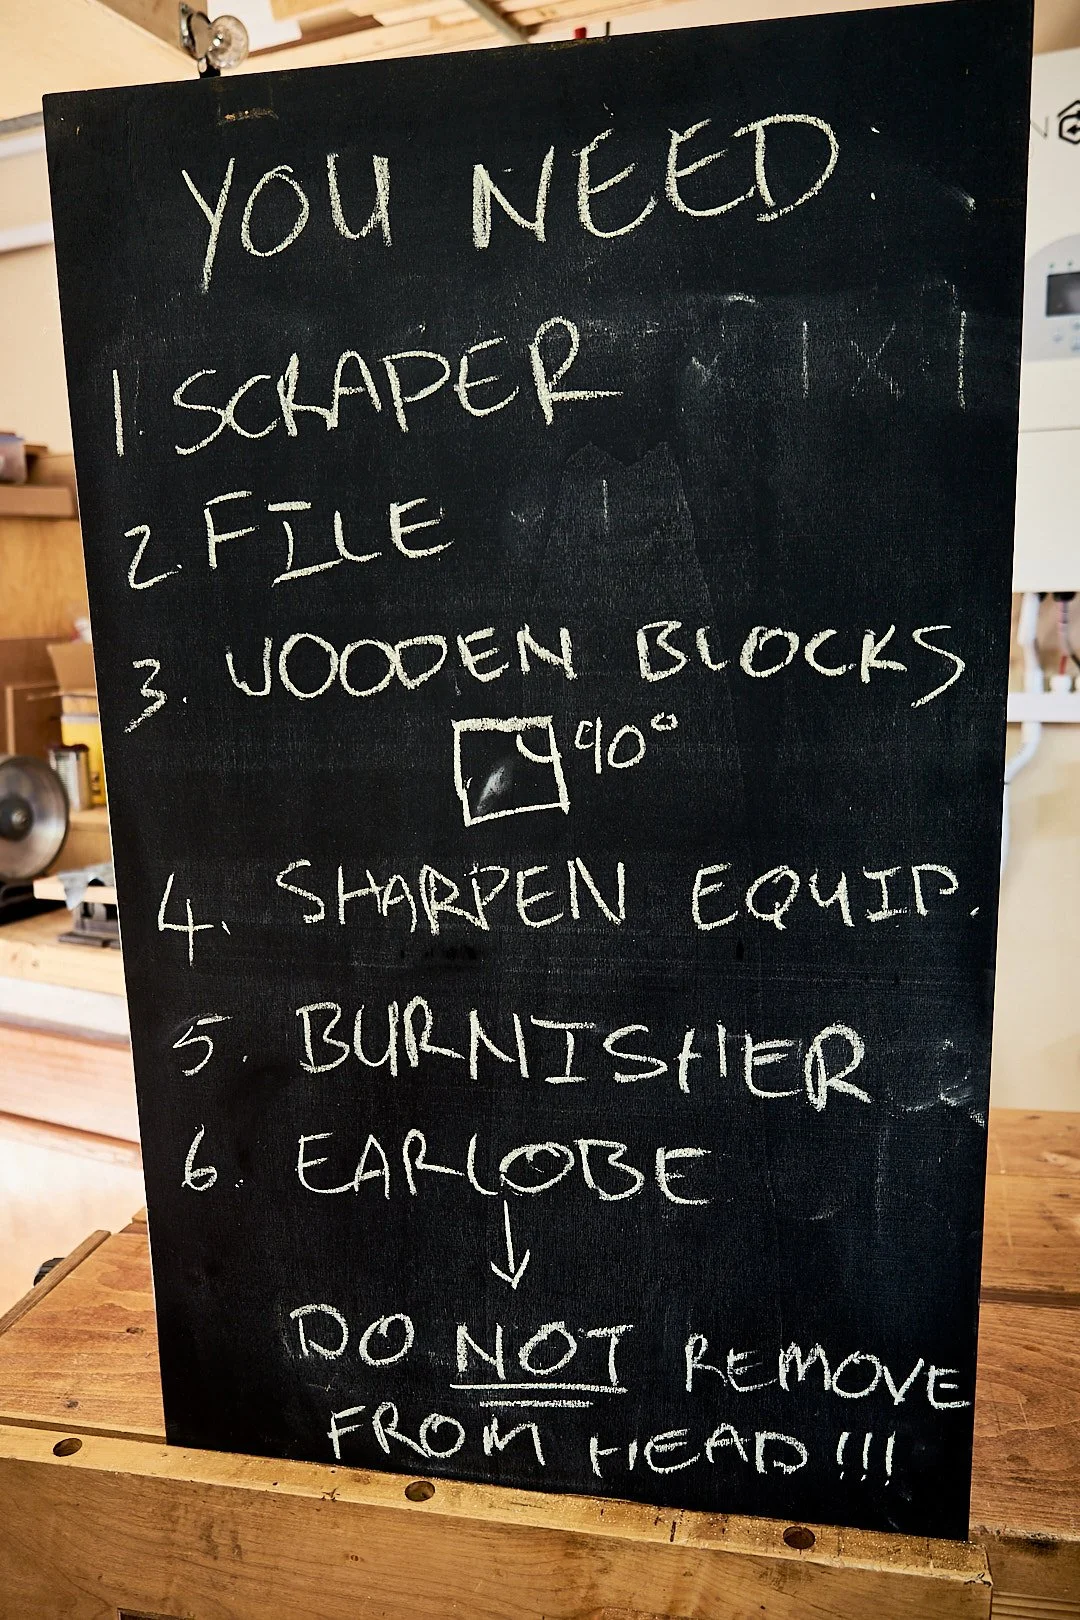
First lets start with the equipment required:
You will need at least one of those pesky card scrapers, if you have more than one, preferably one of the thicker examples on hand.
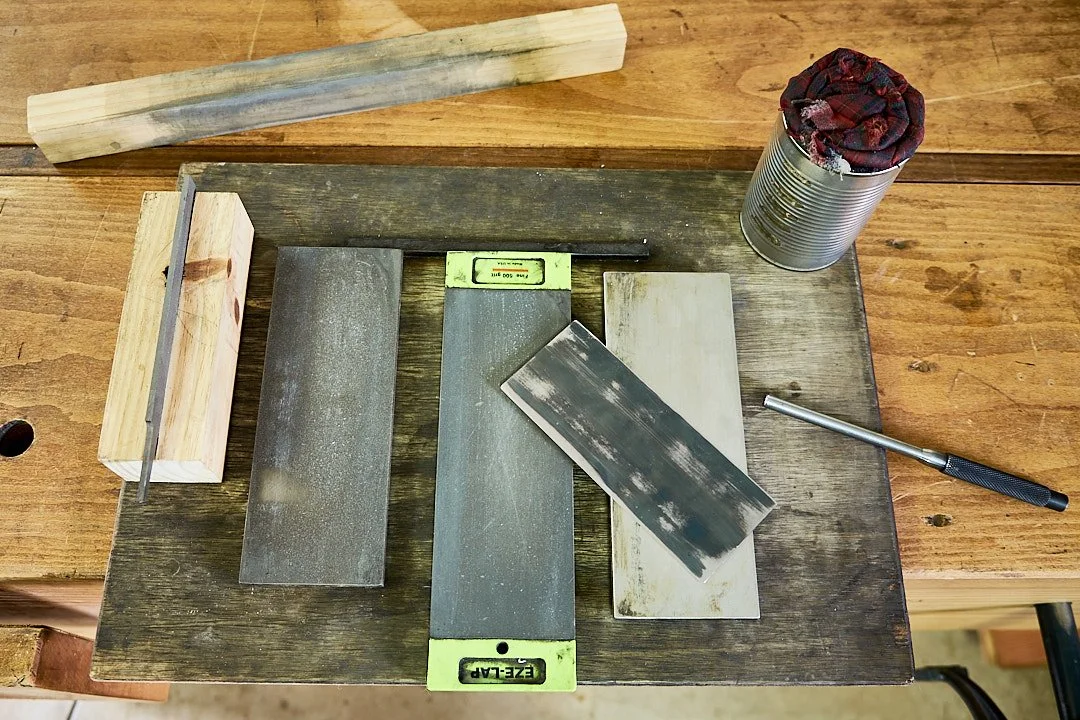
A metal file of some sort, I prefer a second cut version with no handle and about the same length as the scraper.
Two lengths rectangular wooden offcuts, both square in shape with all faces at 90 degrees to one another, also roughly the length of the scraper.
Some form of sharpening system i.e. stones or sanding sheets, water stones may not be suitable for honing the edge as the card will cut into the stone but they can be used with care.
A burnisher or any metal rod made from a metal harder than the scraper itself.
One standard earlobe (got you guessing on that one, don’t I).
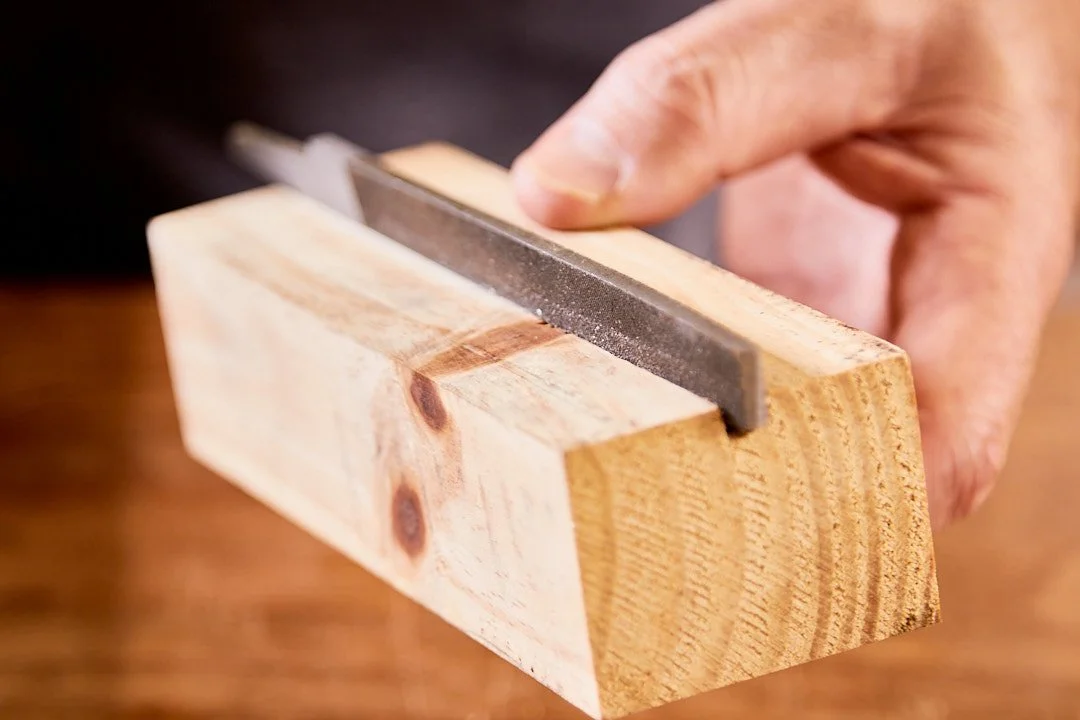
Before we start on the process two of the above items need to be combined in some manner. That will be the file and one of the wooden blocks. The pictures will give a better idea of what is required, but the file needs to be inserted into one of the faces of a wooden block. I did mine by simply cutting a wide enough groove for the file using my table saw. It's relatively important that the cutting edge of the file sits square to the face of the wooden block.
You may omit building this jig if you are comfortable to holding the file parallel to the edge of the scraper when we get to the jointing step. I personally make use of the jig as described.
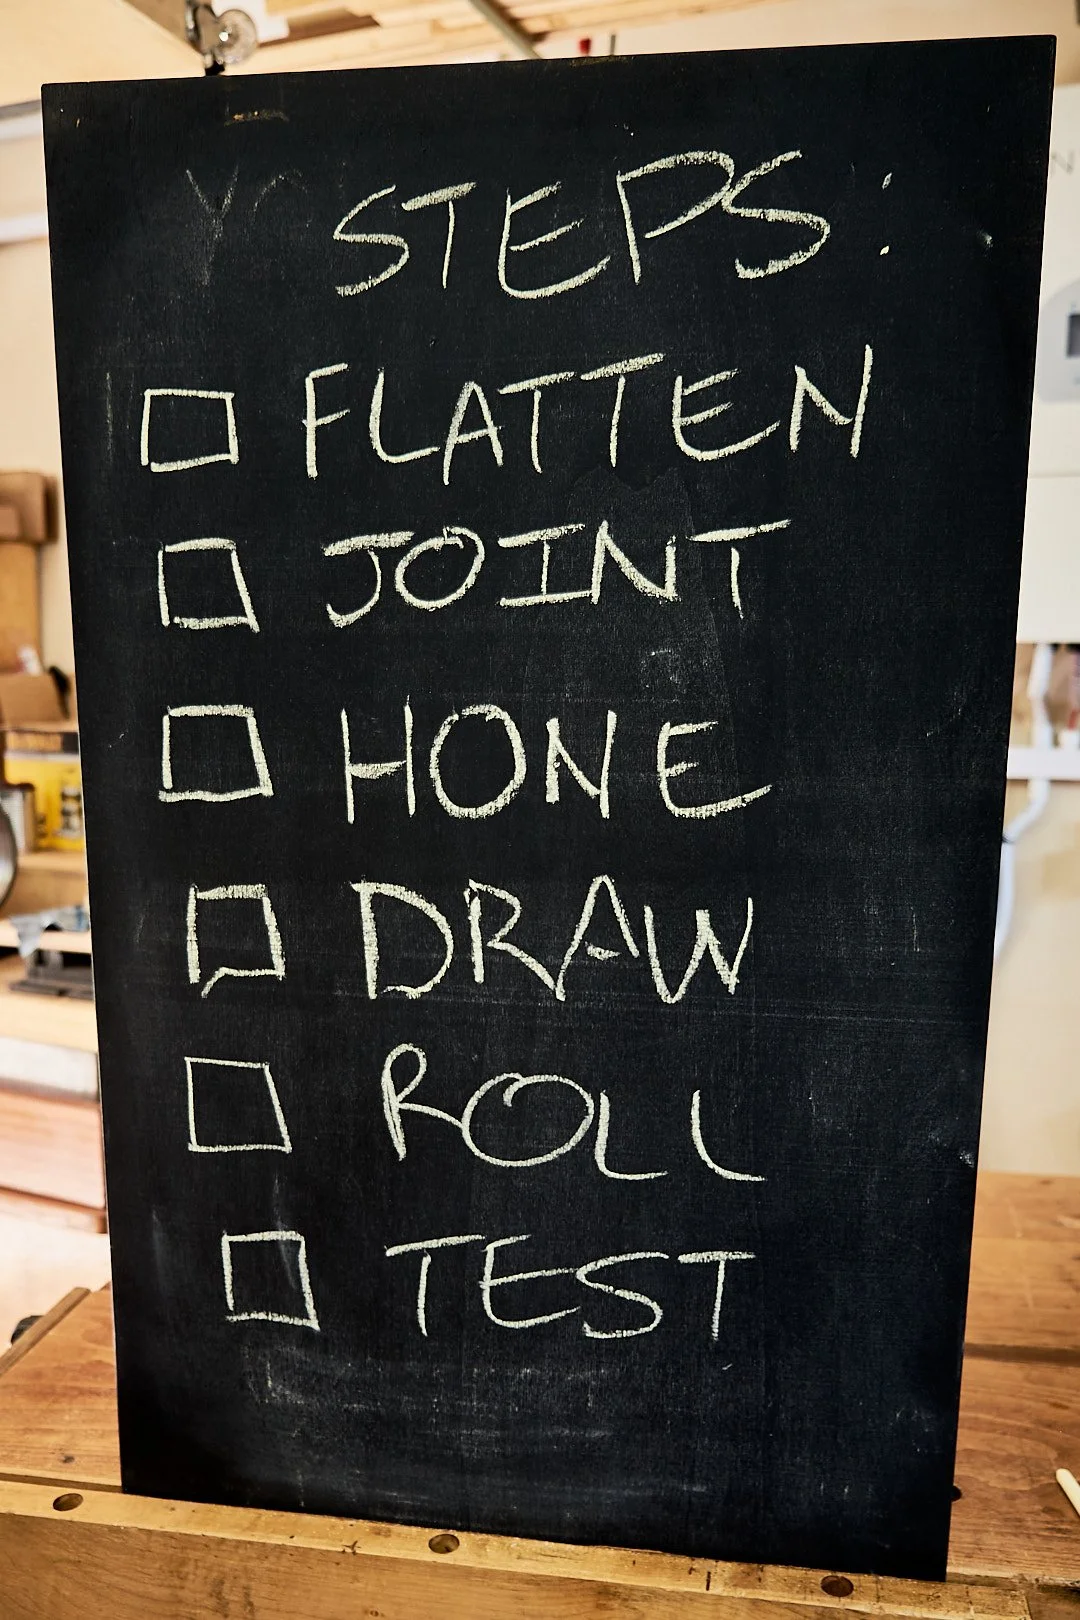
Next the all important steps.
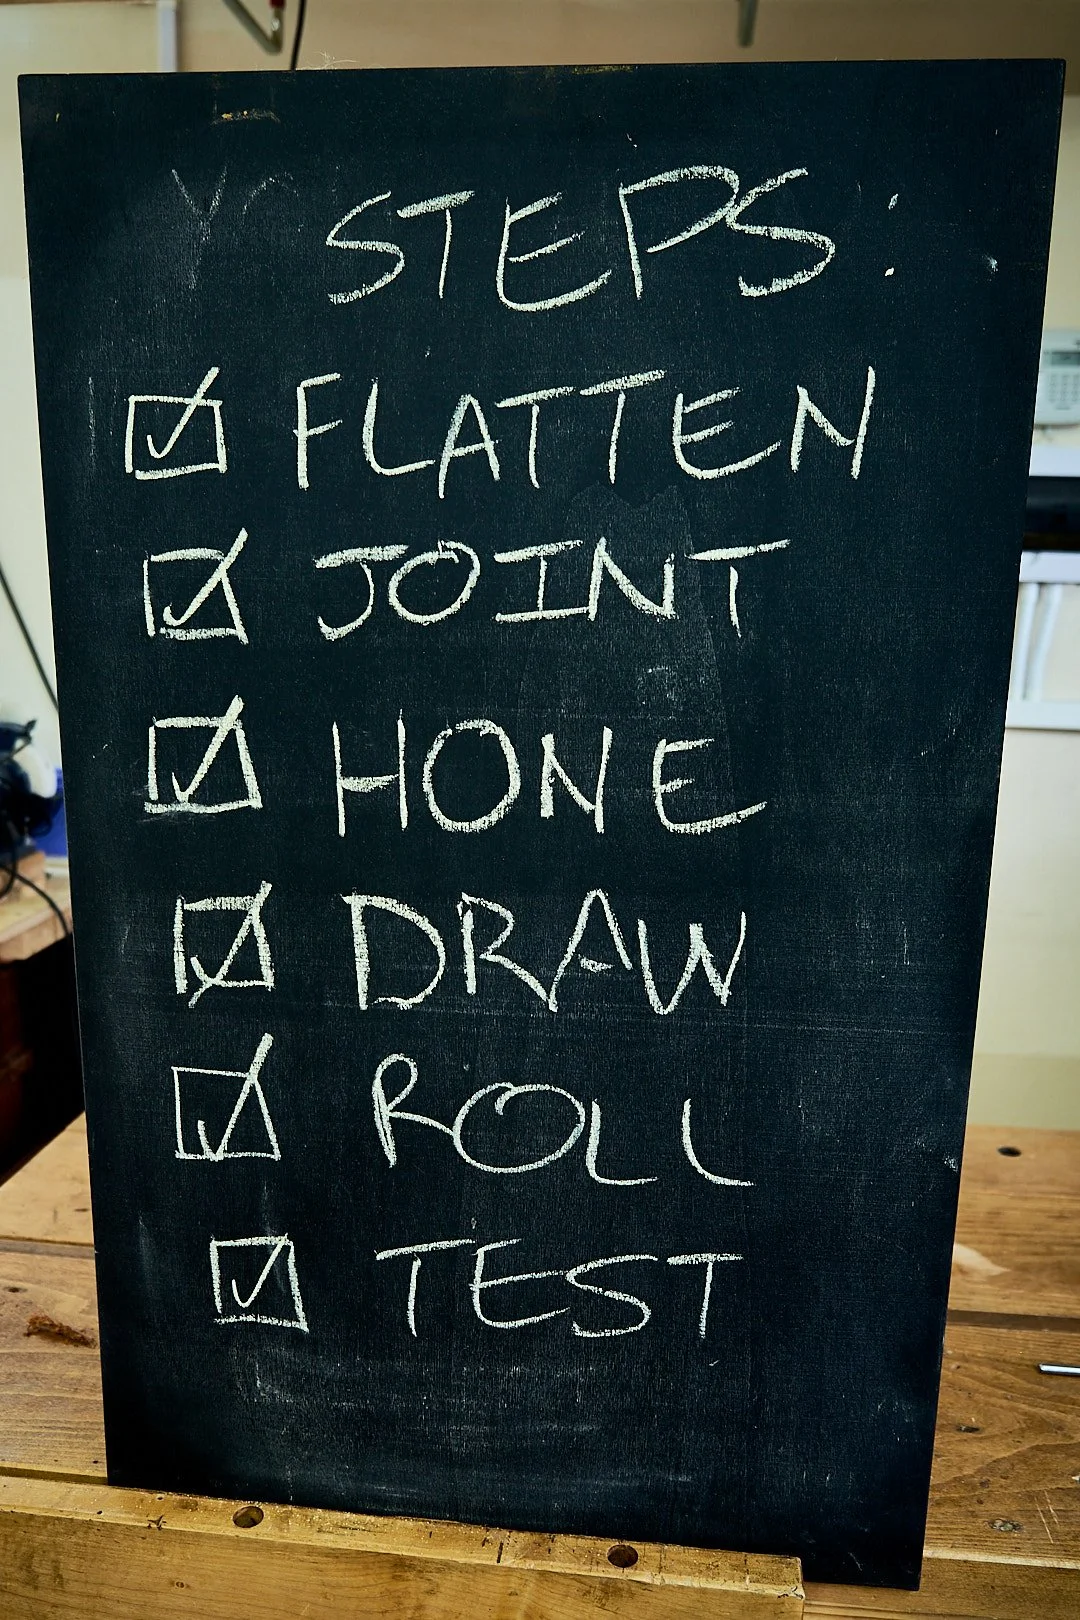
Flatten
Joint (not that one!!!)
Hone
Draw
Roll a hook
Test
If you have a new scraper in hand or if you’ve never done this to your chosen scraper you must not skip #1! If there is any doubt if the scraper was properly flattened during any previous attempts at sharpening or if you can’t remember if it was ever done, a common problem at a certain age and one I happen to find myself at, also do not skip #1. I might even suggest every one starts at step 1 just to be sure.
Ok, enough rambling.
Step 1: Flatten Your Scraper
It is a well known fact that the sharpness of an edge is the result of two surfaces meeting one another with the keenness of a surgeon’s scalpel. The same goes for the humble scraper, no jokes here, I’ve been sliced by a scraper edge unlike as with any other sharp edge in the workshop, buy me enough beers and I’ll divulge more details, but I can tell you this, if done with care your scraper WILL be sharp. Be warned…….
If you’ve spent any amount of time with other edge tools you would be familiar with the mind numbing process of flattening the back of a chisel or a plane blade, especially if the word “premium” doesn’t precede the name of whatever iron you would be working on at the time.
Well, guess what, a scraper has “4 sides” that need to be made flat!
The good news is that the sides only need to be nominally so and that you do not need to see your very attractive visage in the reflection, nor does the whole wide face need to be made flat but only the first 5mm or 3/16” back from the narrow edge.
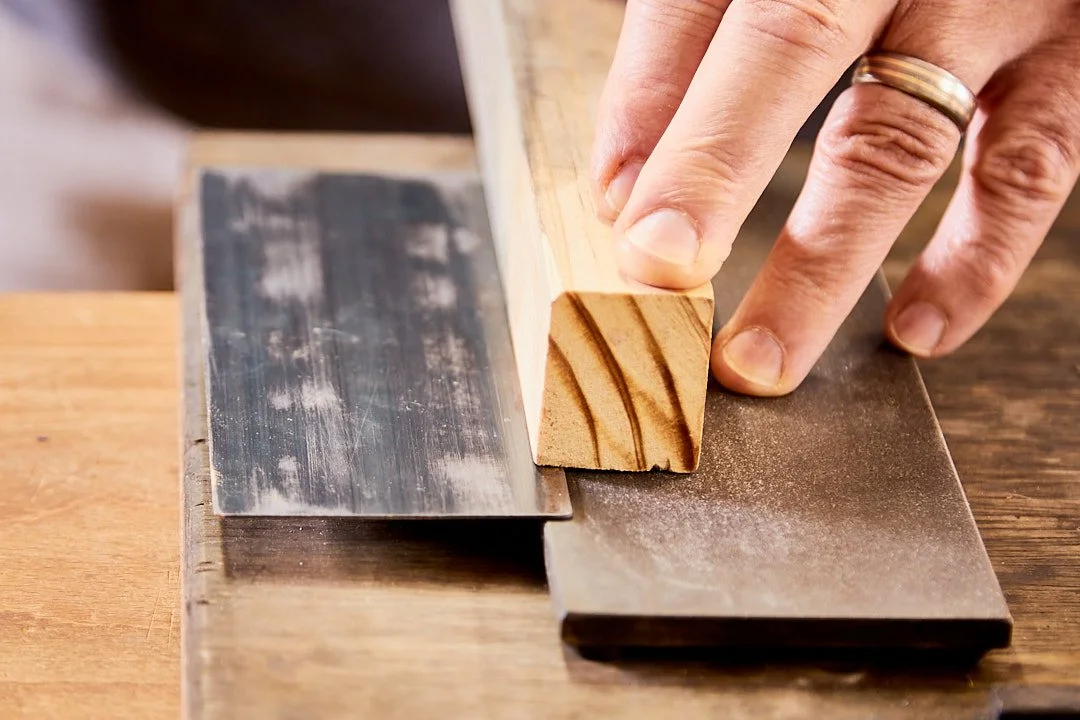
This is where the wooden scrap without the file stuck to it comes into play. First place one of the 4 surfaces to be flattened (long edge) onto the rough version of whatever sharpening surface you use. Remember only about 5 mm or 3/16” needs to be in contact with the abrasive. Now place the wooden block onto the edge that’s in contact with the abrasive to help place even pressure along the whole surface of the scraper that is to be flattened. Scrapers are by nature flexible and the wooden block helps put even pressure along the scraper, helping to get an even, flat surface. Of course don’t forget to move the scraper back and forth until a face is flat and then move on to the next until all the faces are flat.
Here I would suggest working all four “flats” through a single grit of your sharpening system before moving on to your next higher grit. As mentioned earlier you are not looking for a mirror shine but do keep in mind that the smoother the flat part is the cleaner the cutting edge will be later, stopping at the medium setting of whatever sharpening system you use may be a good start.
Step 2: Joint The Edge Of The Scraper
Now we need to joint the two long narrow edges of the scraper, in other words the thin metal section between the sides you have just flattened.
Here the file and the second wooden block comes into play. The file needs to be attached along one side of the wooden block and be as square as possible to the face it is attached to. I do this by cutting a groove along the block that the file slots in to. Go for a tight fit and if you happen to screw it up as I did, you can use something to shim it into position, in this case old business cards did the trick.
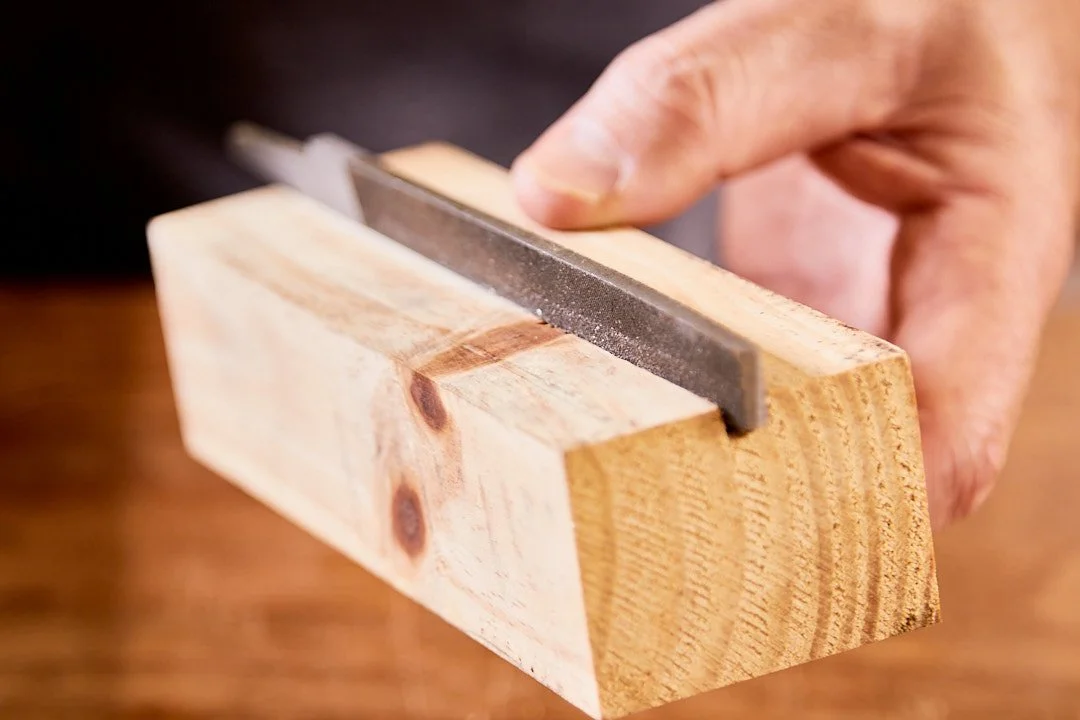
Now clamp the scraper into some sort of vice with a narrow edge pointing up. Take the file jig you’ve just made and register the bottom part of the block against one of the faces of the scraper with the file resting on the edge. If you’ve made it right this jig will now allow you to remove metal from the edge at 90° to the face.
Being right handed I place the block against the right face of the scraper with my right hand and with my left I place light pressure on the file. I like to push the jig away from me along the edge and then lifting it up and back for the next stroke, back and forth does not work as the file cuts on the push stroke. You will be able to feel the resistance of the metal against the file and often it will change as you push the file across the edge, this is because some sections get work hardened during the burnishing process and you need to continue filing at the edge until you feel consistent resistance along the whole edge of the scraper.
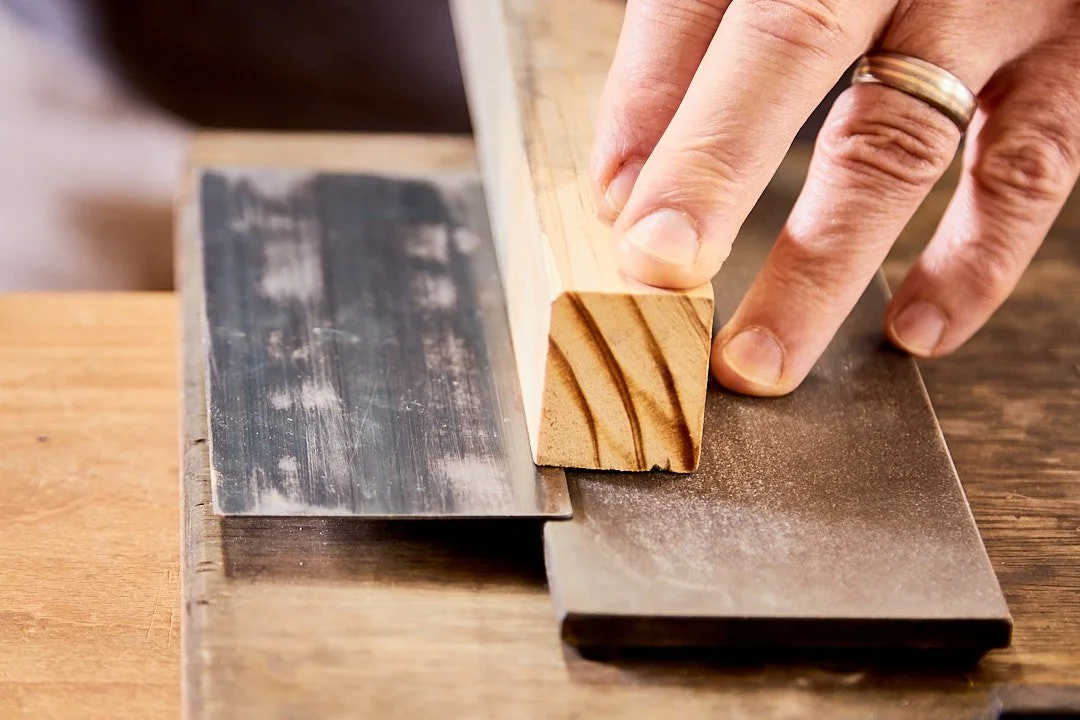
The photo below is the other way around for clarity, my paws would be in the way otherwise.

Step 3: Hone The Edge
Now we turn to our sharpening stones again and here the first block of wood without the file will come in handy. Place the wood on whatever surface you use for sharpening and then offer up a scraper face to the side of the wood. If you followed the instructions provided in the equipment section to have the sides of the block square to one another, the edge of the scraper will meet the abrasive at a right angle. Rub the scraper back and forth moving through the grits up to the same final grit used for flattening. Once the scratch marks from the file has been replaced by those typical of the grit in use on the final stone, your scraper is now jointed and honed.
If you use water stones it is at this sage that the edge of the scraper will cut into the stone and you would need to move the block of wood in some manner across the stone with the scraper along with it, this will help the edge not to cut into the stone. I use diamond stones and I still do this during honing in an effort to wear the stone evenly.
Once the honing step is complete take the flattened faces back to the finest diamond stone and remove any burrs that might have formed after honing.
Next up step 4.
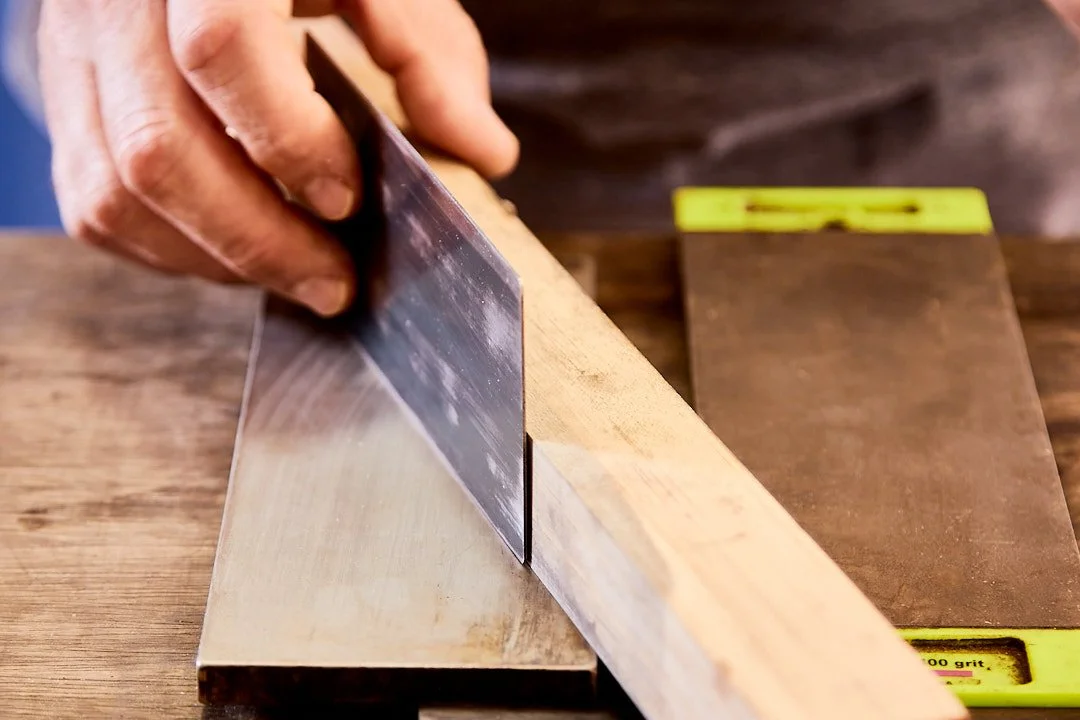
Step 4: Draw Out The Edges
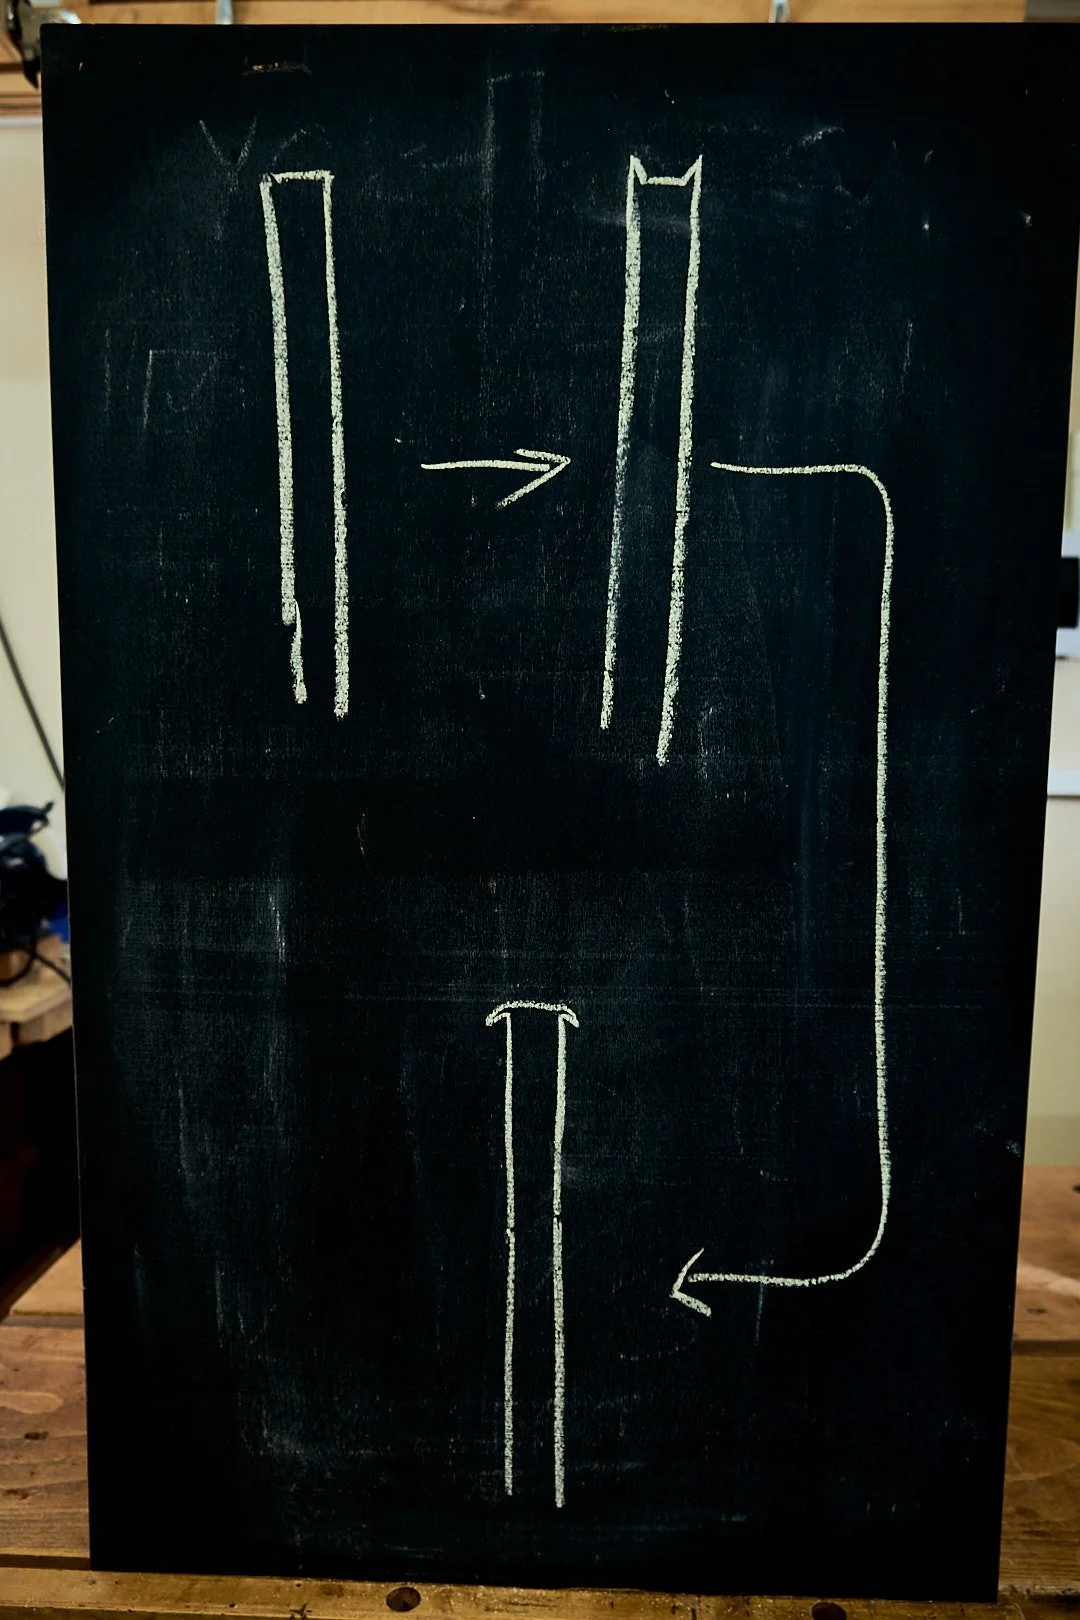
On to the process of drawing out the edges of the scraper to form the start of what will become the hook, that is the sharp edge that will do the cutting once the scraper is sharp.
Head back to the tool list and grab that burnisher. As mentioned earlier this needs to be a metal rod of a tougher constitution than the scraper or in other words of a harder metal than the scraper. Now this could be anything from a screwdriver to a store bought burnisher to one of the fancy purpose made burnishers that allows specific angles to be set, Veritas makes a nice example of the latter.
You could also do what I did and make your own from a long punch. I will be sharing the process of modifying one in a later post. Much cheaper than a purpose made one and dare I say possibly harder and better finished than some!
With a burnisher in hand let's get to rolling.
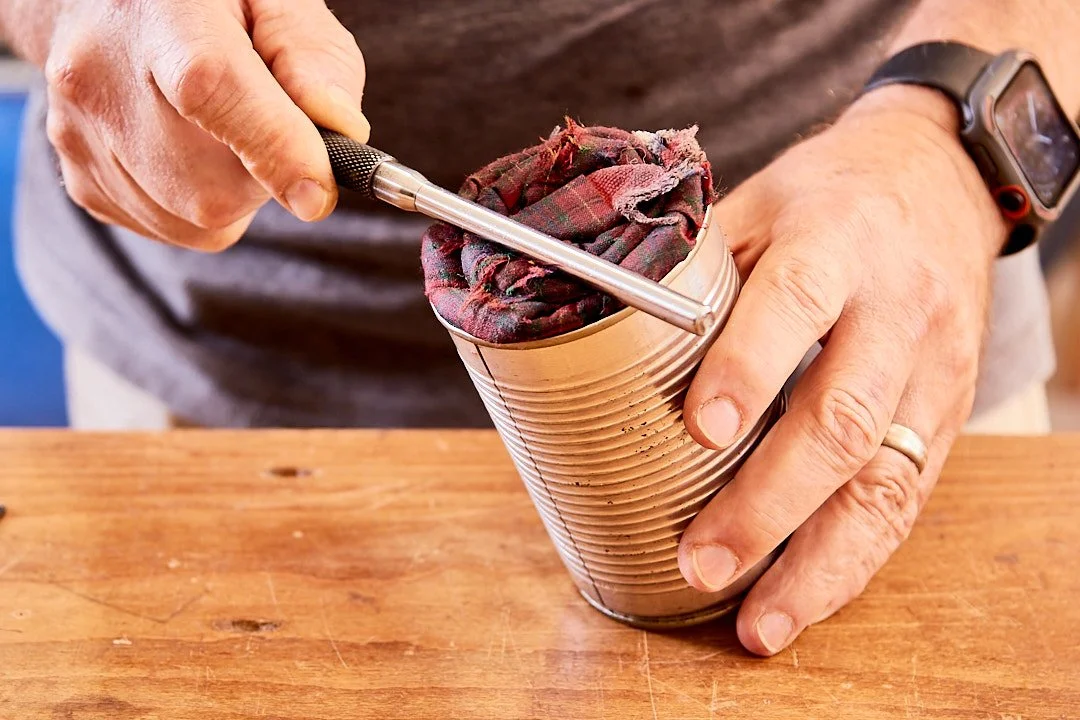
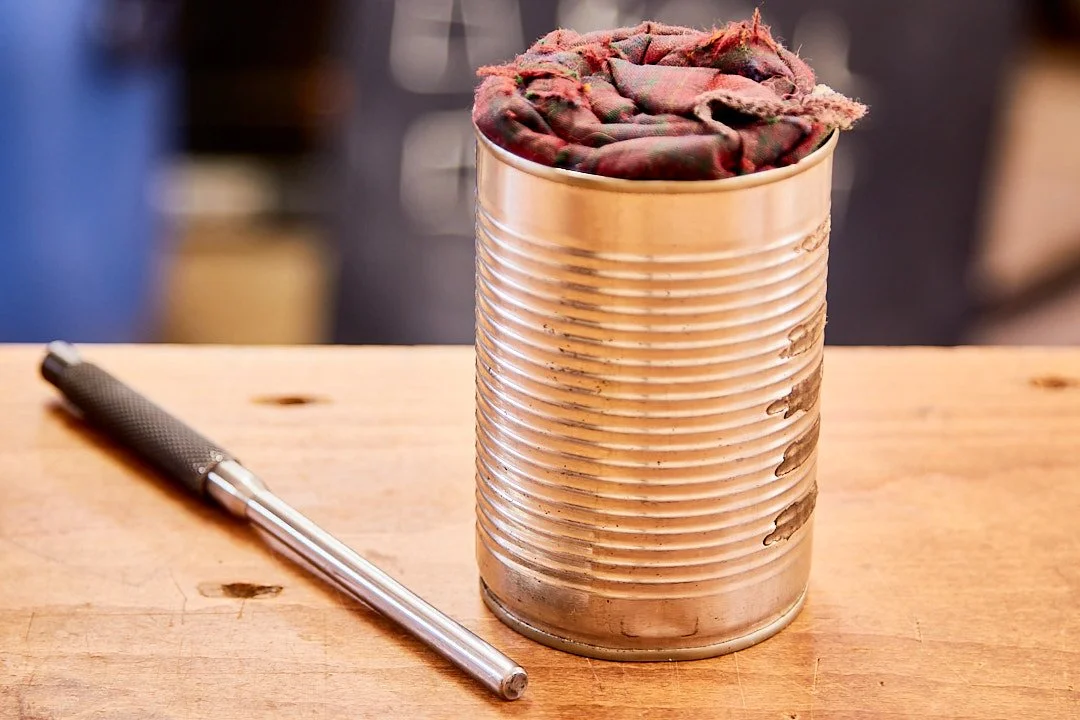
Sorry no not yet, let’s talk about oil, yes O-I-L. Any machinist will inform you that when you happen to rub metal on metal there will be friction and using some form of lubrication may be required, so placing some oil on the edge of the burnisher where it meets the scraper is considered a good idea. You do not need much and old hands at sharpening scrapers will swear by collecting their lube of choice from the side of their nose or their earlobes, also indicated as equipment item #6, using the tip of their index finger and wiping the oil onto the burnisher before proceeding. Of course the amount of lube collected in this manner will differ from one individual to another but I am assured that even the least greasy persons amongst us produce enough, um grease to suffice for the purpose at hand. If you however refuse to acknowledge your own inherent greasiness you are also welcome to dab some light machine oil on a rag and give the burnisher a light coat, before proceeding.
I use a rag in a can as per Paul Sellers.
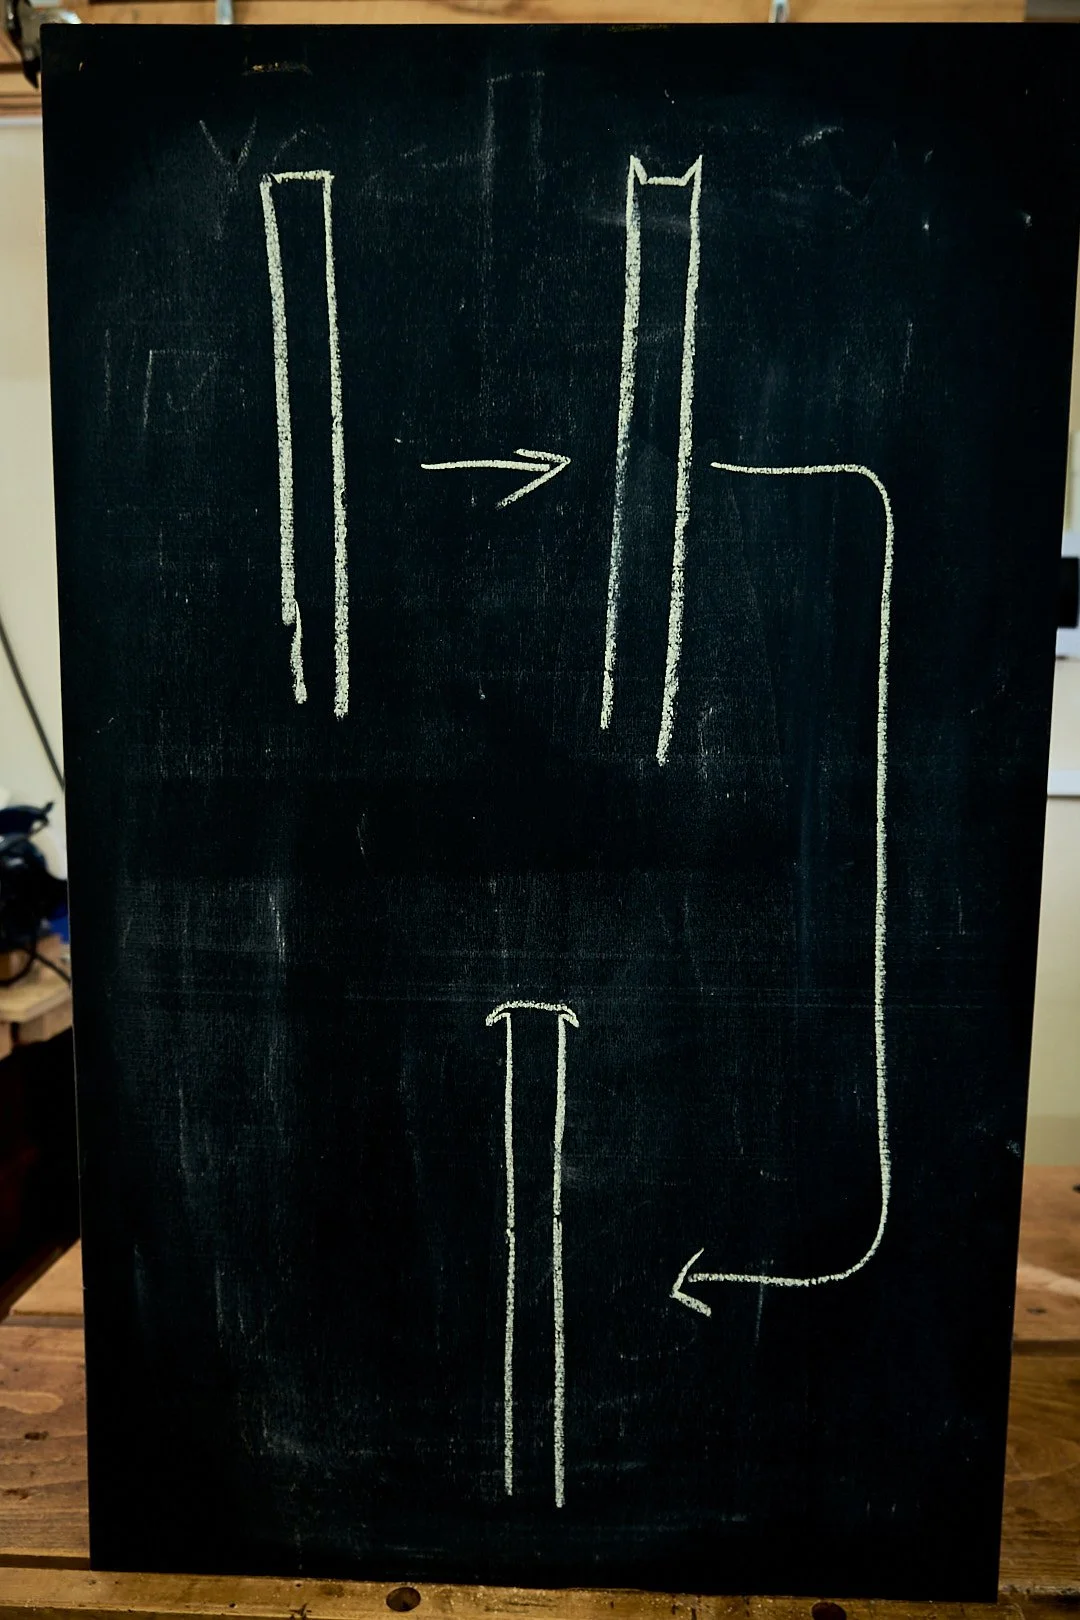
Now to get an exceptionally sharp hook on the scraper this step is crucial. We will be drawing the metal on the sides of the scraper into the narrow edge of said metal device and you go about it like so.
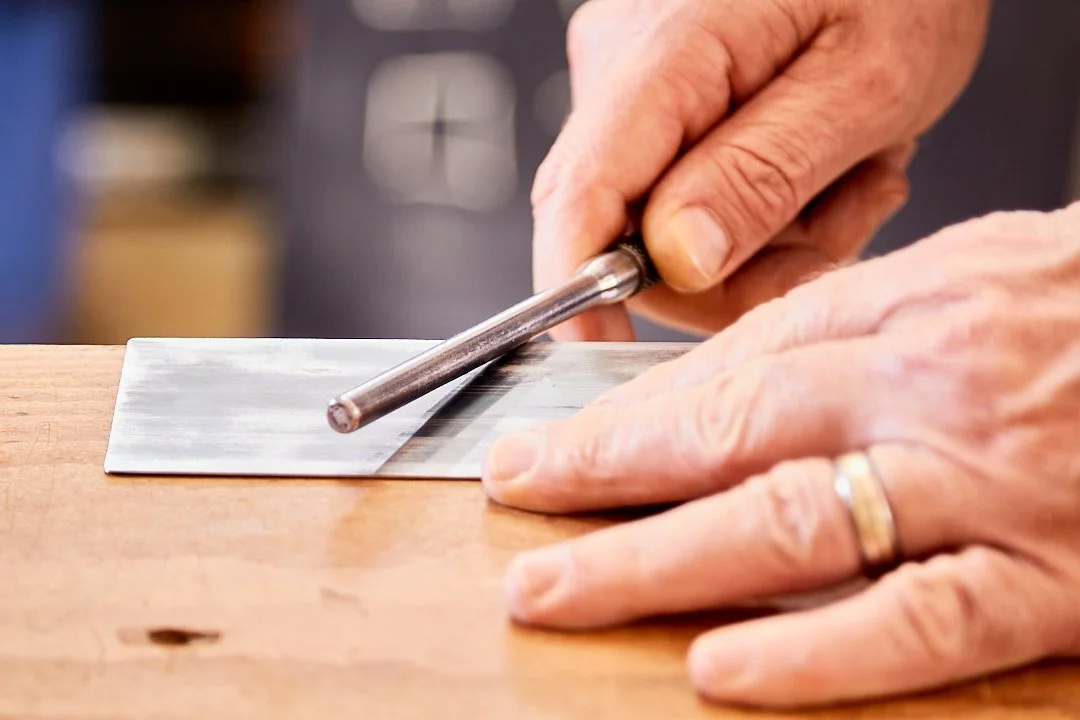
Place the the scraper down flat on a working surface with its edge relatively close and parallel to the edge of the work surface. Now, whilst placing downward pressure with one hand on the upper surface of the scraper you run the burnisher a few times along the top edge closest to the edge of the bench and thus closest to you. You do not need to use excessive pressure with the burnisher and you will ascertain with some experience as to how much your own burnisher needs to be effective. It would help if you started on the lighter side, pressure wise and go up from there. Once the first edge is done turn the scraper over and do the same on the opposing edge, when done turn the far side of the scraper towards you and do the same to the remaining edge top and bottom.
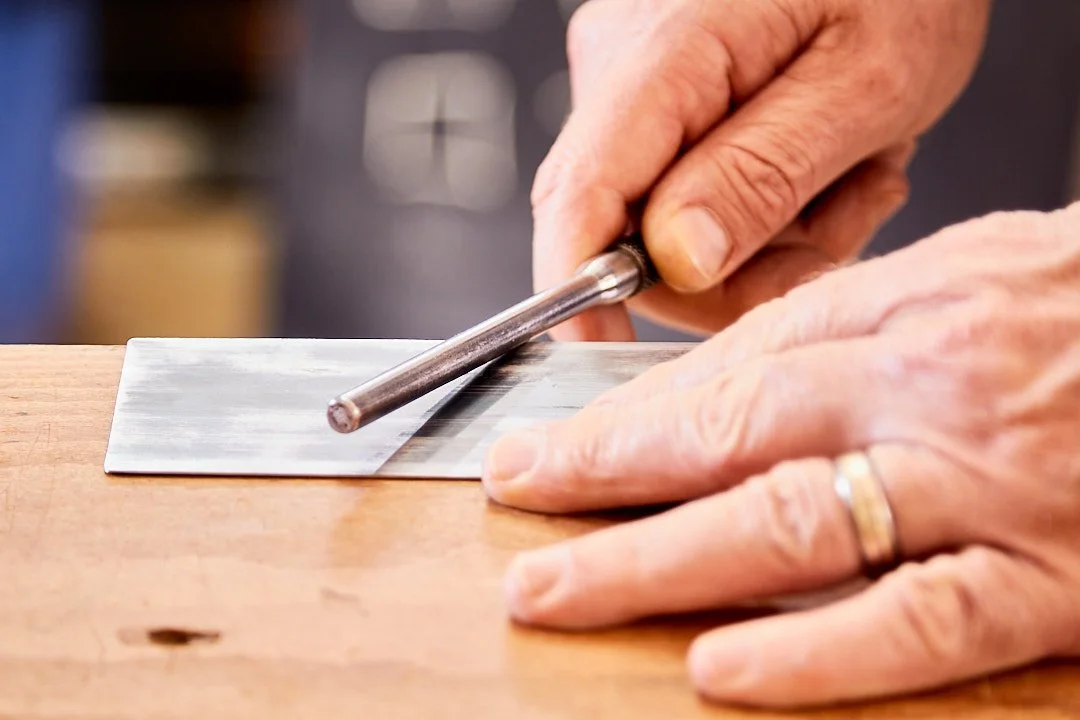
Step 5: Roll the Hook
On to the magic.
For the next step the scraper needs to be orientated with one of the drawn narrow edges facing up. In my case I find it easiest to clamp the scraper in my face vice in a manner that leaves the edge roughly 25mm or 1 inch proud of the working surface.
Lube the burnisher as preferred and hold the handle on your dominant hand whilst supporting the other end with the other. If you happen to be ambidextrous, bonus! In my case, handle right other end left. Most important here is that you do not grip the burnisher as if you are about to club the scraper but rather hold it lightly, this step requires finesse if you are to roll a nice even hook.
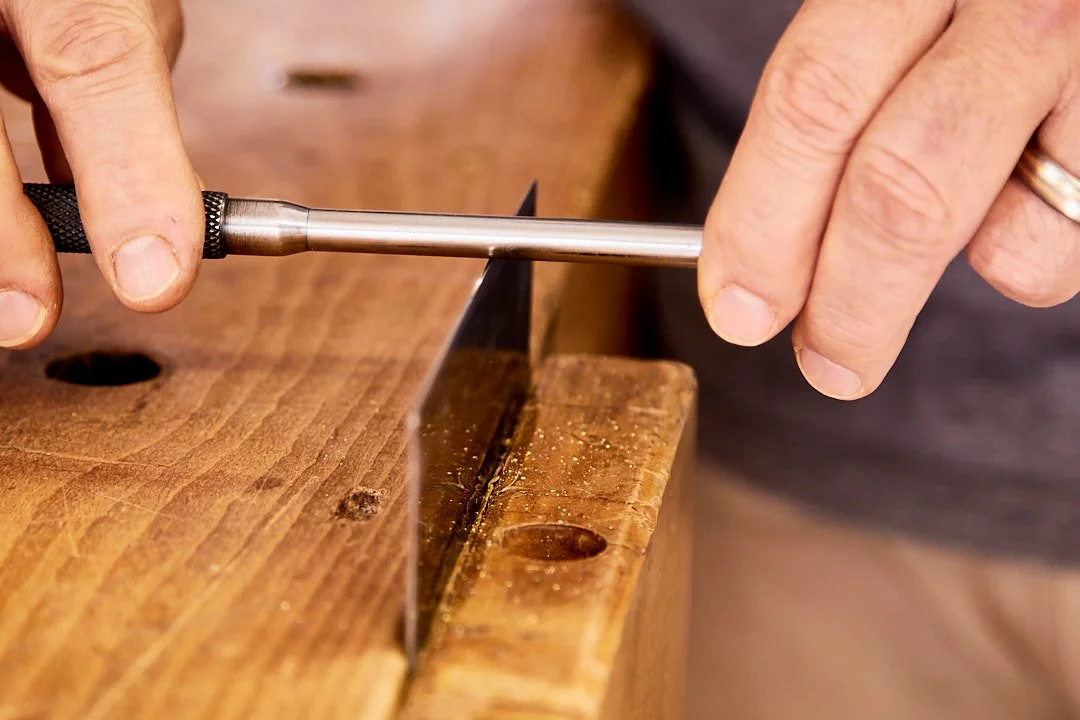
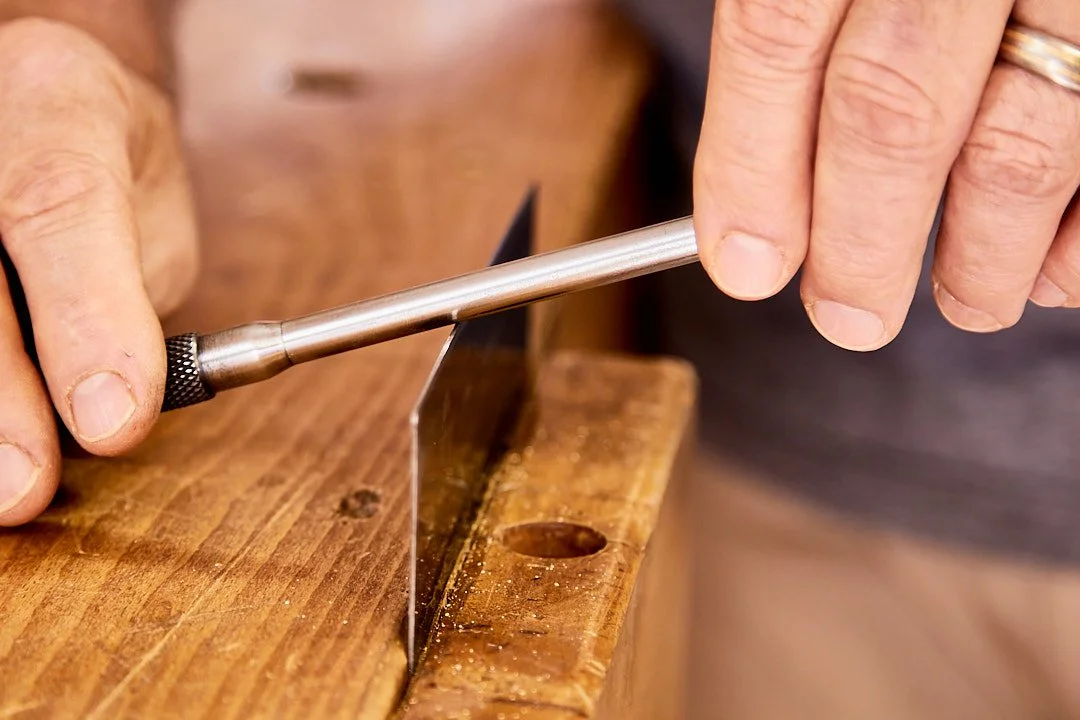
With burnisher in hand very carefully approach the clamped scraper and place the oiled side of the former on the narrow edge of the latter. With light pressure rub the burnisher back and forth on the scraper edge, keeping the the burnisher horizontal and trying to lift the burnisher of the edge as you reach the corners of the scraper. You are now pushing the drawn edges of the scraper back and forming the edge that will become the hook and if you lose your balance as the burnisher drops off the corners you are pushing too HARD!
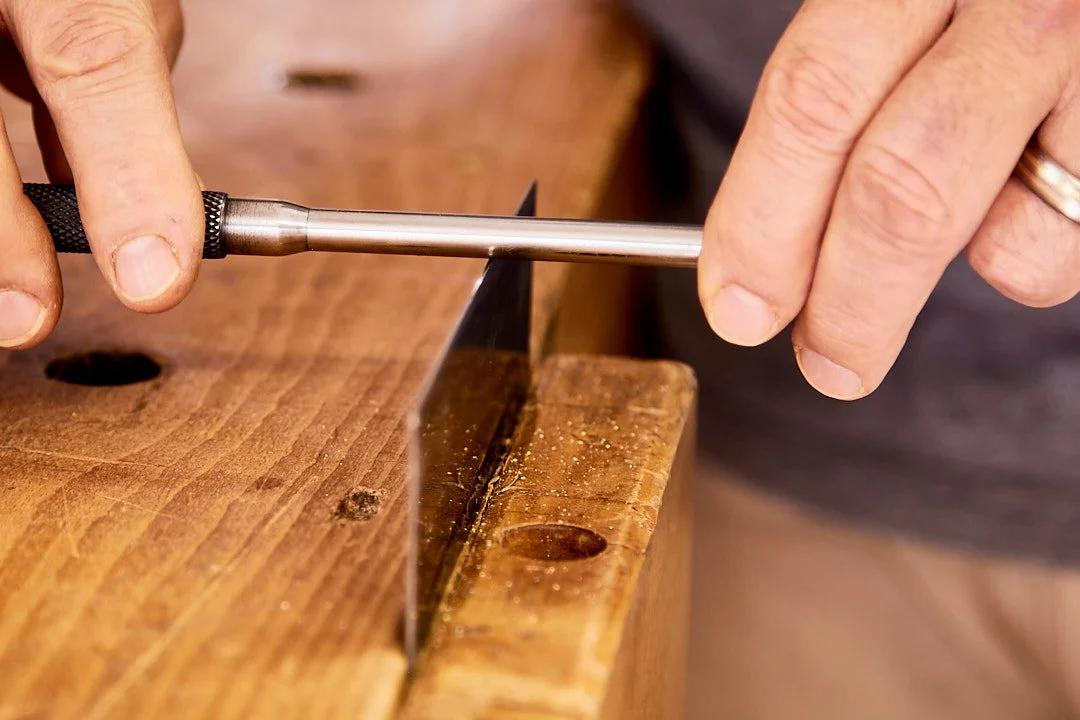
After a few strokes, let’s say about five, start to lower the handle side of the burnisher, in my case right hand, on each following stroke. This will result in the right edge of the scraper gradually being rolled over in a hook with every stroke as the handle is lowered. With the scraper protruding 25mm above the bench top (higher in the photo for demonstration) my bench now becomes my depth stop for determining the final angle of the hook in relation to the face of the scraper, so the moment I have angled the burnisher handle to the point where it almost touches the bench top I know I am there. Now you slowly bring the burnisher back to parallel on each stroke and then start dropping the other end down, in my case left. Here I am dropping the burnisher into “air” but I can eyeball against the bench top how far I need to drop to get a similar angle. The more you do this the better you will get at rolling both hooks to similar angles.
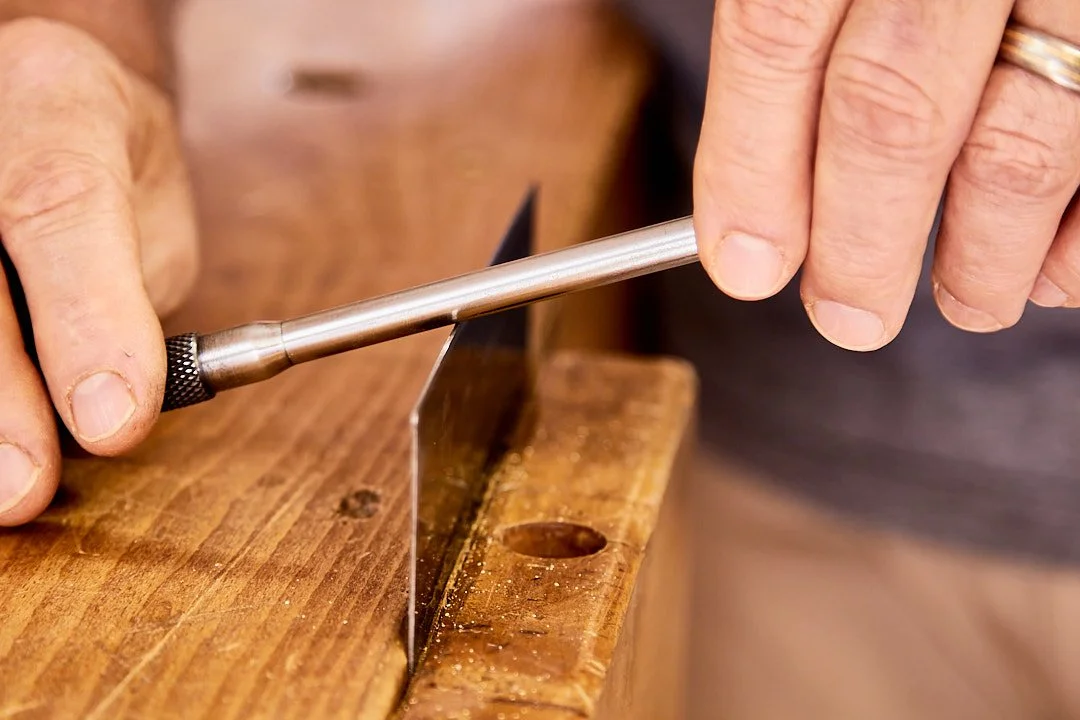
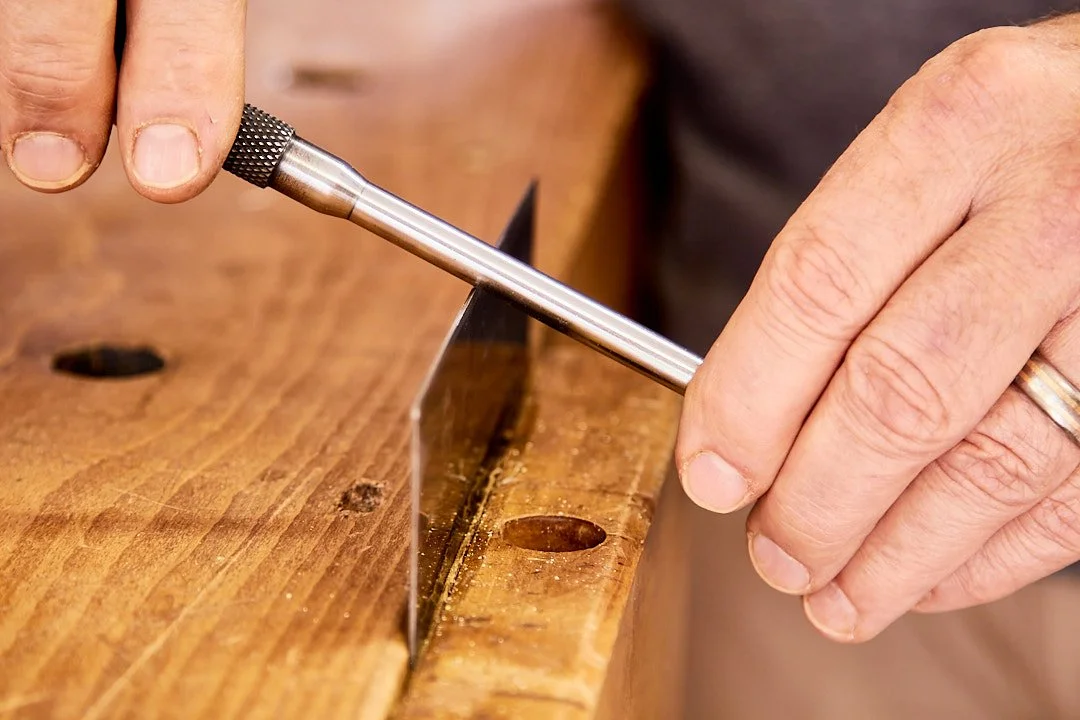
It may be hard to tell if you are using too much pressure, but you should be able to just catch your finger nail under the slightest of wire edges, and that ladies and gentlemen is the hook. Note, too much pressure will leave a significant edge or maybe even break it away altogether. If in doubt lean towards less pressure rather than more.
I need to ask you one big favour though, when checking if there is a hook on the edge please, please, pretty please do not slide your finger along the edge parallel to the length of the scraper, at least not without decent medical cover or a packet of plasters handy. If you followed along with these steps you now have an edge that will not only break the skin but will make you bleed, I guarantee.
Now turn the scraper around so that the other edge faces up and repeat. This does include the part about being careful when checking the edge!
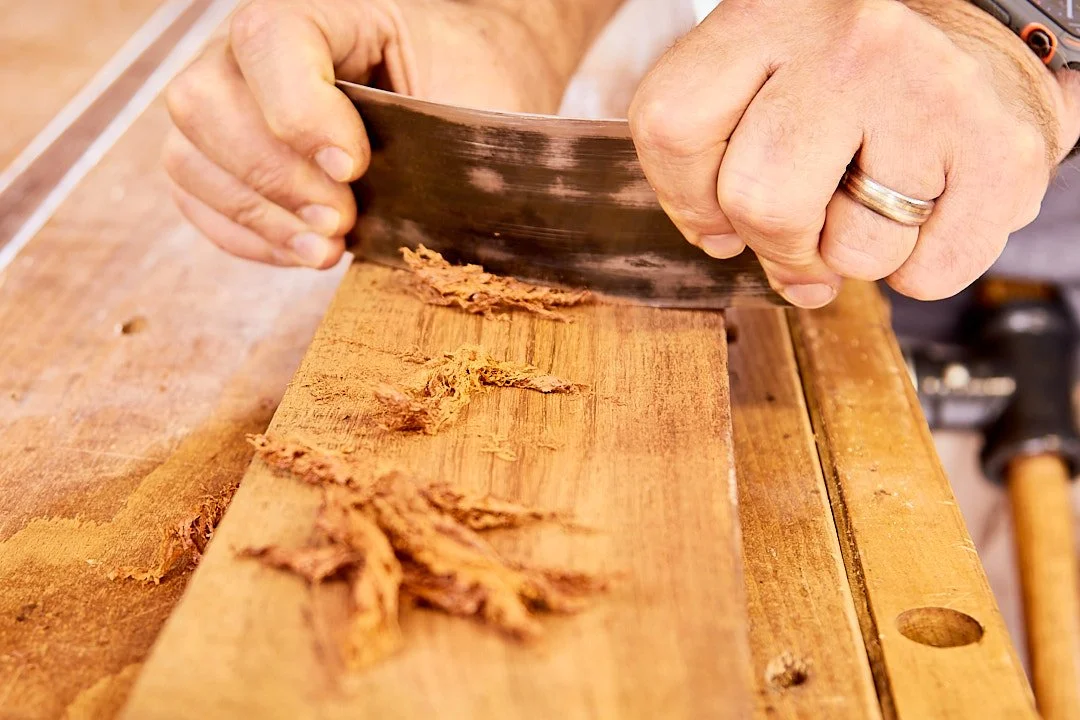
That’s it, you may proceed in testing your newly set up and sharpened scraper on some deserving piece of lumber, ideally one with a prepped surface of some sort. Remember a scraper would be one of the last tools to touch your project before a possible sanding and finish. Also test it on some hardwood and not that piece of pine in the corner. Softwoods do not take well to scraping so you may end up thinking that this post is one big lie and that scrapers will never be of any use to you. Most attempts to scrape soft wood such as pine is likely to result in dust rather than shavings.

You may now have questions on how do you use your new favourite tool and how the angles work? Well with this post at almost 2 800 words you would need to look out for a post in the not too distant future where we’ll attempt to help with these. For now just be aware that the further the hook is rolled over the more aggressive it tends to get and the more you need to tilt the scraper “down” towards the surface of the wood for the hook to bite.
Now that you’ve learned how to sharpen a scraper, you can tackle more precise woodworking projects with ease, but before you head off with your newly sharpened scrapers in hand to make go and make shavings I’ll leave you with this short story.
I think it was the second scraper I had ever sharpened, but I had it clamped in a metal vice that was a bit far from me which forced me to lean over a bit in an effort to get even pressure down onto the edge with the burnisher. Of course even pressure in this case was also a synonym for wayyyyyy too much pressure. Anyway, as I pushed the burnisher away from me on one of the strokes the burnisher slid to one side and as it did so my thumb was pulled along the edge of the hook I had just rolled.
No edge tool in my workshop had ever sliced me as cleanly and deeply as this particular scraper did on that day.
Here is the lesson, do pay attention to not using too much downward pressure when rolling the hook as this allows more control and please do not check this or any other sharp edge by feeling for sharpness along the edge. If you insist in using a digit to check for blade sharpness do this perpendicular to the edge.
By the way you owe me a beer.
Please let me know if you sharpen your own scrapers the same way I do and if you have any tips or tricks that you can share with the rest of us?
See you at the next instalment.
Be happy and safe in your workshop.






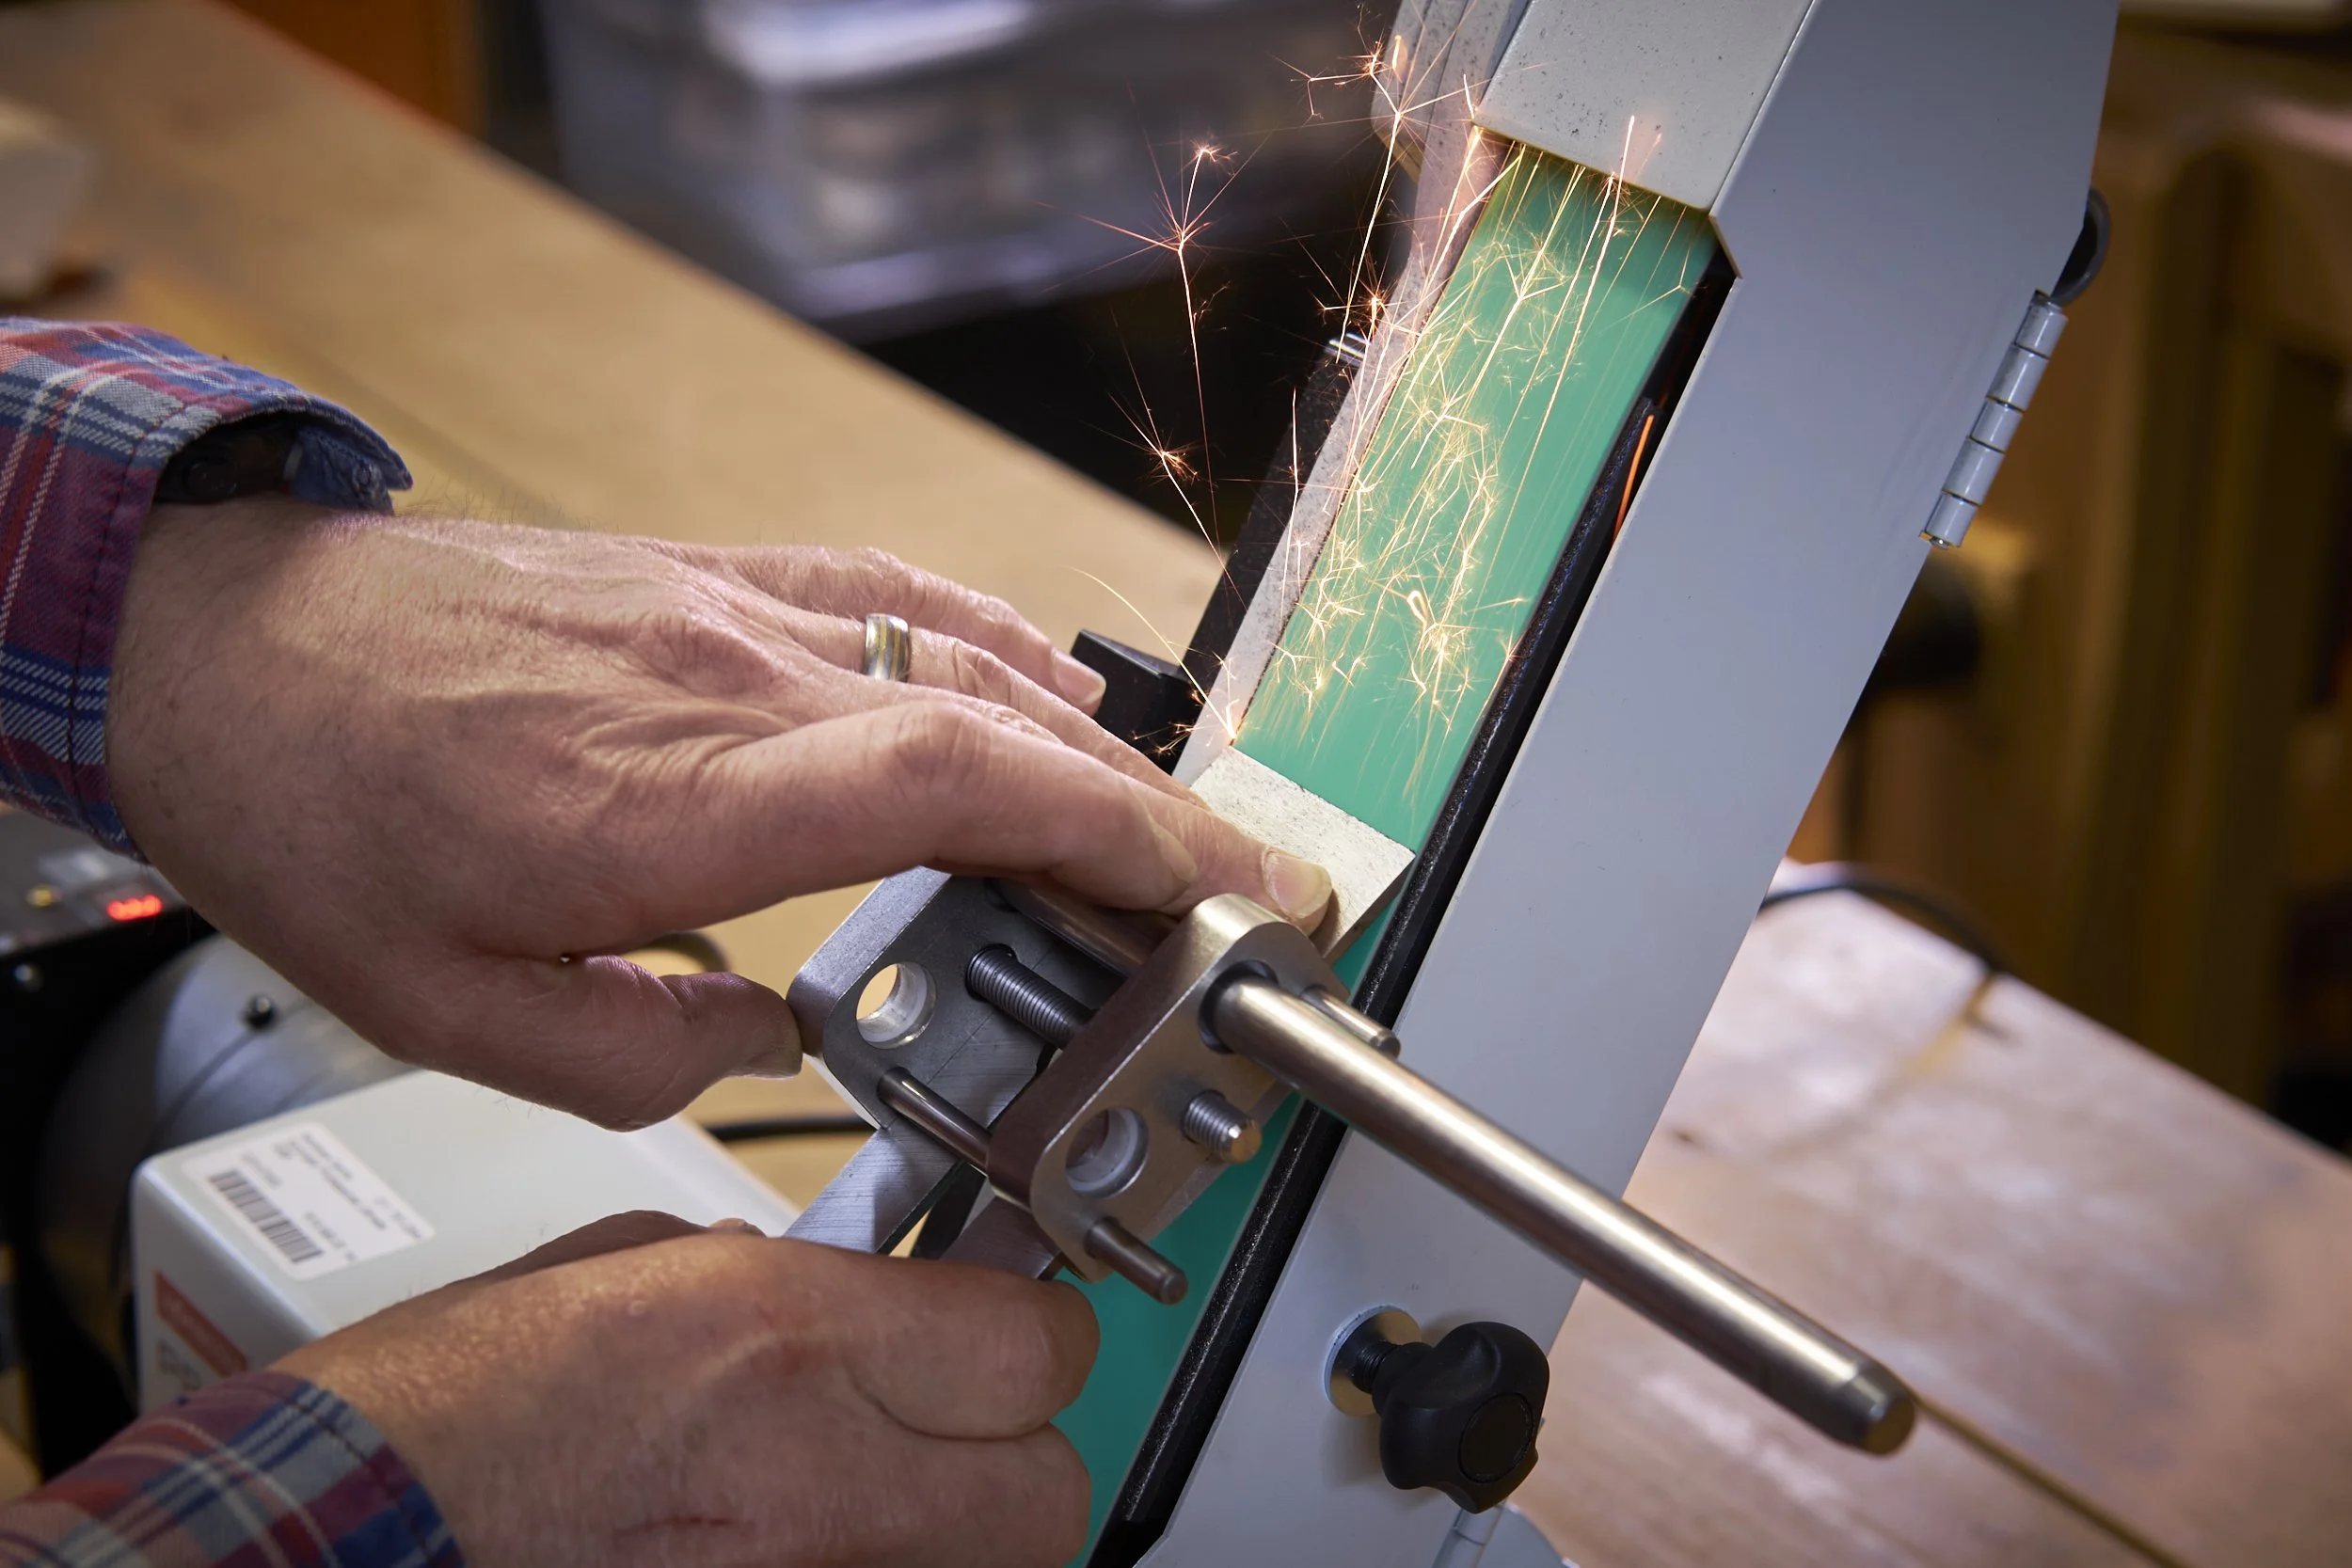


A hands-on comparison of the three most popular hand-sharpening systems — diamond stones, Japanese water stones, and the “scary sharp” method. I’ll share the real pros, cons, and quirks of each, along with what I actually use in my own workshop.