
Blade Making For Woodworkers
This is part one of my wooden hand plane making series and today we start with the blade.
In this series I will be going through a step by step overview of the process of making a wooden hand plane that not only looks great but is also fully functional, shockingly accurate and a true joy to use.
No need for concern though, making and using a wooden hand plane is well within the grasp of any woodworker willing to take the time to learn!
Ask anyone who has ever used a well made and set up wooden hand plane what they think of the experience and I would wager that they’d rate it somewhere between amazing and mind blowing! There is something special about the tactile experience that a wooden hand plane offers that can simply not be matched by a metal bodied plane. Don’t get me wrong I regularly use metal bodied hand planes and love doing so but the feedback offered by a good wooden plane whilst in use just places it on a different level.
Not only is using a wooden hand plane an unique experience but when using bedding angles (more on these later in the series) of 45º or steeper you can make most of the hand planes you will ever need yourself. These can range from Jacks and jointers to high angle smoothers and planes that will hollow seat chairs, even spokeshaves! You don’t even need to add handles, which is by the way the part that I find to be the hardest to do and takes the most time in the process. Check out this link to have a look at the planes made by James Krenov to see more about handle-less versions.
The very best of all is getting to use a tool that you have made yourself, there’s just nothing else like it!
By making your own tools I am NOT referring to the crosscut sled you made last week using the plans from my free plan page 😏.
Well, if they are so great, then why don’t you see them more in use in the modern workshop?
Wooden hand planes do have a bit of a reputation of being hard to set but rest assured that if you get the basics right and work somewhat accurately in the areas that matter during the build process you will end up with a tool that that will not only be easy to use but surprisingly accurate to boot!
If you have a spare blade you can use in a wooden plane and don’t need to make your own, you will need to wait a couple of weeks before the next part describing the build process is published but in the mean time why not hang around and learn something new?
Off to the furnace then.
A Word On Steel
Before we get going I need to tell you more about the RAW material you will be using.
You will want to get your hands on a high carbon tool steel of which the hardening and tempering process is as forgiving as possible. Unless you have access to professional grade equipment for the hardening process you need an alloy that will allow some wiggle room in regard to hitting the correct temperatures during the heating steps.
If you can find it, O1 tool steel is ideal and if not available locally as is in my case, try and find something like K460 which is apparently very close in composition. If you can’t find either, you are looking for a high carbon tool steel with a similar alloy makeup, you will likely find all the info you need on Google but as an example the data sheet included for K460 also provides some details.
Yes you can use an old saw blade, yes you can use a fancy exotic stainless steel or other tool steel if you like. No, you don’t know what the saw blade is made off and you may not hit the correct temperatures for it to work and as far as the exotics go, they may need exotic temperatures to be treated.
Trust me, if you are using basic equipment and if you are trusting in your mark one eyeball and a male perception of colour nuance to hit “cherry red” you are better off using an alloy that allows some room to make mistakes.
We’ll cover more points on metallurgy as we get on with the process, but I would suggest that it might be useful to keep the document at this link close at hand to help make sense of the technical stuff we are about to cover.
WARNING: This process will expose you to extremely hot surfaces and potentially hazardous equipment, please be sure to follow the manufacturer safety requirements for the equipment you will be using and be careful of heated surfaces/liquids and take all necessary precautions not to burn yourself and protect yourself from injury.
Step 1: Shape The Blade
Now is the time to shape the blade, both in regard to its aesthetics and the initial angle of the primary bevel (I like to start at a 25º). It’s also a good idea to drill any holes or form any other features that a design may require at this point.
This step should be done before the hardening and tempering process. If you purchase a steel blank it will likely arrive at your door in an annealed state. Often the steel goes through a heat treatment process during manufacturing that leaves it at a softer state than we are heading towards exactly for the purpose of allowing relatively easy shaping of the blank.
We will refer to the document in the link again later but this details the temperatures and technical details for the K460 steel that I use. They do mention an annealing temperature but for our purposes the steel is sufficiently “soft” without any prior heat treatment required from us.
Follow these steps and tips to shape the blade:
Cut the blank to size.
Mark the desired shape of the blade.
Cut the rough shape and refine as needed.
Bevel or round the sharp edges.
Form the primary bevel.


Tips:
Use an awl to mark the rough dimensions and basic shape on the blade. To make the marks easier to see you can use marking blue or a permanent marker to colour the blank before using the awl.
To mark the shape you can eyeball the design or use a template. For my recent jointer blade I used my #8 jointer blade as a template.
Don’t forget to ease all the sharp edges, it makes the blade more comfortable to handle during the hardening process and in use.
When forming the primary bevel DO NOT grind it all the way down to form an edge, you will grind the edge fully during the sharpening stage. We do this so that the cutting edge doesn’t starve of carbon during the hardening step, this is important for edge retention when the blade is sharpened during routine use.
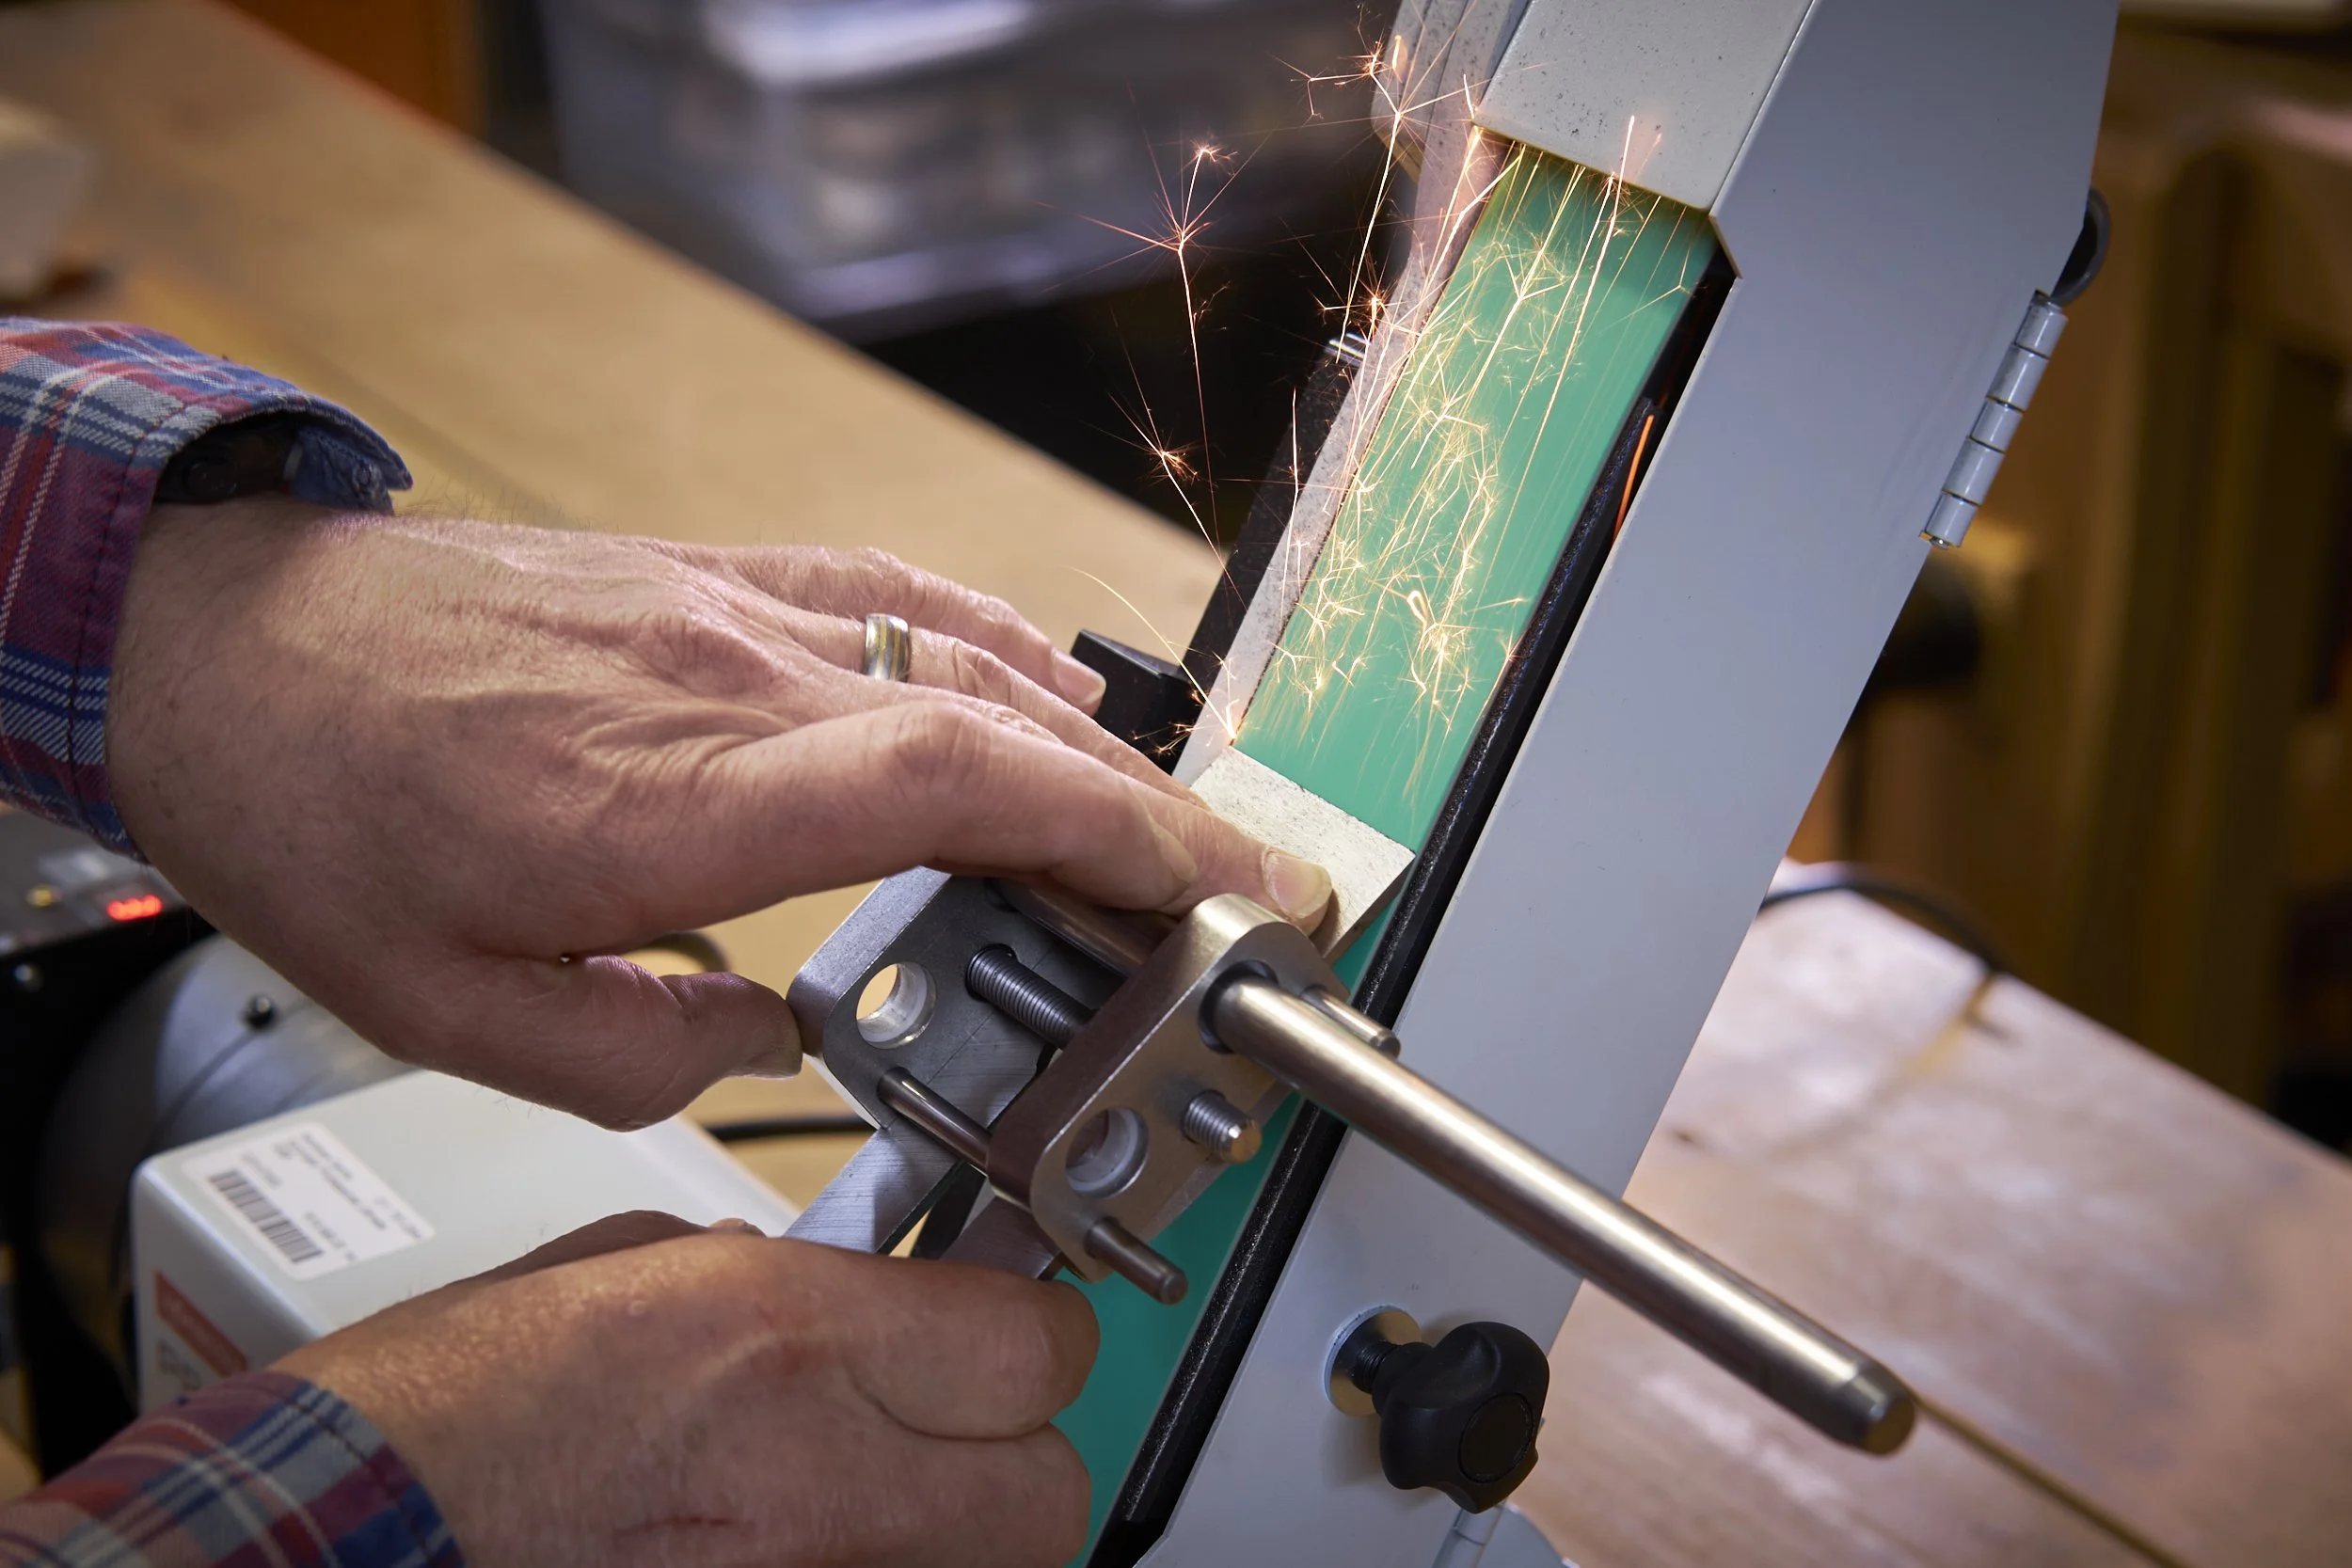
How do you shape the blade? You can use anything from a grinder to a hack saw and metal file, whatever you choose. Personally I use a combination of a bench grinder and a belt sander to do the shaping, with the belt sander doing the bulk of the rough material removal and the bench grinder for the final shaping of the primary bevel (more on sharpening later).
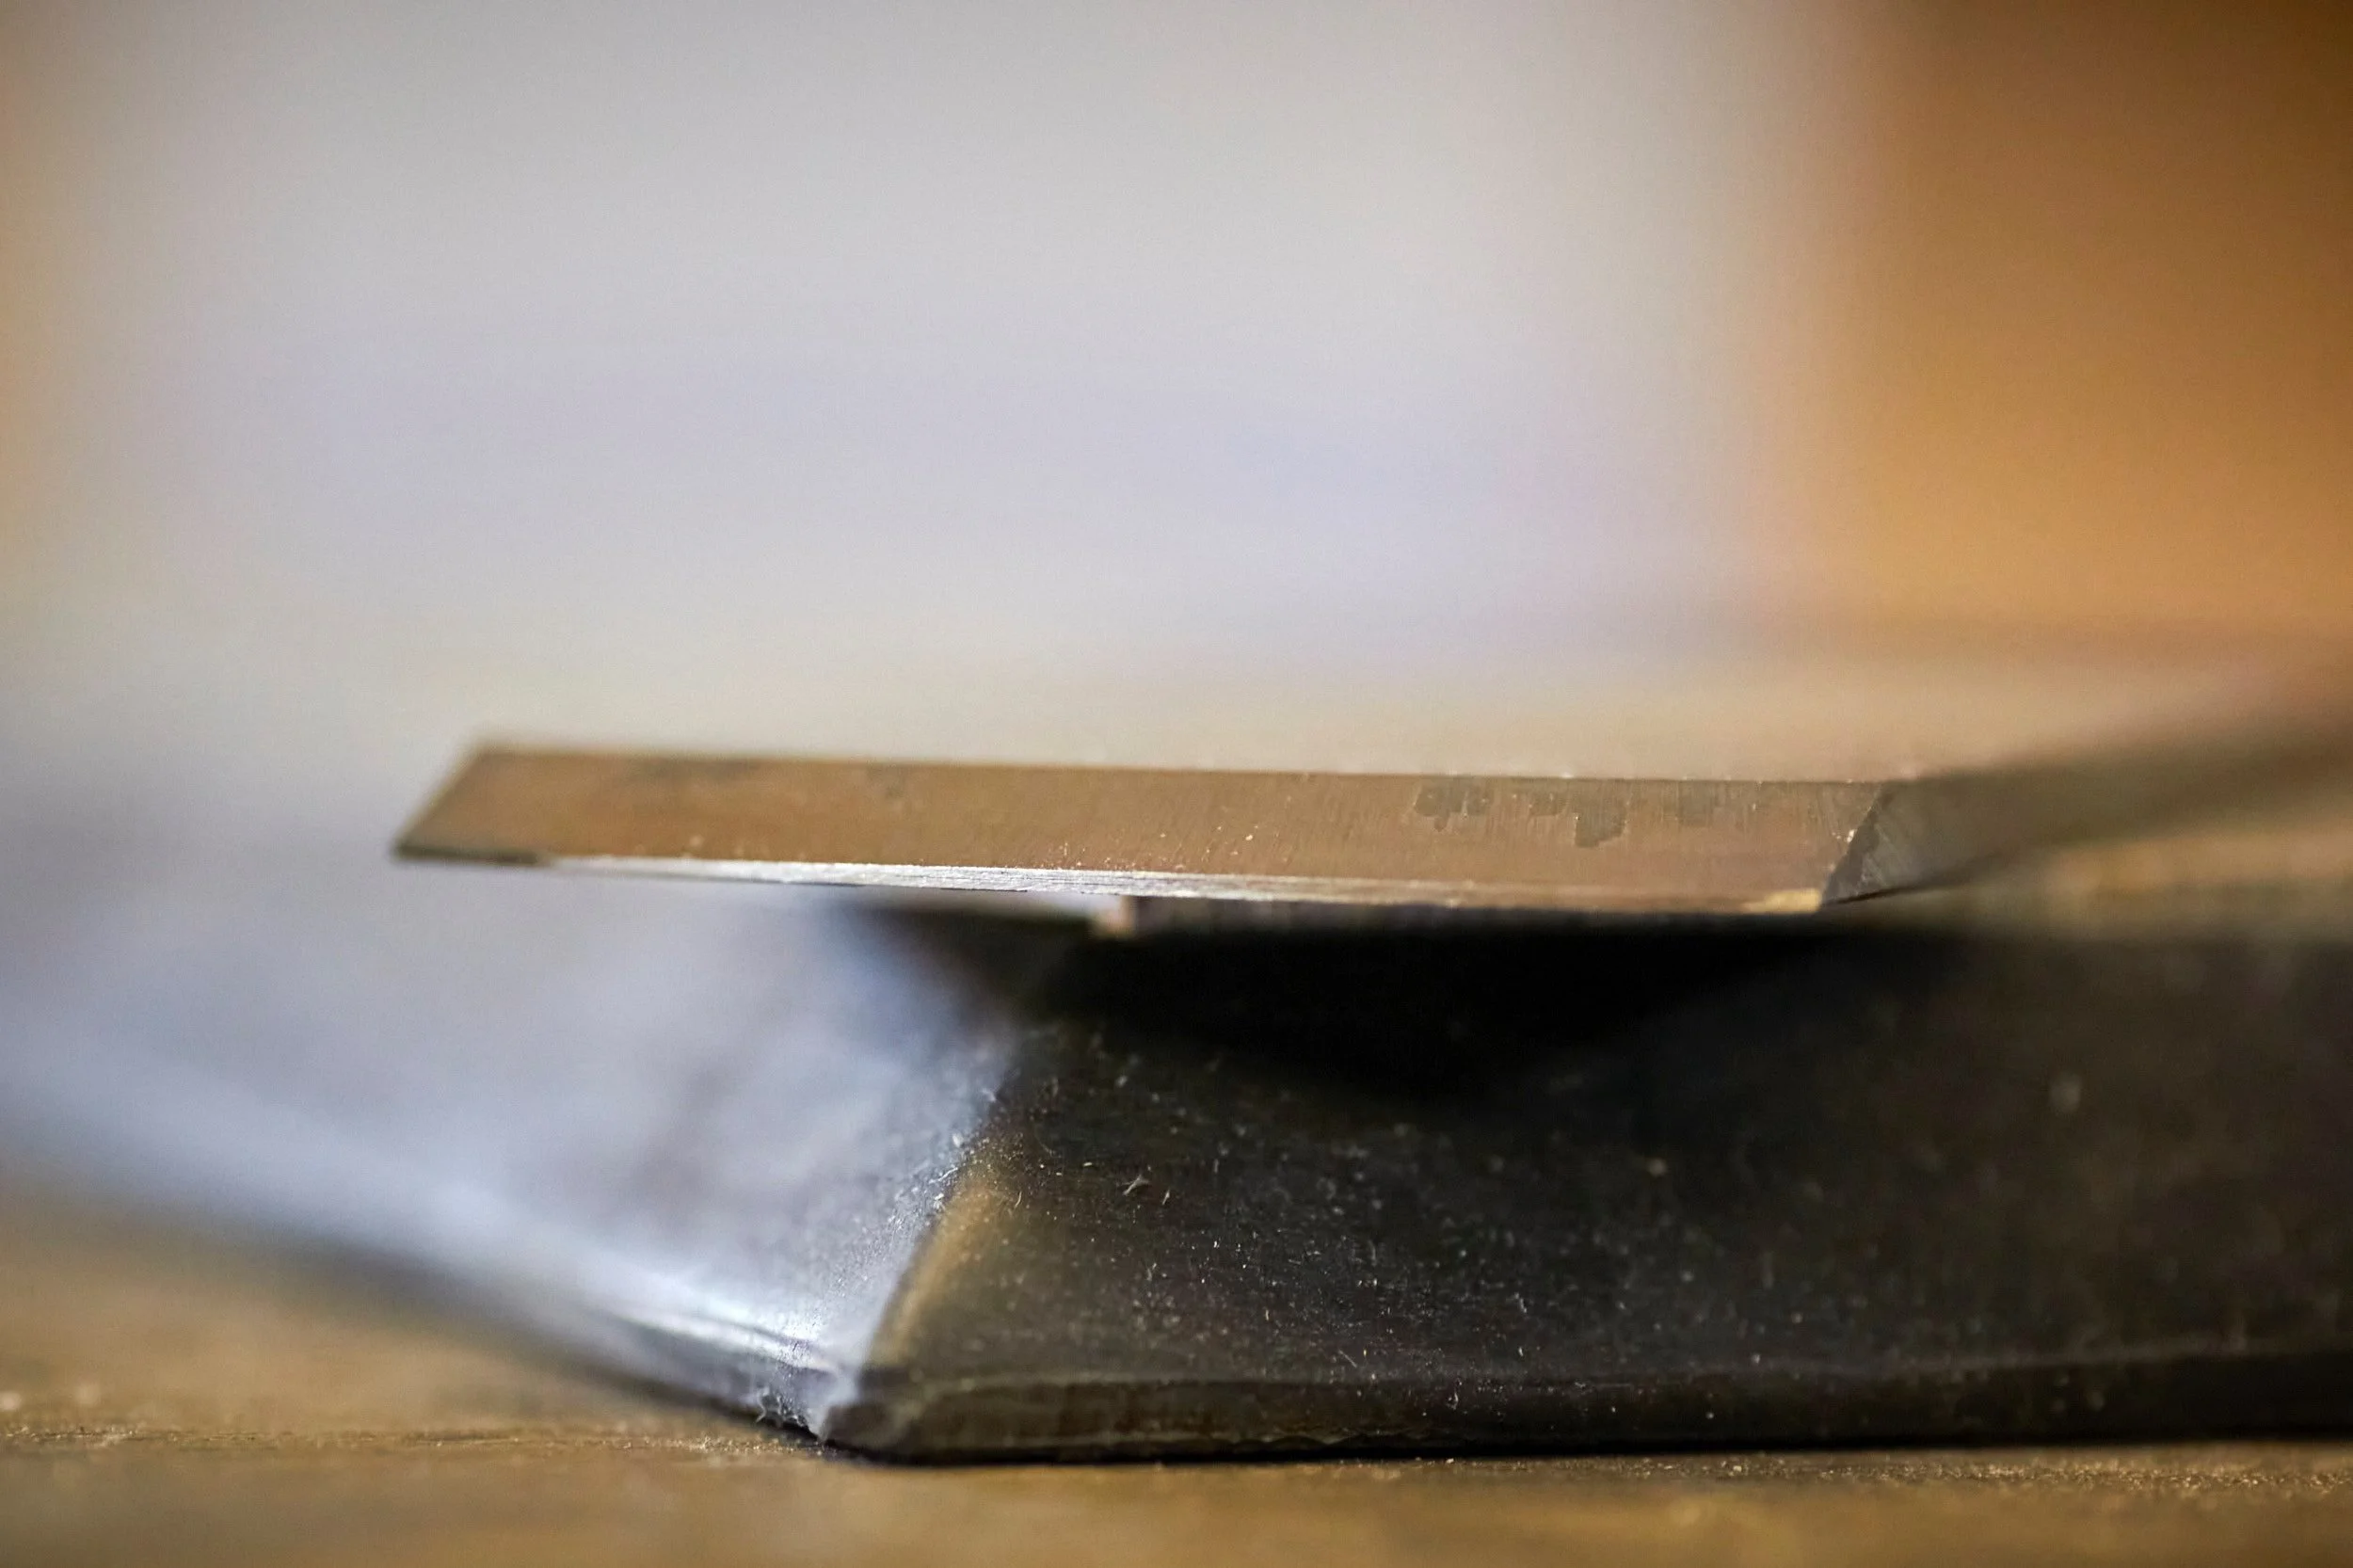
Not quite there…..
When shaping the bevel avoid grinding it all the way down to the edge. This is to avoid starving the cutting edge of carbon during the hardening process.
Pro Tip: Keep a container of cold water handy if your shaping is done on any form of machine. The friction will heat up the blank and depending of how aggressive the process is, things might get hot. Usually you will dip a blade into water so that it doesn’t overheat and lose its temper however at this point we haven’t gone through the hardening process yet. The water is there to cool the blank down so that you don’t burn yourself!
Step 2: Hardening
Franky, this is both the coolest and scariest part of the process. It is also likely the part that puts most people off from trying to make their own blades but if you use a forgiving steel as suggested it’s actually quite hard to get it wrong if you follow a few basic steps.
Let’s talk temperature.
The document referred to earlier is the data sheet for K460 and goes into some detail about how the steel should be treated. At first it might seem complicated but we are mainly looking at 3 aspects in particular.
Hardening temp = 780 - 820℃ (1,436 - 1,508ºF).
Quenching medium = Oil (Ignore the salt bath part).
Tempering temp = Refer to the tempering chart, we will cover this in more detail in Step 3.
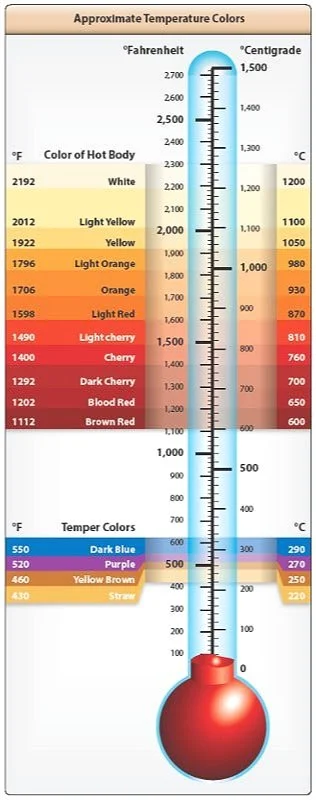
Measuring temperatures while holding a burning MAPP gas torch to a blade blank whilst trying not to drop anything or get scorched is hard. Luckily you don’t need to measure the temperature of the blank and only need to keep watch for the colour that will tell you when it’s been heated to the correct temperature. Have a look at the temperature colour chart included, you will note that “cherry red” very neatly covers almost the exact temperature range that the K460 steel should be heated to during hardening. You may also note that both the manufacturer’s data sheet and the chart covers almost a 40-50℃ range leaving some room for “interpretation” by the onlooker as to what exactly constitutes “cherry red”.
In simple terms, it’s not hard at all to know when you’ve hit the correct temperature especially once you done the process a few times and you don’t even need to hit the target exactly with close being, good enough.
The only hard part of the process is to get the blade evenly heated before the quench.
Check out the Pro Tip later to learn how you can get even closer to the correct temperature with a simple little tool, also be sure to read through the tips section for more details and advice.
BTW, I got colour graphic from here.
Follow these steps to harden the blade:
Heat the blade evenly with a MAPP torch or similar.
Constantly move the torch back and forth over the blade to heat it evenly. Turn the blade over to get heat onto all the surfaces to be hardened.
Once the steel gets to “cherry red” test it to check the temp, refer to the Pro Tip.
After testing for the correct temperature bring the blade back to the torch to make sure you re-heat any cooled spots.
After reaching “cherry red” or thereabouts quench the blade in oil.
Remove the blade from the oil and let it cool - careful, it will still be hot when it comes out of the oil!


Tips:
Be sure to secure the blade in a safe manner during the heating process. I use a long handled vice grip that I found at a local tool outlet. It’s important that you are able to move the blade around whilst heating to ensure an even result.
This process needs a lot of heat, especially if the blade is thick or a large portion of metal needs to be heated. Check the heat rating on the torch you will be using to make sure it’s up to the task. I use a torch that implements a MAPP gas blend. I am aware that this gas mixture is not available everywhere but may still be called “MAPP” even though it’s not strictly the same gas mix.
You need to retain as much heat as possible on the blade to get it up to temperature. You can use stacked thermal bricks (see warning) to “make” a furnace or you can use two metal cans held together with pop rivets like mine. If you have access to a furnace, you are a fortunate person.
You only need to heat up the edge of the blade that will do the cutting, there is no point in hardening the whole blade. Just like flattening the back of the blade during sharpening it is only the front 5mm or so that needs to be hardened.
Make sure to heat the blade evenly across its full width avoiding cool spots.
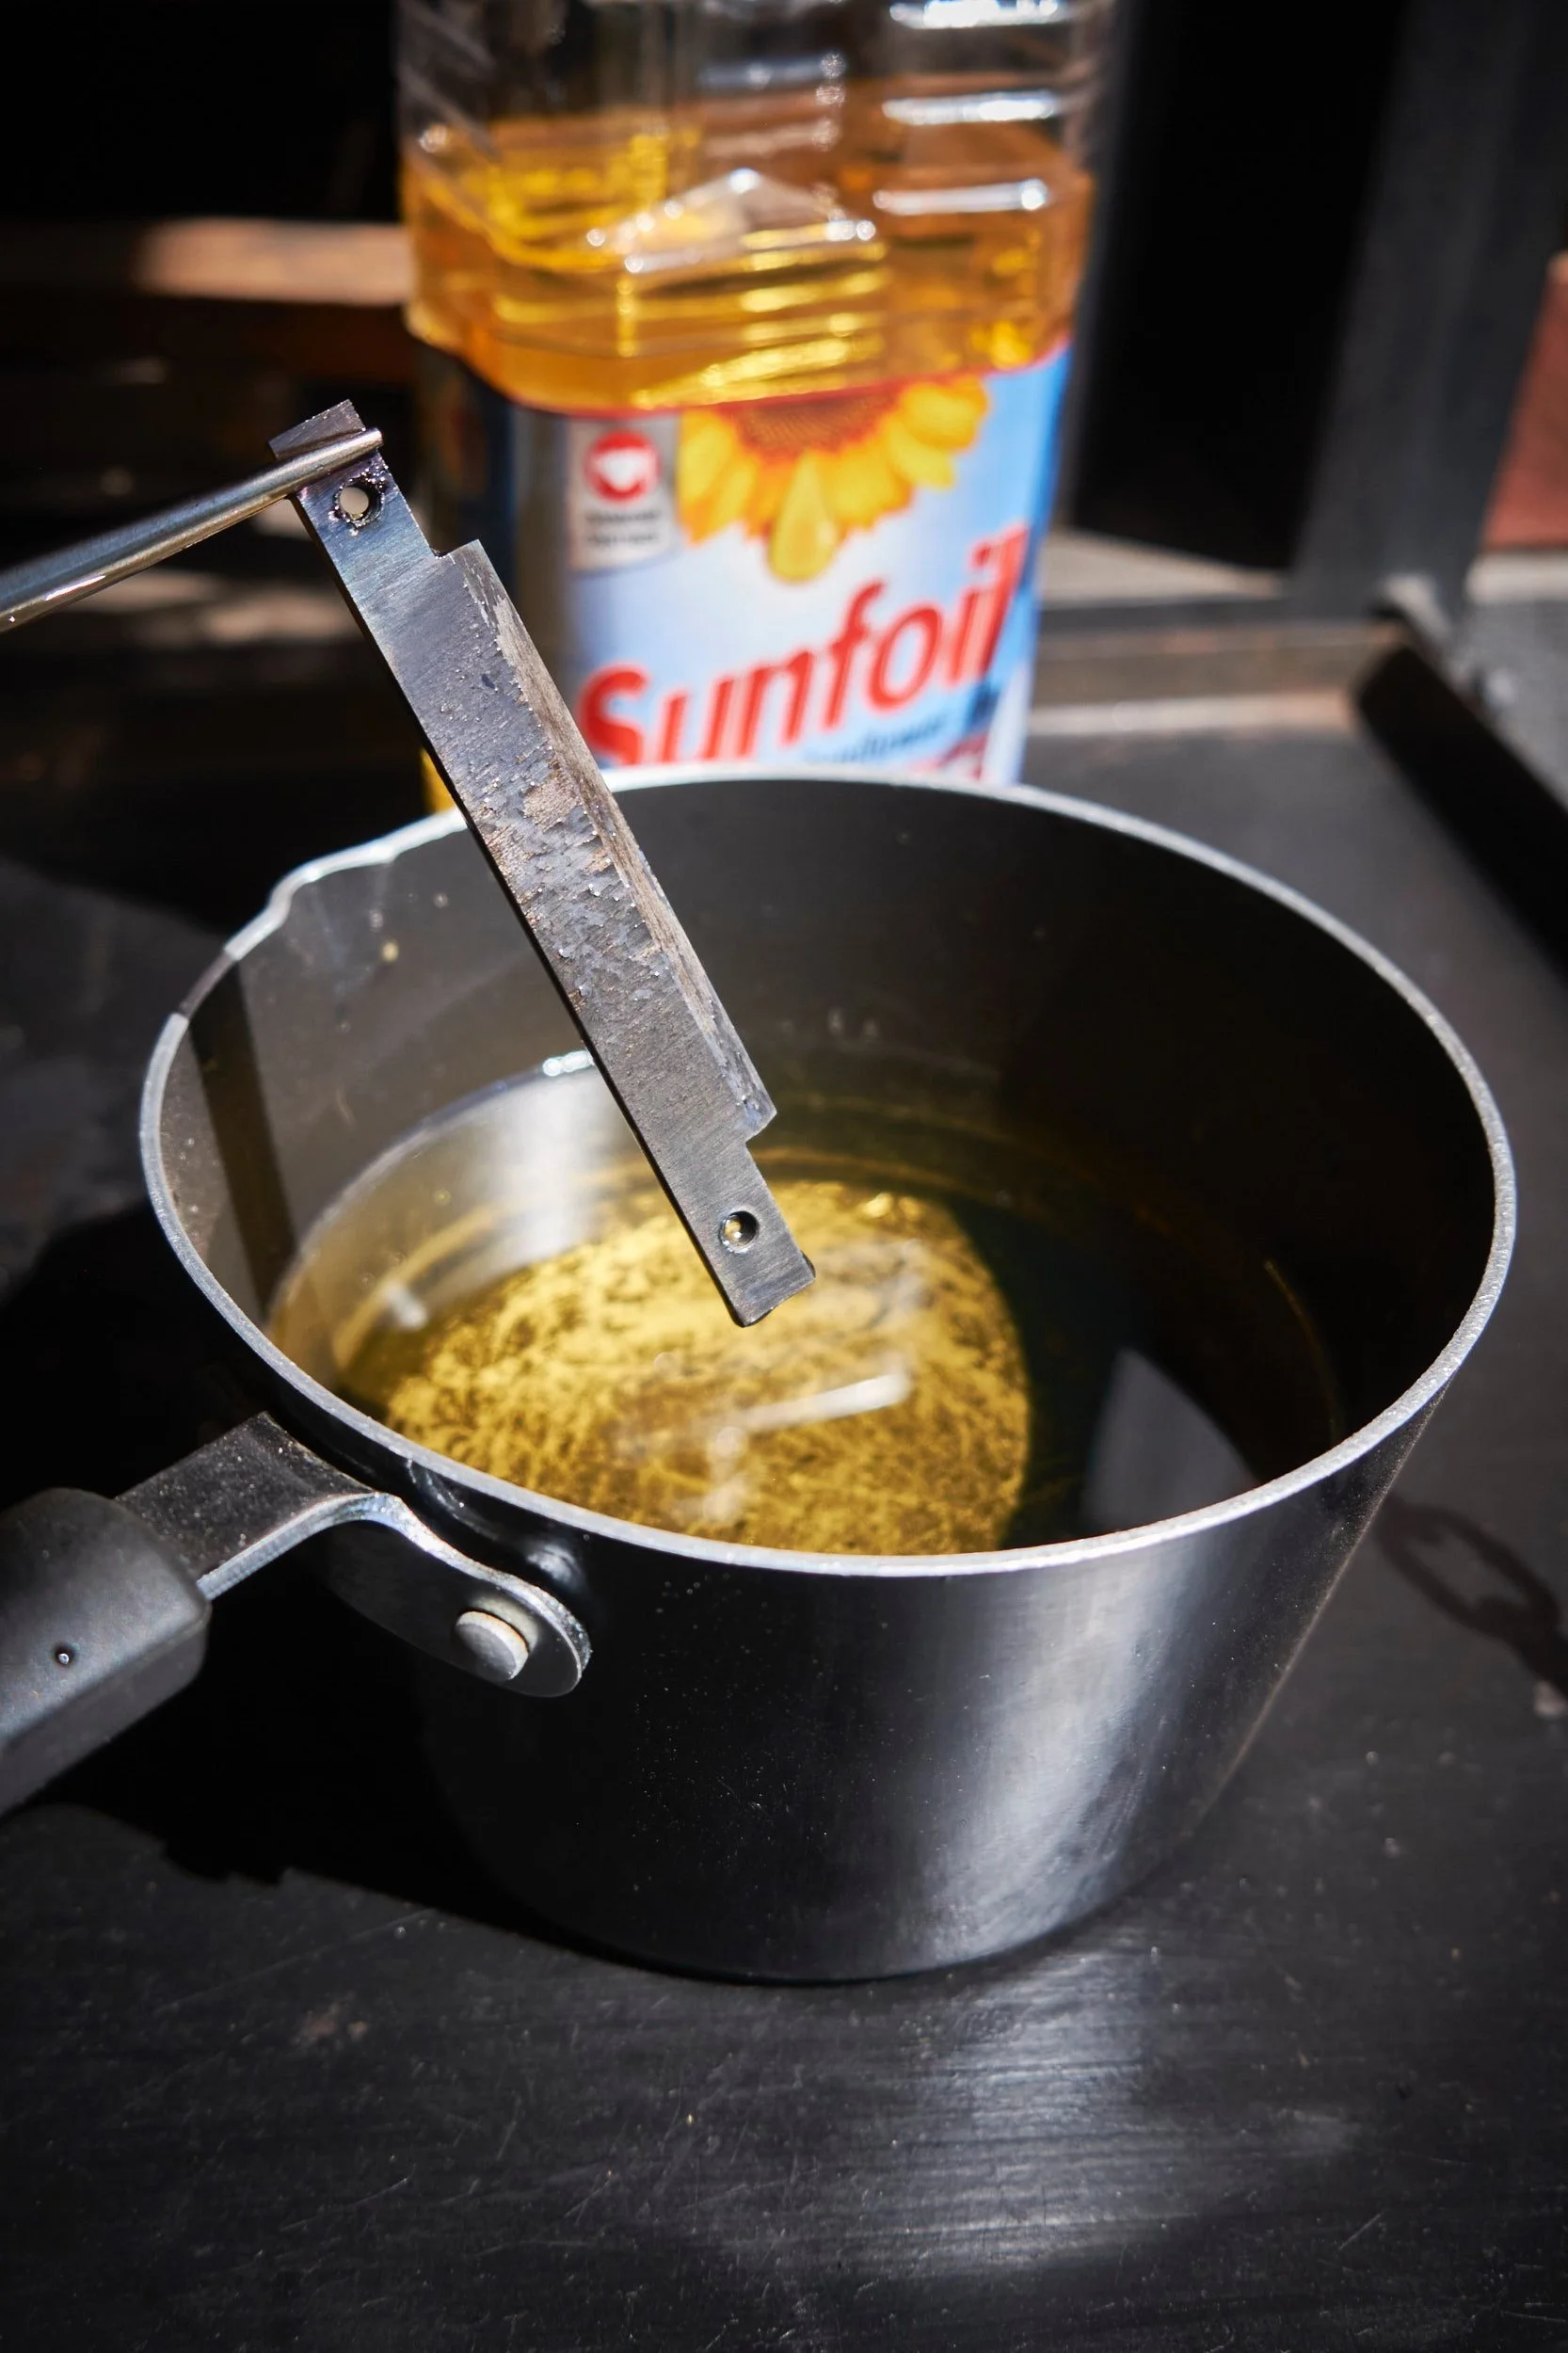
You can use any oil for quenching, even used motor oil will work in a pinch but I find cheap vegetable oil to be cleaner and easier to use.
Put the oil in a metal container, a heated blade will transfer a LOT of heat to the oil and using glass or plastic containers will cause problems.
MOVE - don’t just dunk or drop the heated metal into the oil. As the blade enters the oil the liquid at the surface of the steel will boil and bubble. Moving the blade removes the bubbles from the surface and ensures an even harden. Bubbles may cause sections of the blade to remain brittle in use.
WARNING: Do NOT use normal bricks to build your furnace, the heat may cause the bricks to explode.
Conduct the heating and quenching process in an open area with lots of ventilation. Your barbecue would be a good place to do the work.
Make sure you have fire suppression or safety equipment at hand in case you set something alight.
Protect your hands and eyes by wearing the necessary safety gear.
Pro Tip: Use a magnet to check if the “cutting” edge of the blade is magnetic. Once steel reaches the correct hardening temperature it loses its magnetism. Touch the magnet to the edge of the primary bevel and as soon as the magnet no longer “sticks” you are good to quench. I prefer to bring the blade back to the torch before I go to the oil as the metal loses a bit of heat during the test (you will actually see the colour on the blade dull a bit).
Don’t be like me the first time I did it and check the non heated part of the blade, the magnet will stick to the blade!
Pro Tip: If you are using a tool like a vice grip to hold on to the blade during heating, avoid setting the jaws too tight, they will leave marks in the metal that will be very hard to get rid of during the cleanup.
Has the blade been hardened? You can do a simple test, once the blade has cooled, run a metal file over the hardened edge. It should skid off the metal as if were glass. If it does you have a hardened blade, if it doesn’t you would need to repeat Step 2. The beauty of the process is that you can keep repeating it until you get it right! In that way metal is much more forgiving than wood.
Be careful not to drop the blade at this point, untempered steel can shatter like glass if it hits something hard.
Ok, that’s it for the easy stuff now for the dangerous part.
Step 3: Temper
Temper, in this case can refer to two things. The first would be the metallurgical process of toughening the steel, the second refers to your partner’s likelihood of losing their’s. I know it all depends on the particular individual’s temperament but occupying our oven for longer than two hours to temper a batch of blades comes with a certain amount of risk in my house, especially when I do so with two small spokeshave blades and the cost benefit analysis of using so much power on so little steel does not make sense to an MBA!

So tempering the blade itself isn’t dangerous, occupying the oven shortly before dinner or lunch is.
The instructions from the manufacturer of the steel states that tempering should take place directly after hardening and I try to time my blade making activities to accommodate culinary demands. You will also note on the data sheet that K460 can be tempered at different temperatures to result in varying degrees of hardness. For plane blades I like to hit around 60 on the scale so I will set my oven to roughly 200 - 250℃ (390 - 480ºF). We want the blade to be tough enough to hold an edge but we want to be able to sharpen it regularly without having to spend hours at the sharpening station in an effort to remove metal and get a burr.
Not sure what a burr is, read more about sharpening here.
The steps to temper:
Place the blades in the oven, on a wire rack is ideal.
Set the temperature and switch on the oven, you want the blades to heat up slowly with the oven.
Set the timer for an hour and a half at least.
After the timer goes off switch off the oven and let it cool, leave the blades inside the oven to cool down with the oven.
Once cooled remove the blades and head on over to Step 4.
Tips:
It’s important to let the blades heat up and cool down in the oven, sudden temperature changes may shock the blade and affect the temper.
Plan, seriously it’s is a pain if you need to use the oven but have to wait for the temper to complete.
The whole blade needs to reach an even temperature all the way through, don’t be tempted to cut corners on thinner stock by using shorter times at the correct temperature.
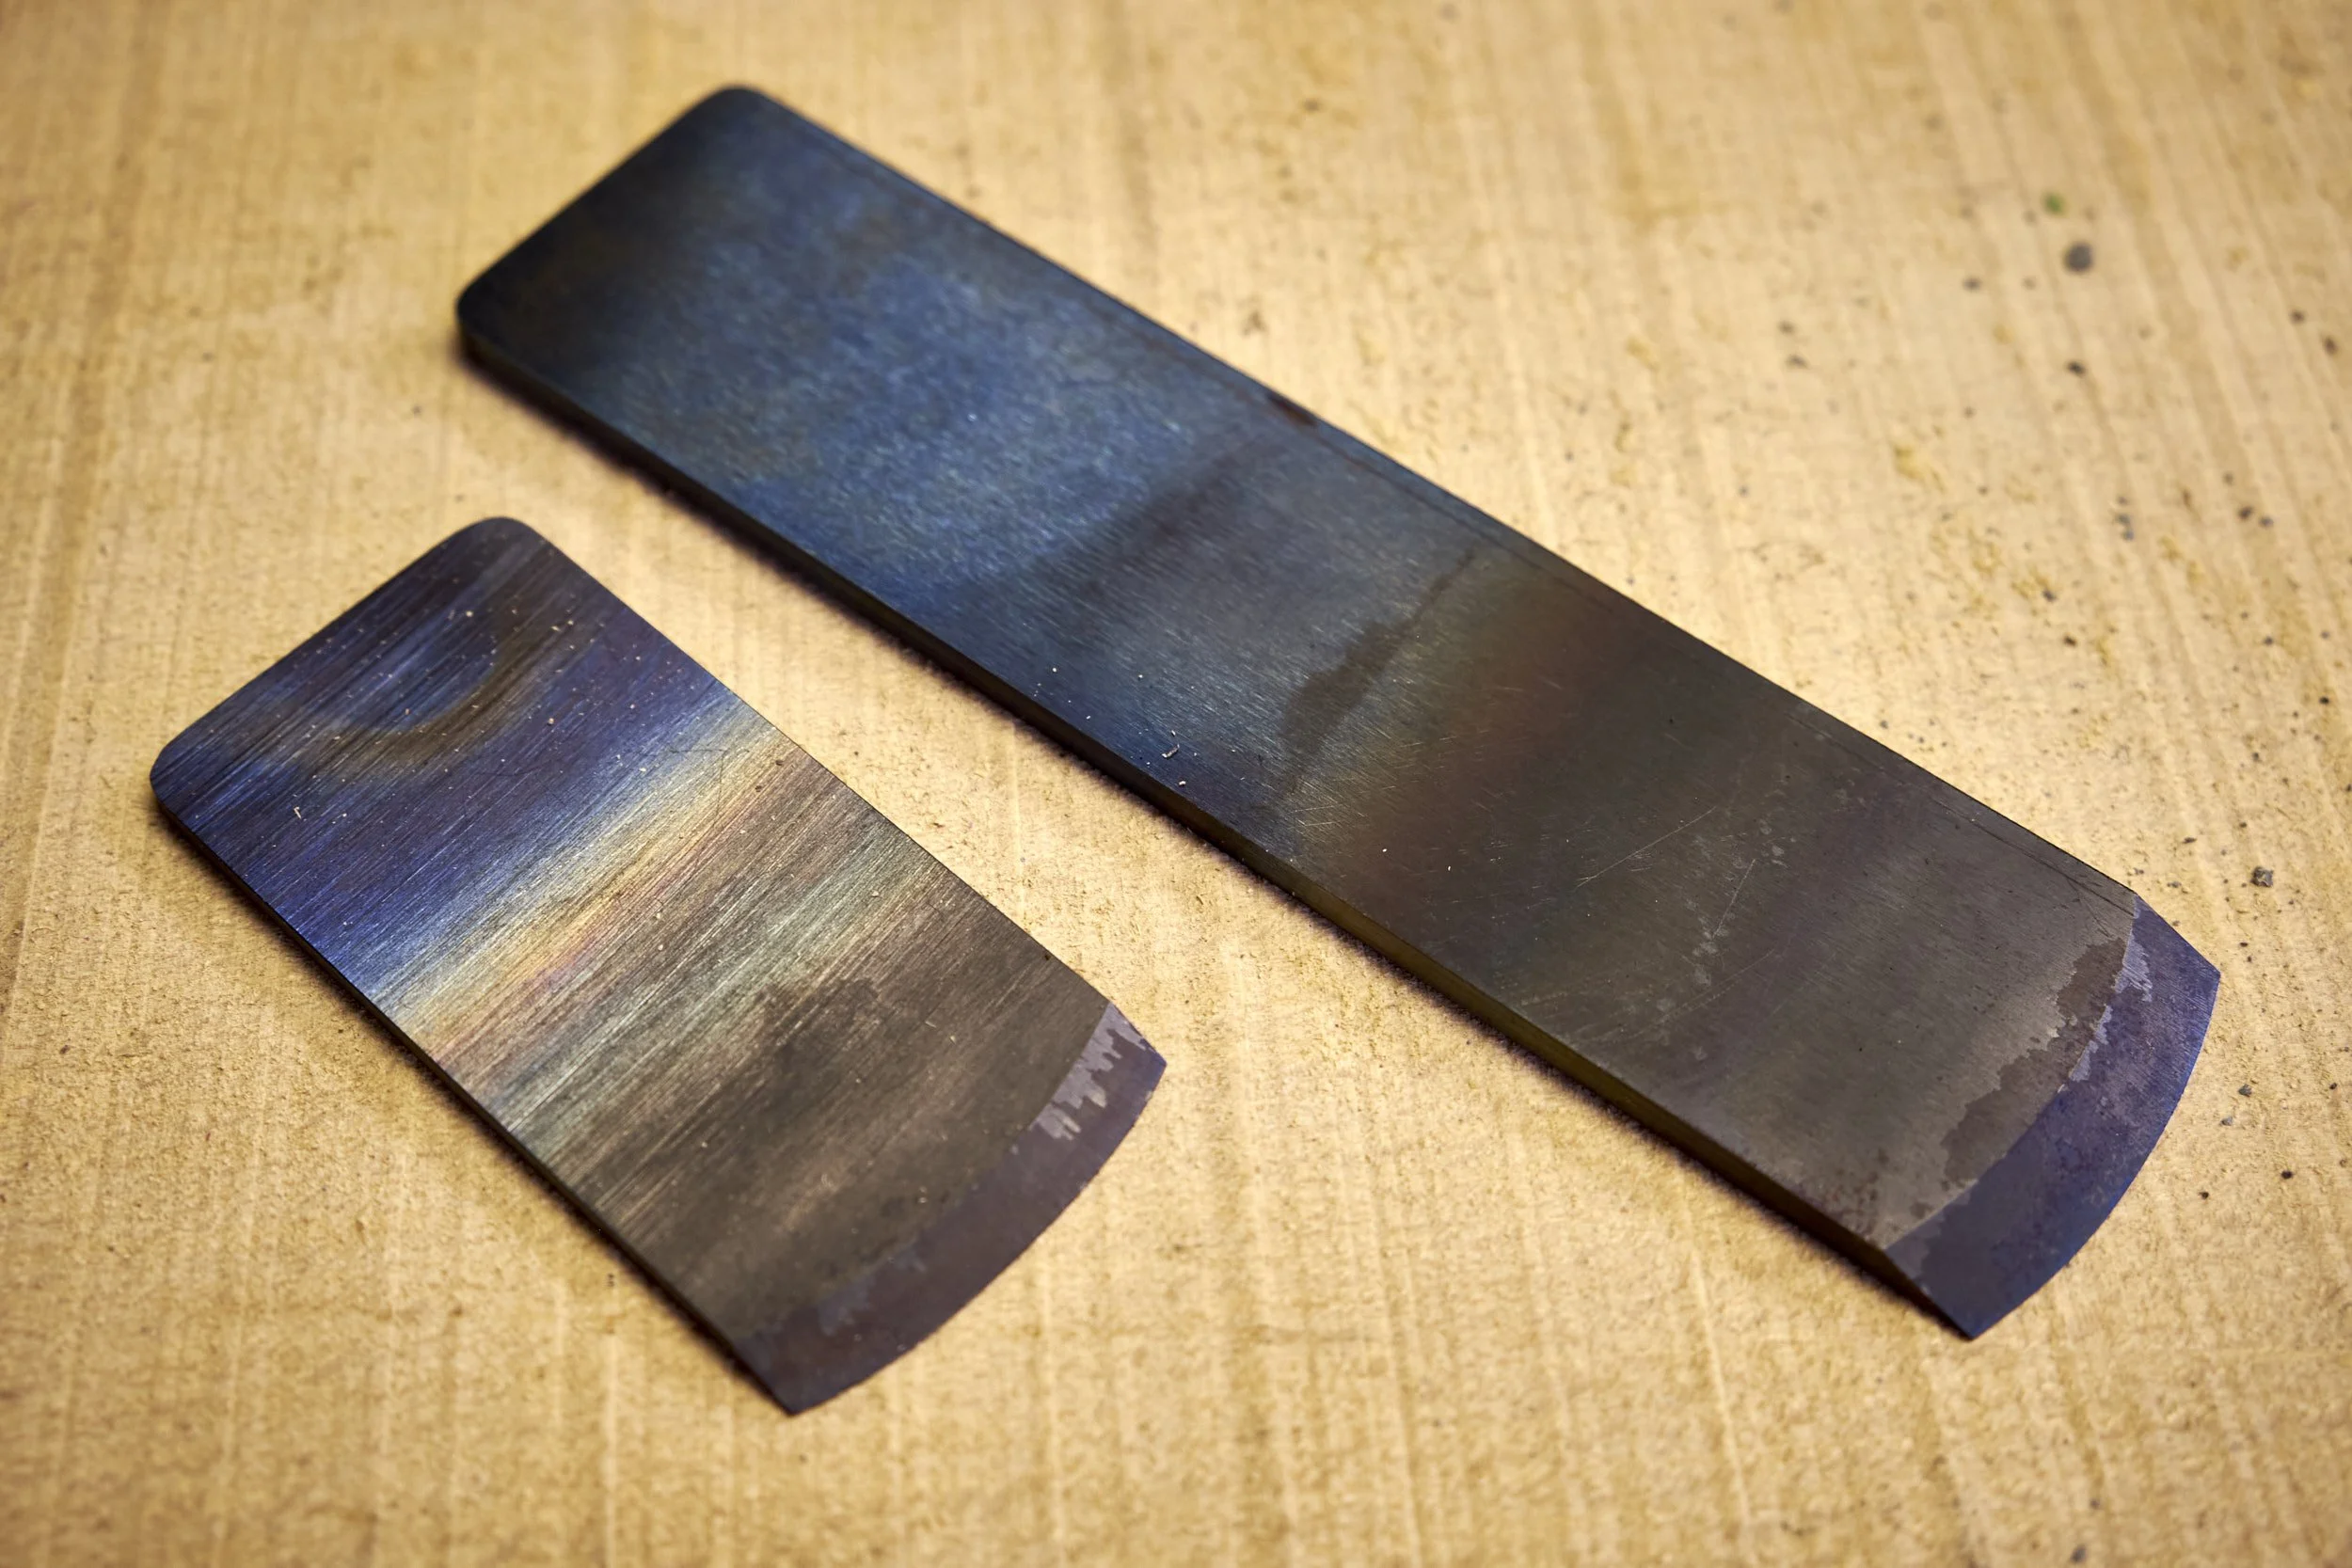
The part of the blade that was not blackened during hardening will either be straw coloured or blue when “cooked” all the way through. The colour depends on the temperature the oven was set at. The colour chart here shows it nicely.
Last step.
Step 4: Cleanup & Sharpen
Into the final stretch before starting on the hand plane proper.
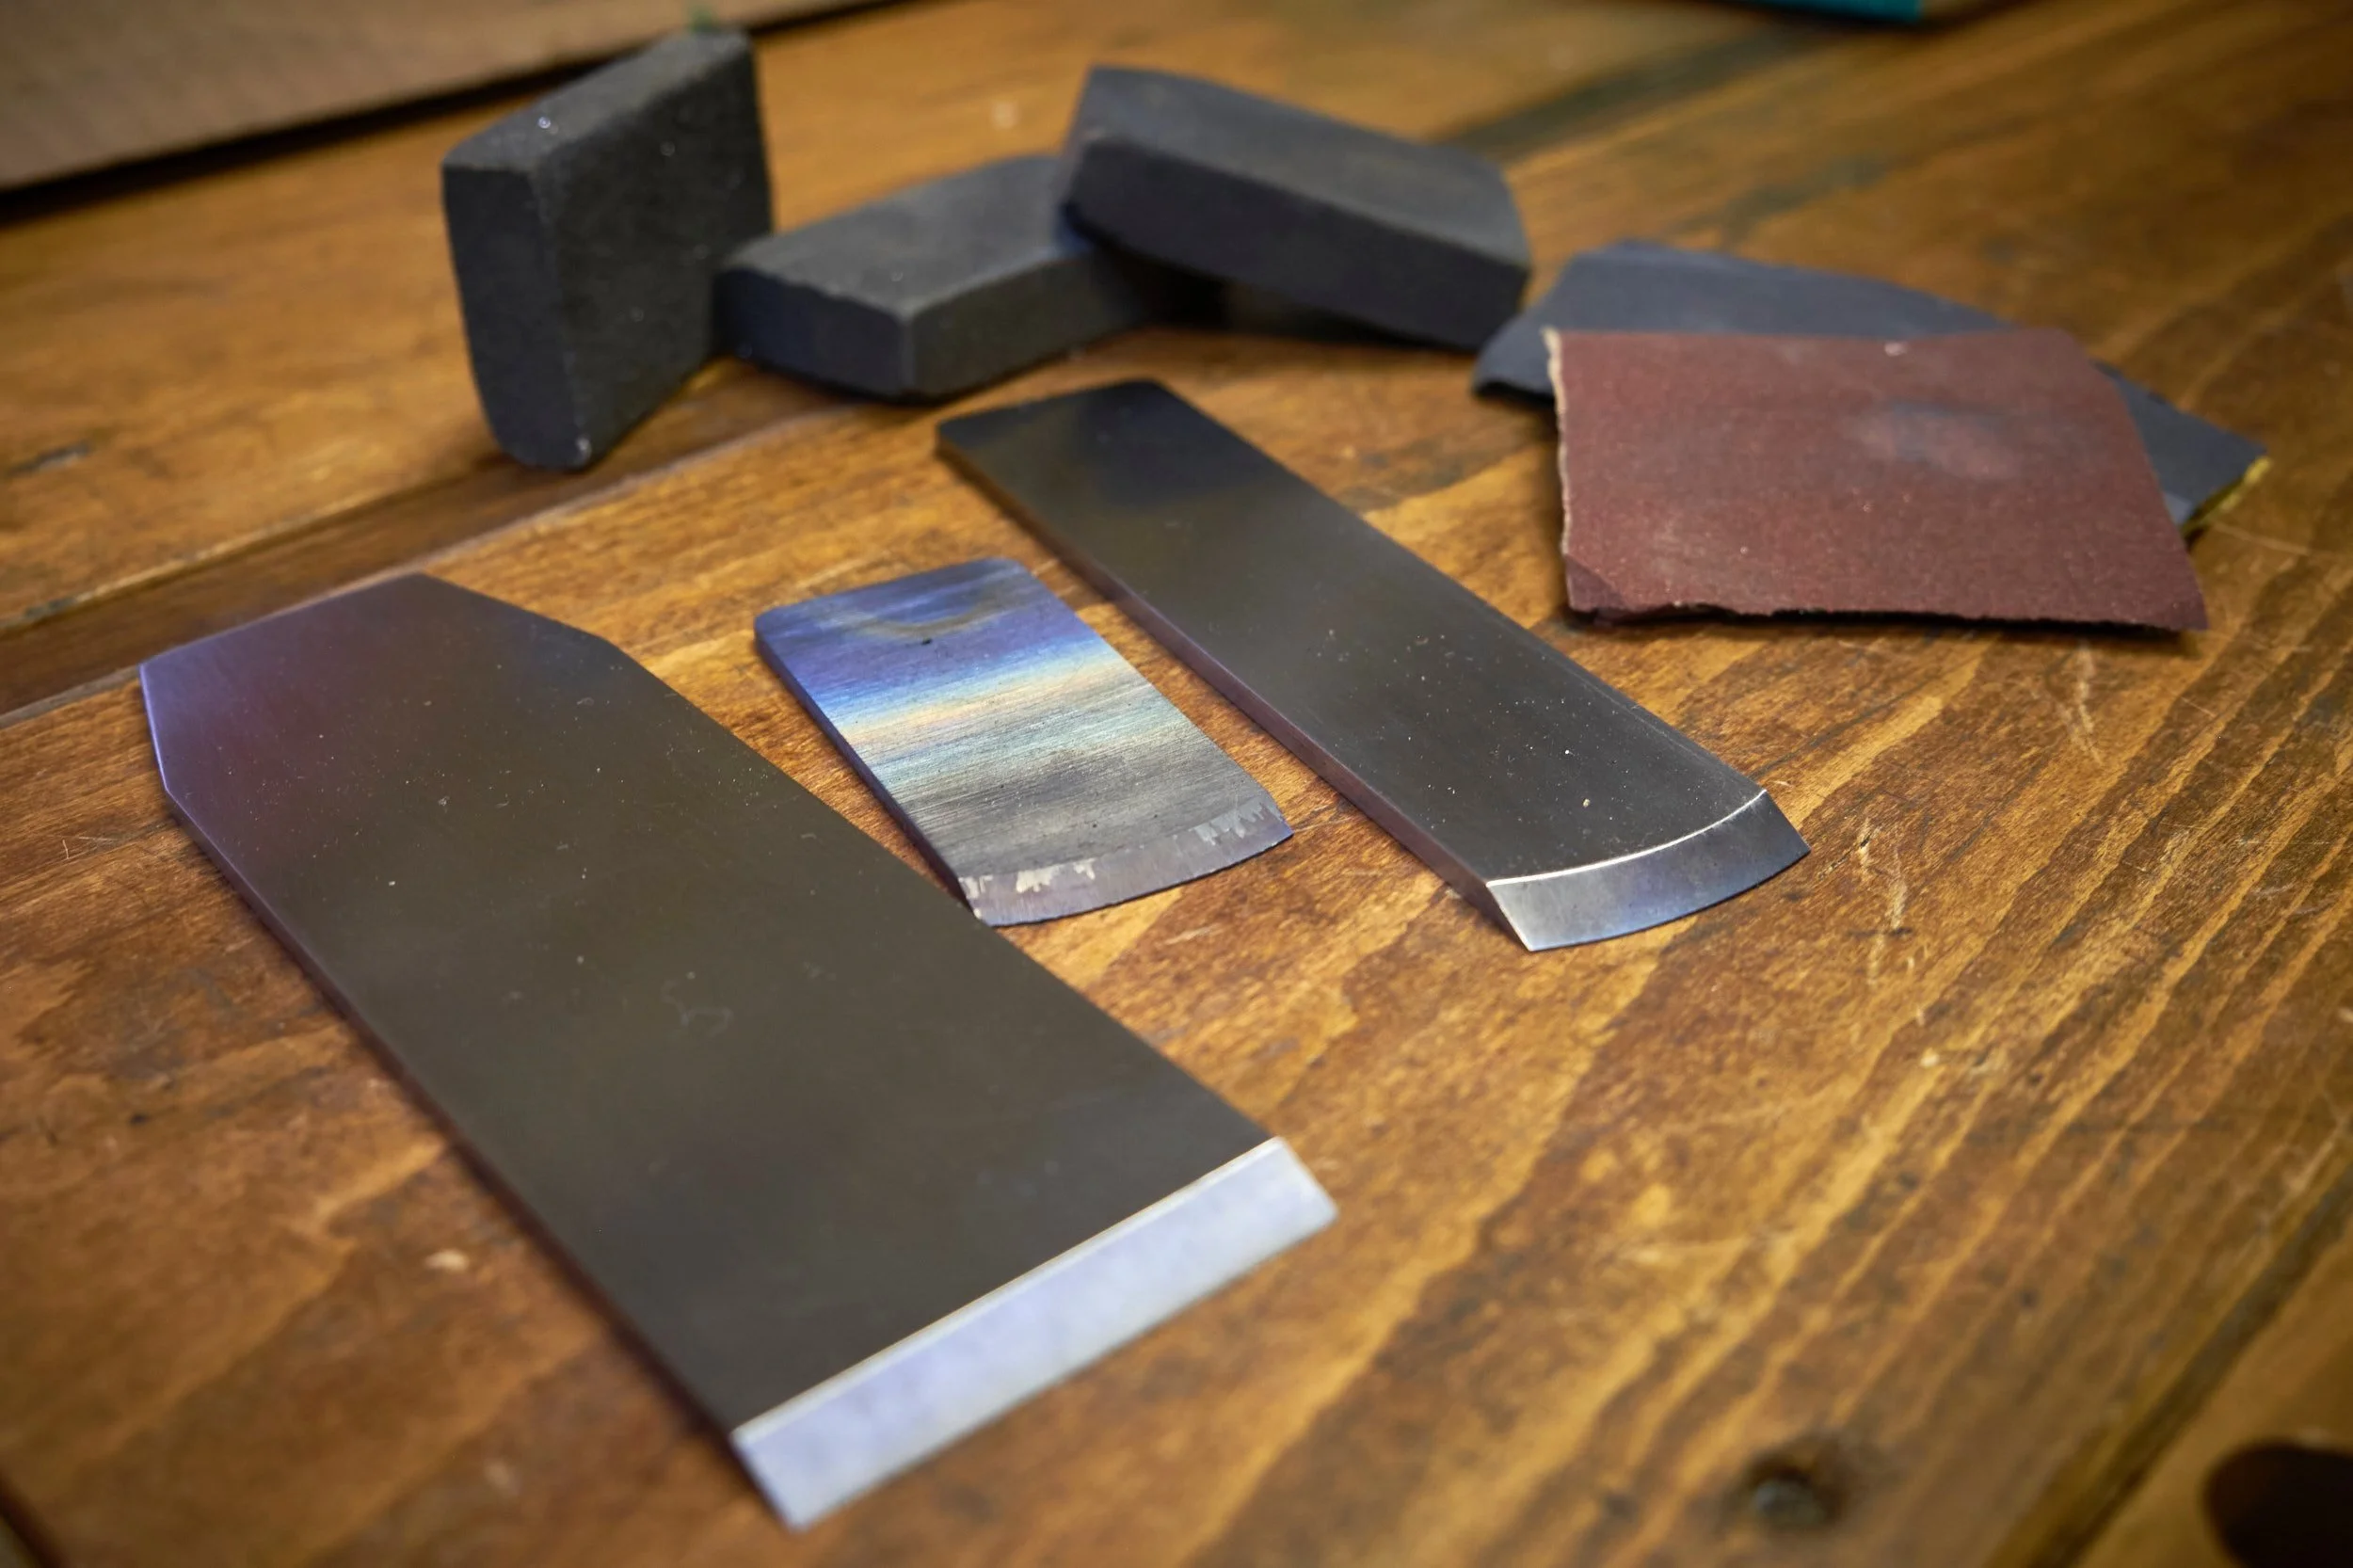
Apart from sharpening the cleanup part is not strictly necessary. You can choose to clean the blade to a mirror shine or leave it as is. Cleaning can be done with different grits of sand paper or other abrasives. If you are going to clean up the blade it’s important that it’s done before the final flattening and sharpening process.
I like the look of the coloured steel and have started to leave my blades showing the hardening and tempering colours. I spend a lot of time getting the edge as sharp as I can.
Steps:
Use sanding paper or other abrasives to clean up the blade to your taste.
Sign your name - optional.
Shape the final bevel to get rid of the “flat” at the cutting edge that was left for hardening.
Flatten the back of the blade.
Sharpen and hone the blade to final sharpness.


Tips:
If the blade has warped during the heating and cooling of the previous steps it may be hard to flatten the back of the blade on your choice of sharpening stones. You can flatten the back on a belt sander prior to moving on to the stones for final flattening and polish.
I use either my bench grinder or belt sander to shape the primary bevel to about 25º.
Have water close by, this time it’s to prevent burning the cutting edge and losing the temper you’ve worked so hard to achieve. If you overheat the cutting edge you will need to grind the edge back, past the damage and start on the primary bevel again.
Sharpen and hone the blade to final sharpness.
As a nice touch you can also use letter and number punches to “sign” the blade which is something I would like to do on my next batch of blades.
If you need any detailed help on sharpening and honing your blade head over to this post in the blog for a detailed how-to on sharpening.
And that’s it folks, you now have a bespoke blade in hand that will go into the bespoke wooden hand plane we will start making in a few weeks.
Making your own blades will open a whole new world of making your own woodworking tools and it’s not just limited to making hand planes, I think I’ll be trying my hand at making a new marking knife soon.
I’ll see you next when we start on the plane body. If you haven’t joined the PlyCreations community yet you can do so here. Not only will you know when the next article goes live but you will also get access to my FREE plan page where you can download a selection of build plans for small projects, free of charge.

A hands-on comparison of the three most popular hand-sharpening systems — diamond stones, Japanese water stones, and the “scary sharp” method. I’ll share the real pros, cons, and quirks of each, along with what I actually use in my own workshop.