
How to Sharpen, Hone, and Prepare Woodworking Blades for Razor-Sharp Results
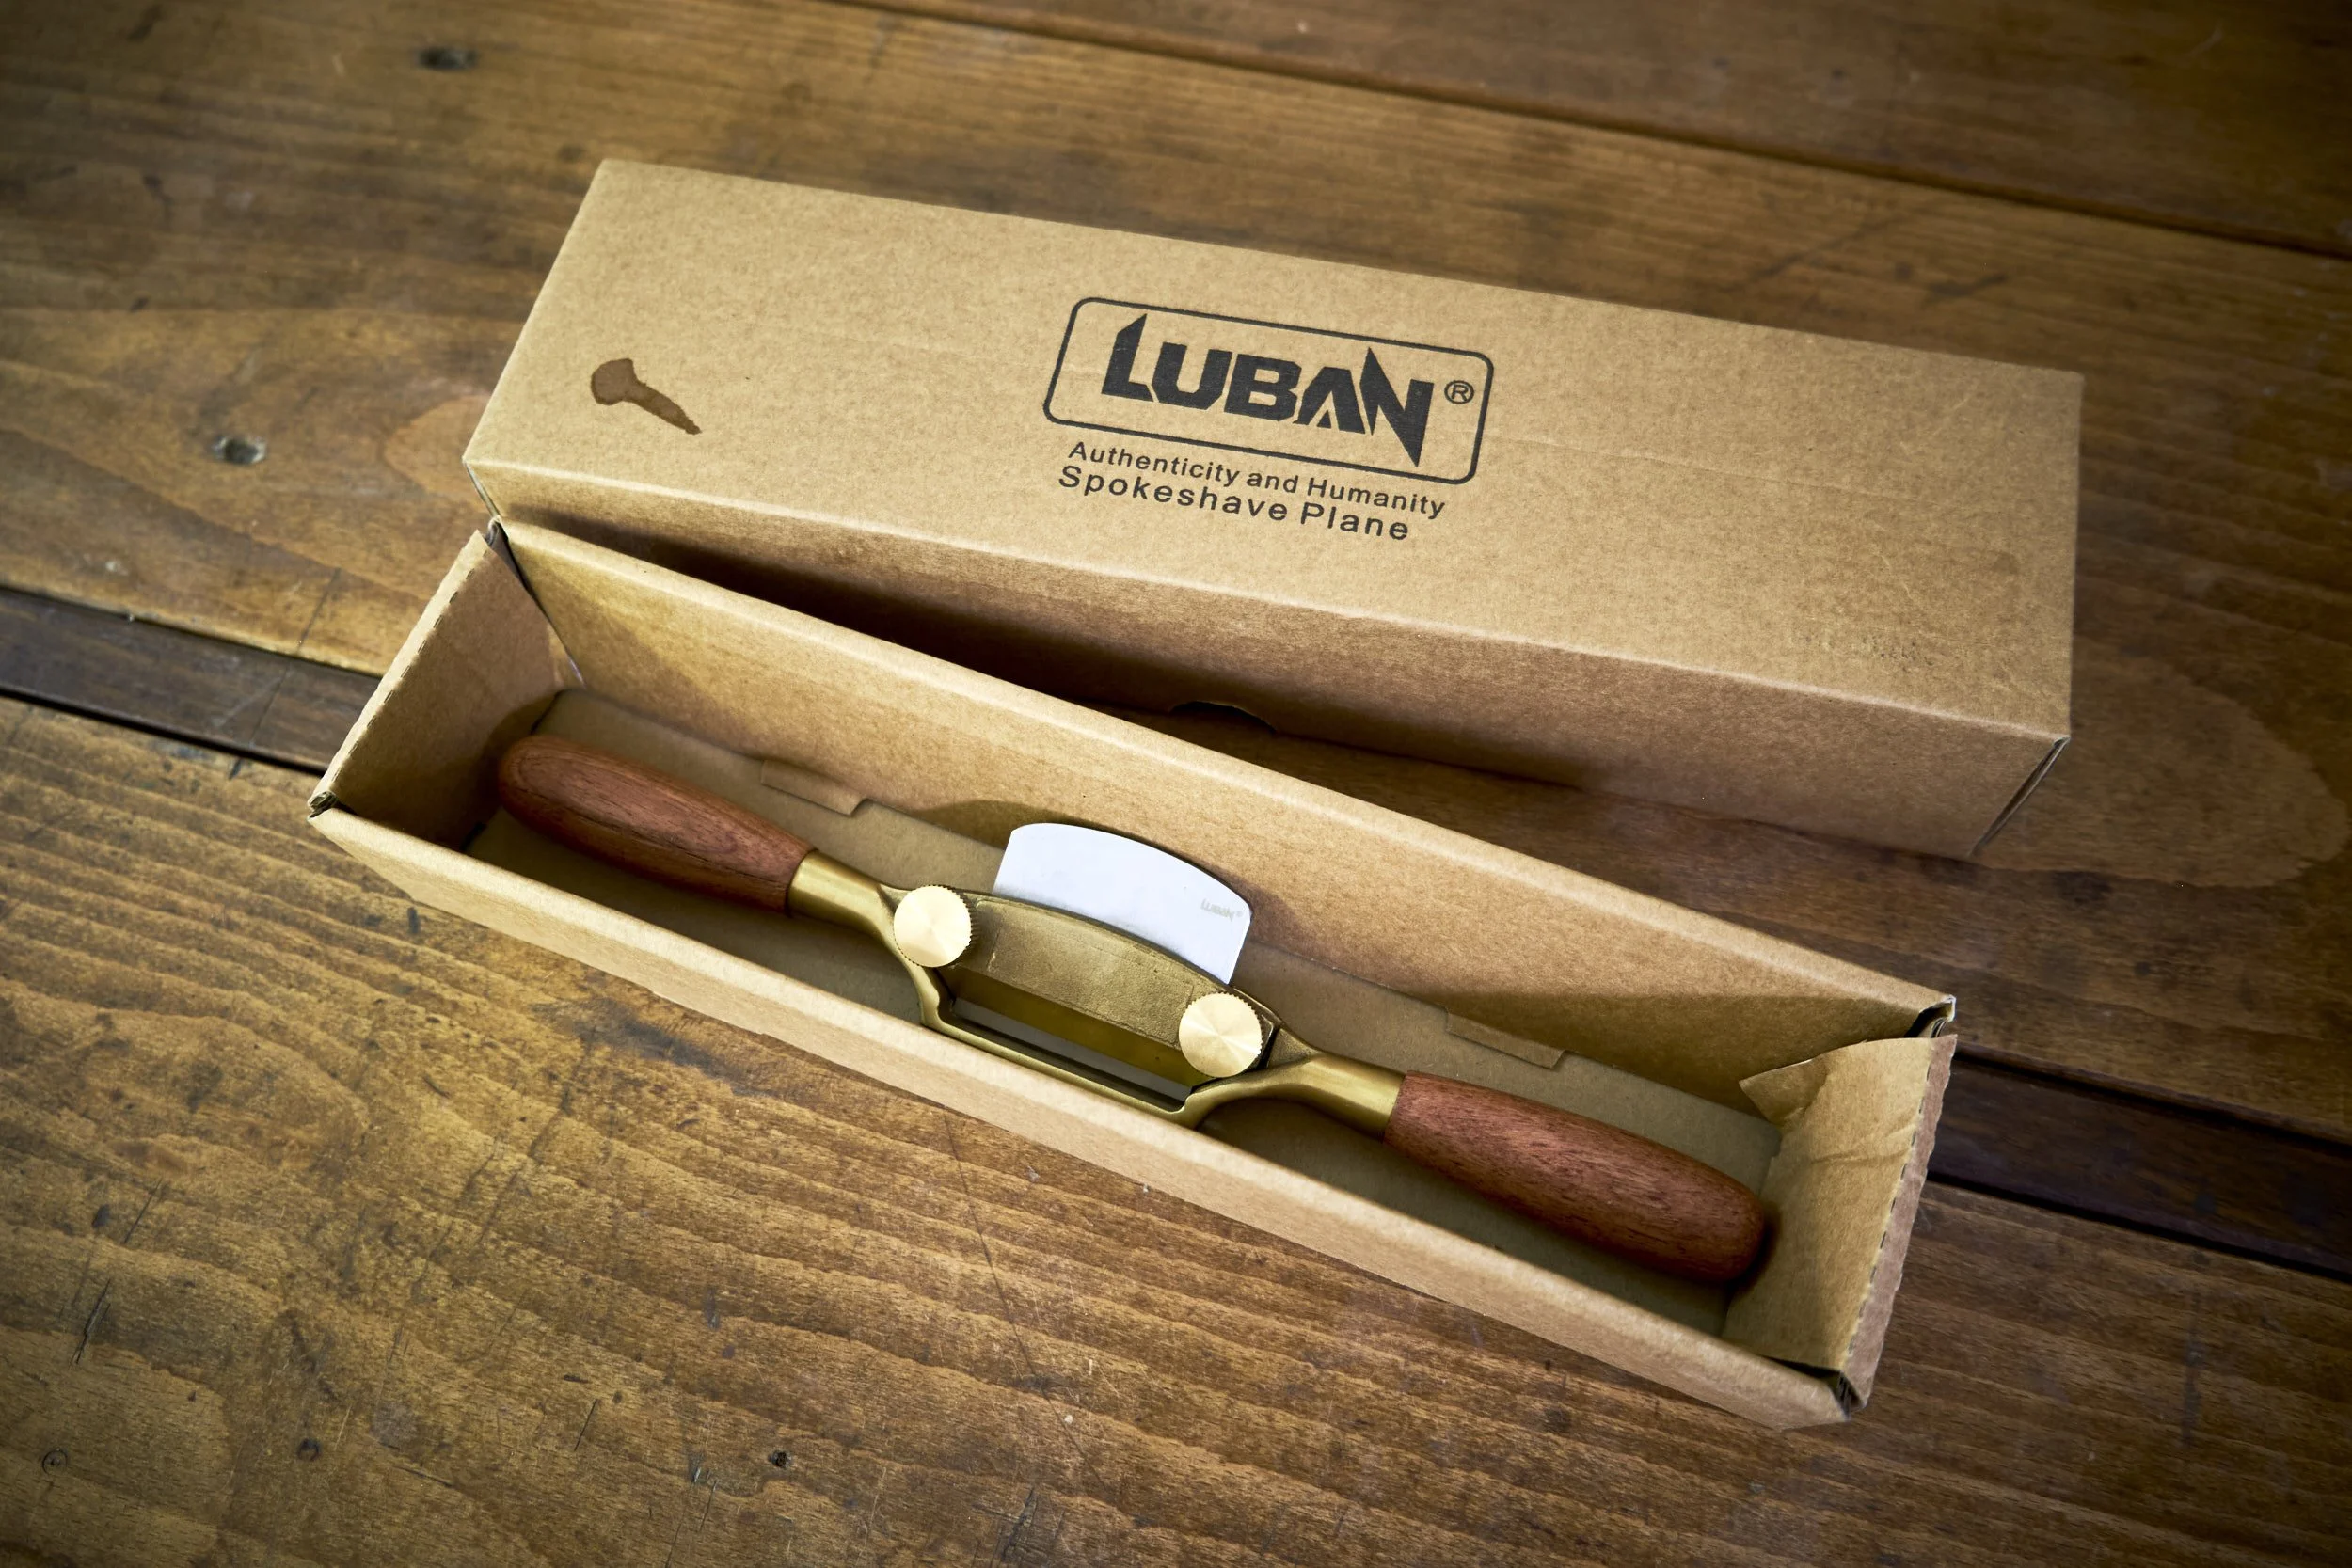
“New” blades need attention before they can be put to full use in the workshop and by “new” I mean any blade that has not gone through the step by step process detailed in this how-to, this also means blades being refurbished.
One might be forgiven to believe that blade set-up is the exclusive purview of old blades in the process of being restored, or examples from shall we say lesser quality manufacturers, but alas even those rather expensive blades of “premium” repute can often do with some prep time before they are put into full use in our workshops. Granted, examples of the “premium” kind may take less work to get them there but they require some set-up time nonetheless.
Before we get into the first step I need to stress that this how-to relates to western style blades rather than Japanese style iron. Although some similarities do exist.
Why blade prep?
I have yet to get a blade from a cutting tool, in this case hand planes, spoke shaves or speciality planes in my workshop that I would consider truly sharp. I am talking hair shaving, paper slicing sharp and although I’m not a fan of the scary sharp system I like my cutting irons to be at least, somewhat frightening.
So to get there any new blade needs some work and this how-to will attempt to detail the steps to get there with some why’s thrown in for good measure.
Some info you may find useful before we get going.
I use diamond plates to sharpen almost all blades in my workshop. Routinely I start on a course EZE-Lap stone before moving on to a medium grit stone from the same manufacturer. Next grit up is the extra fine stone by DMT with final honing done on a strop, loaded up with a polishing compound of unknown grit. I can tell you that the compound is white and leaves the iron being honed with a nice mirror shine. Depending on the state of the blade I may use a bench grinder (normal speed) with a 180 grit CBN wheel to reset the primary bevel and an Extra-Extra-Course DMT stone if heavy duty work is required to flatten the back.
Yes, I have a mixed set of stones as we do not always have equipment readily available in our neck of the woods, so we make do with what is available. This has also allowed me to assess the performance of stones from both manufacturers. I like DMT stones more than EZE-Lap and if I was to suggest a brand I would lean towards the former.
Apart from one or two specific cases I sharpen all blades free hand.
This is not a tool review though so let’s get to what you came here for and that’s learning about getting a new blade set-up and sharp.
Step 1 - Prepping
This step focusses primarily on three areas in order of operation if not in order of importance. If that were the case #3 would be at the top and #2 at the bottom.
Primary bevel
Squareness
Back of the blade
Primary bevel angle
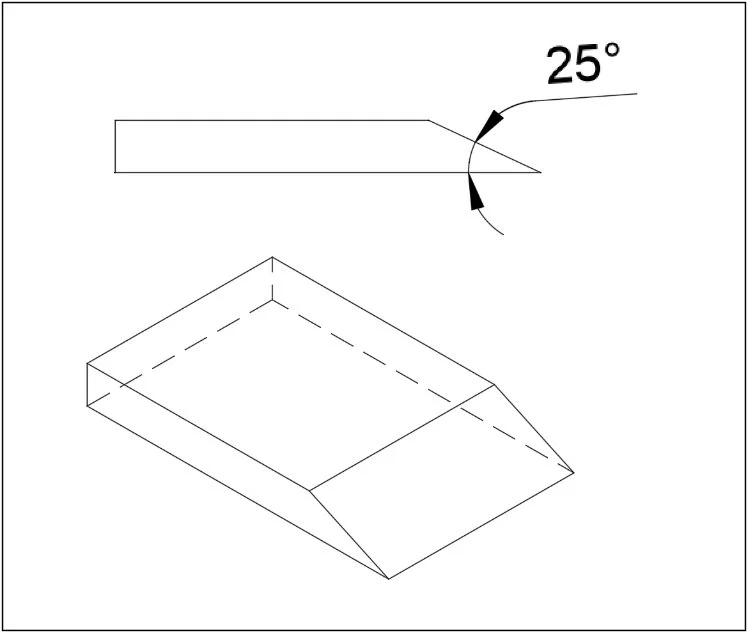
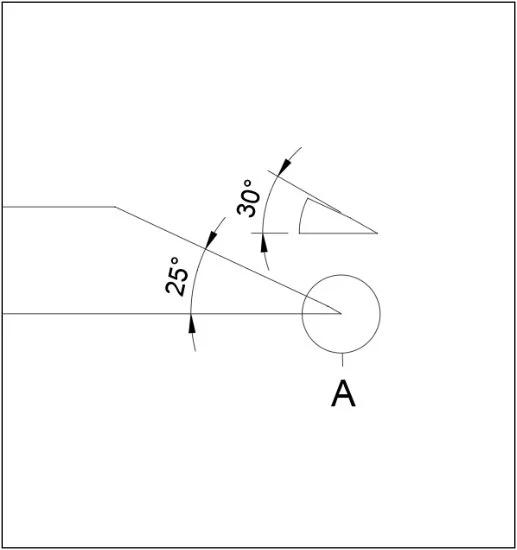
All blades in my workshop have primary bevels sharpened to a 25º angle. The diagram shows what this looks like viewed edge on.
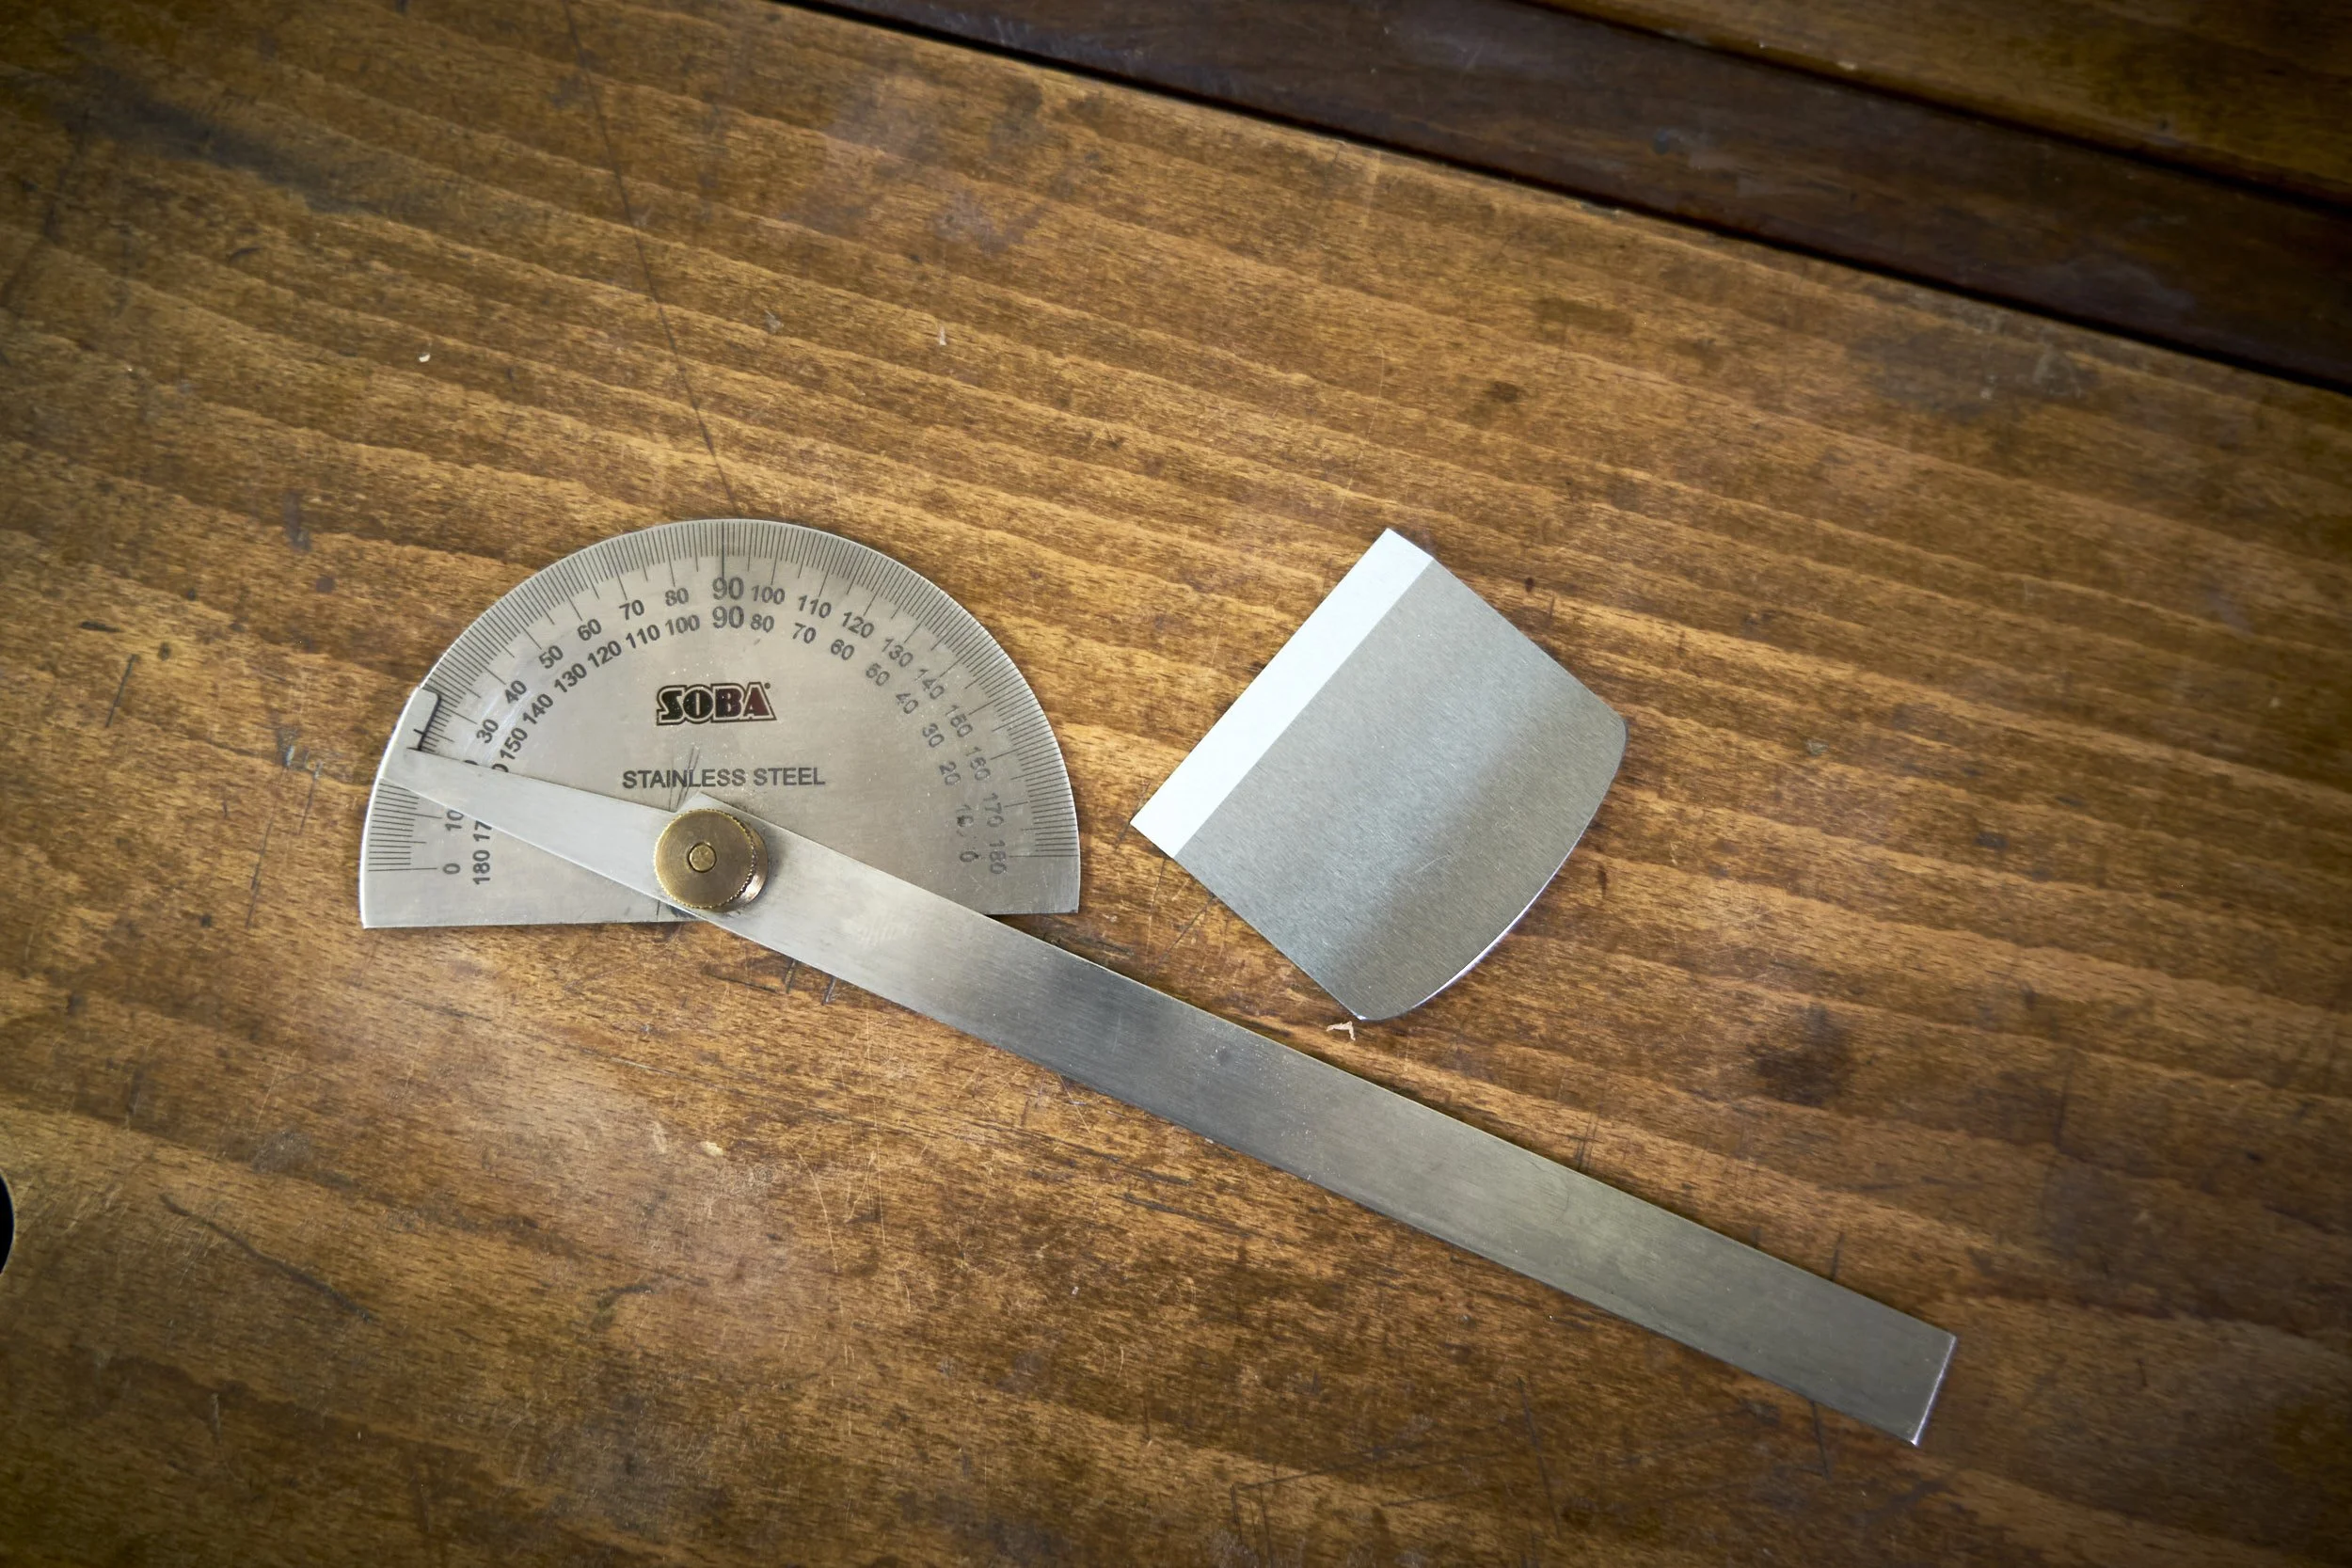
The first step in this process is to assess the blade to check the state of the primary bevel and for this I use one of the most used tools in my shop, the protractor. If you do not have one of the these I can only suggest that you get one in the strongest possible terms. I use mine for everything, from checking and making bevels on blades and turning tools to marking out angled joinery and setting sliding bevels, this is one of those TRULY versatile tools. Get one!
If you are refurbishing an old blade you may need to regrind the bevel to 25º, so while doing this you can also focus on getting what will become the cutting edge, square across the face of the blade. That will take care of #1 and 2.
The blade in this example is from my new Luban round bottom spoke shave and knowing the quality of their tools it was really for the sake of this article that I broke out the protractor to check the bevel angle and if you have to know, the angle came in at 24º. This brings me to two points to take note of.
The primary bevel angle can be ball park, it does not need to be exact and a difference of a degree or two either direction of 25º WILL NOT affect the quality of the cut or usefulness of the tool the blade is put into.
I never checked the squareness of the edge across the blade and to be honest I very rarely do these days. There is a lot of lateral adjustment room in most hand planes and it isn’t hard to set the cutting edge of the blade parallel to the sole of whatever tool it happens to find itself in. If you eyeball the cutting edge and it is not obviously out of square you are good to go.
Stating point two above is especially ironic considering the amount of time and effort I used to invest in getting cutting edges square on plane blades, however saying that, in the case of chisels it is important that the cutting edge is nominally square across the tool.
Bevel at 24º degrees and square across, I think, it was time to flatten the back.
This is the one place where quality during manufacture and thus the price tag becomes a factor. The other is edge retention but the latter is outside the ambit of this article so back to the former. The time it takes to flatten the back of a blade is often a direct correlation to the quality of the blade, not always, but often.
Flattening the back of a blade is likely the most important step in this whole process and will affect how sharp you are able to get the cutting edge during the latter stages of the process.
Let me explain.
It needs to be flat
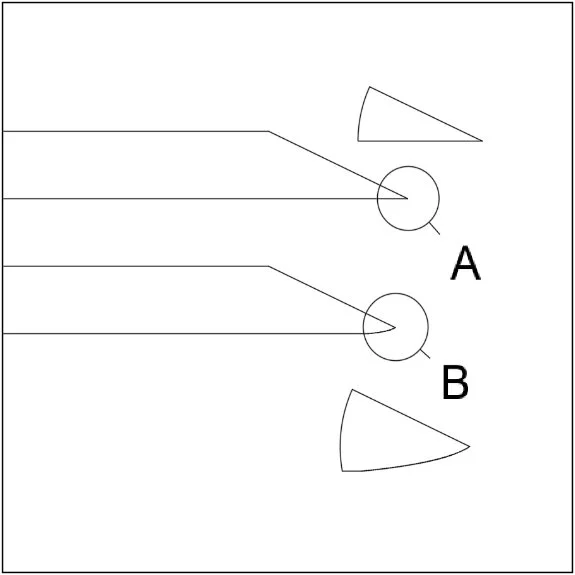
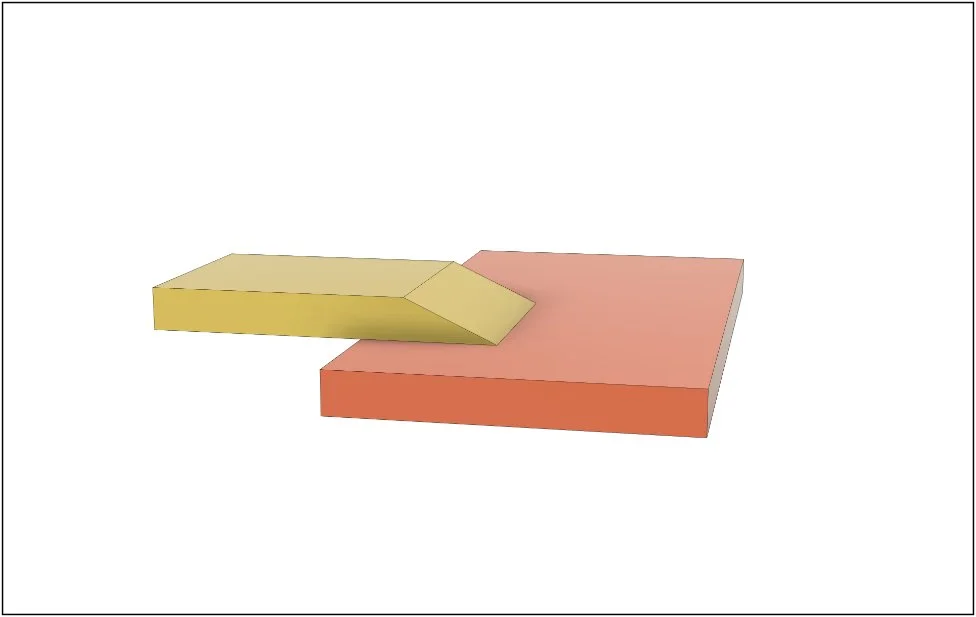
A - The back is flat up to the edge leaving a clean cutting edge.
B - Not flat all the way, this edge will be a challenge to get sharp.
The diagram shown here shows that the more acute (A) one is able to get the top and bottom surfaces of and edge to meet the “sharper” the cutting edge. You can spend all the time you like on the surface of the primary bevel but as long as it does not meet the back of the blade at an acute angle (B) you will always have a less than keen cutting edge, so it’s this step in the process that will ultimately determine how sharp you are able to get the blade and it’s worth the effort to get it right.
Here’s how I go about it.
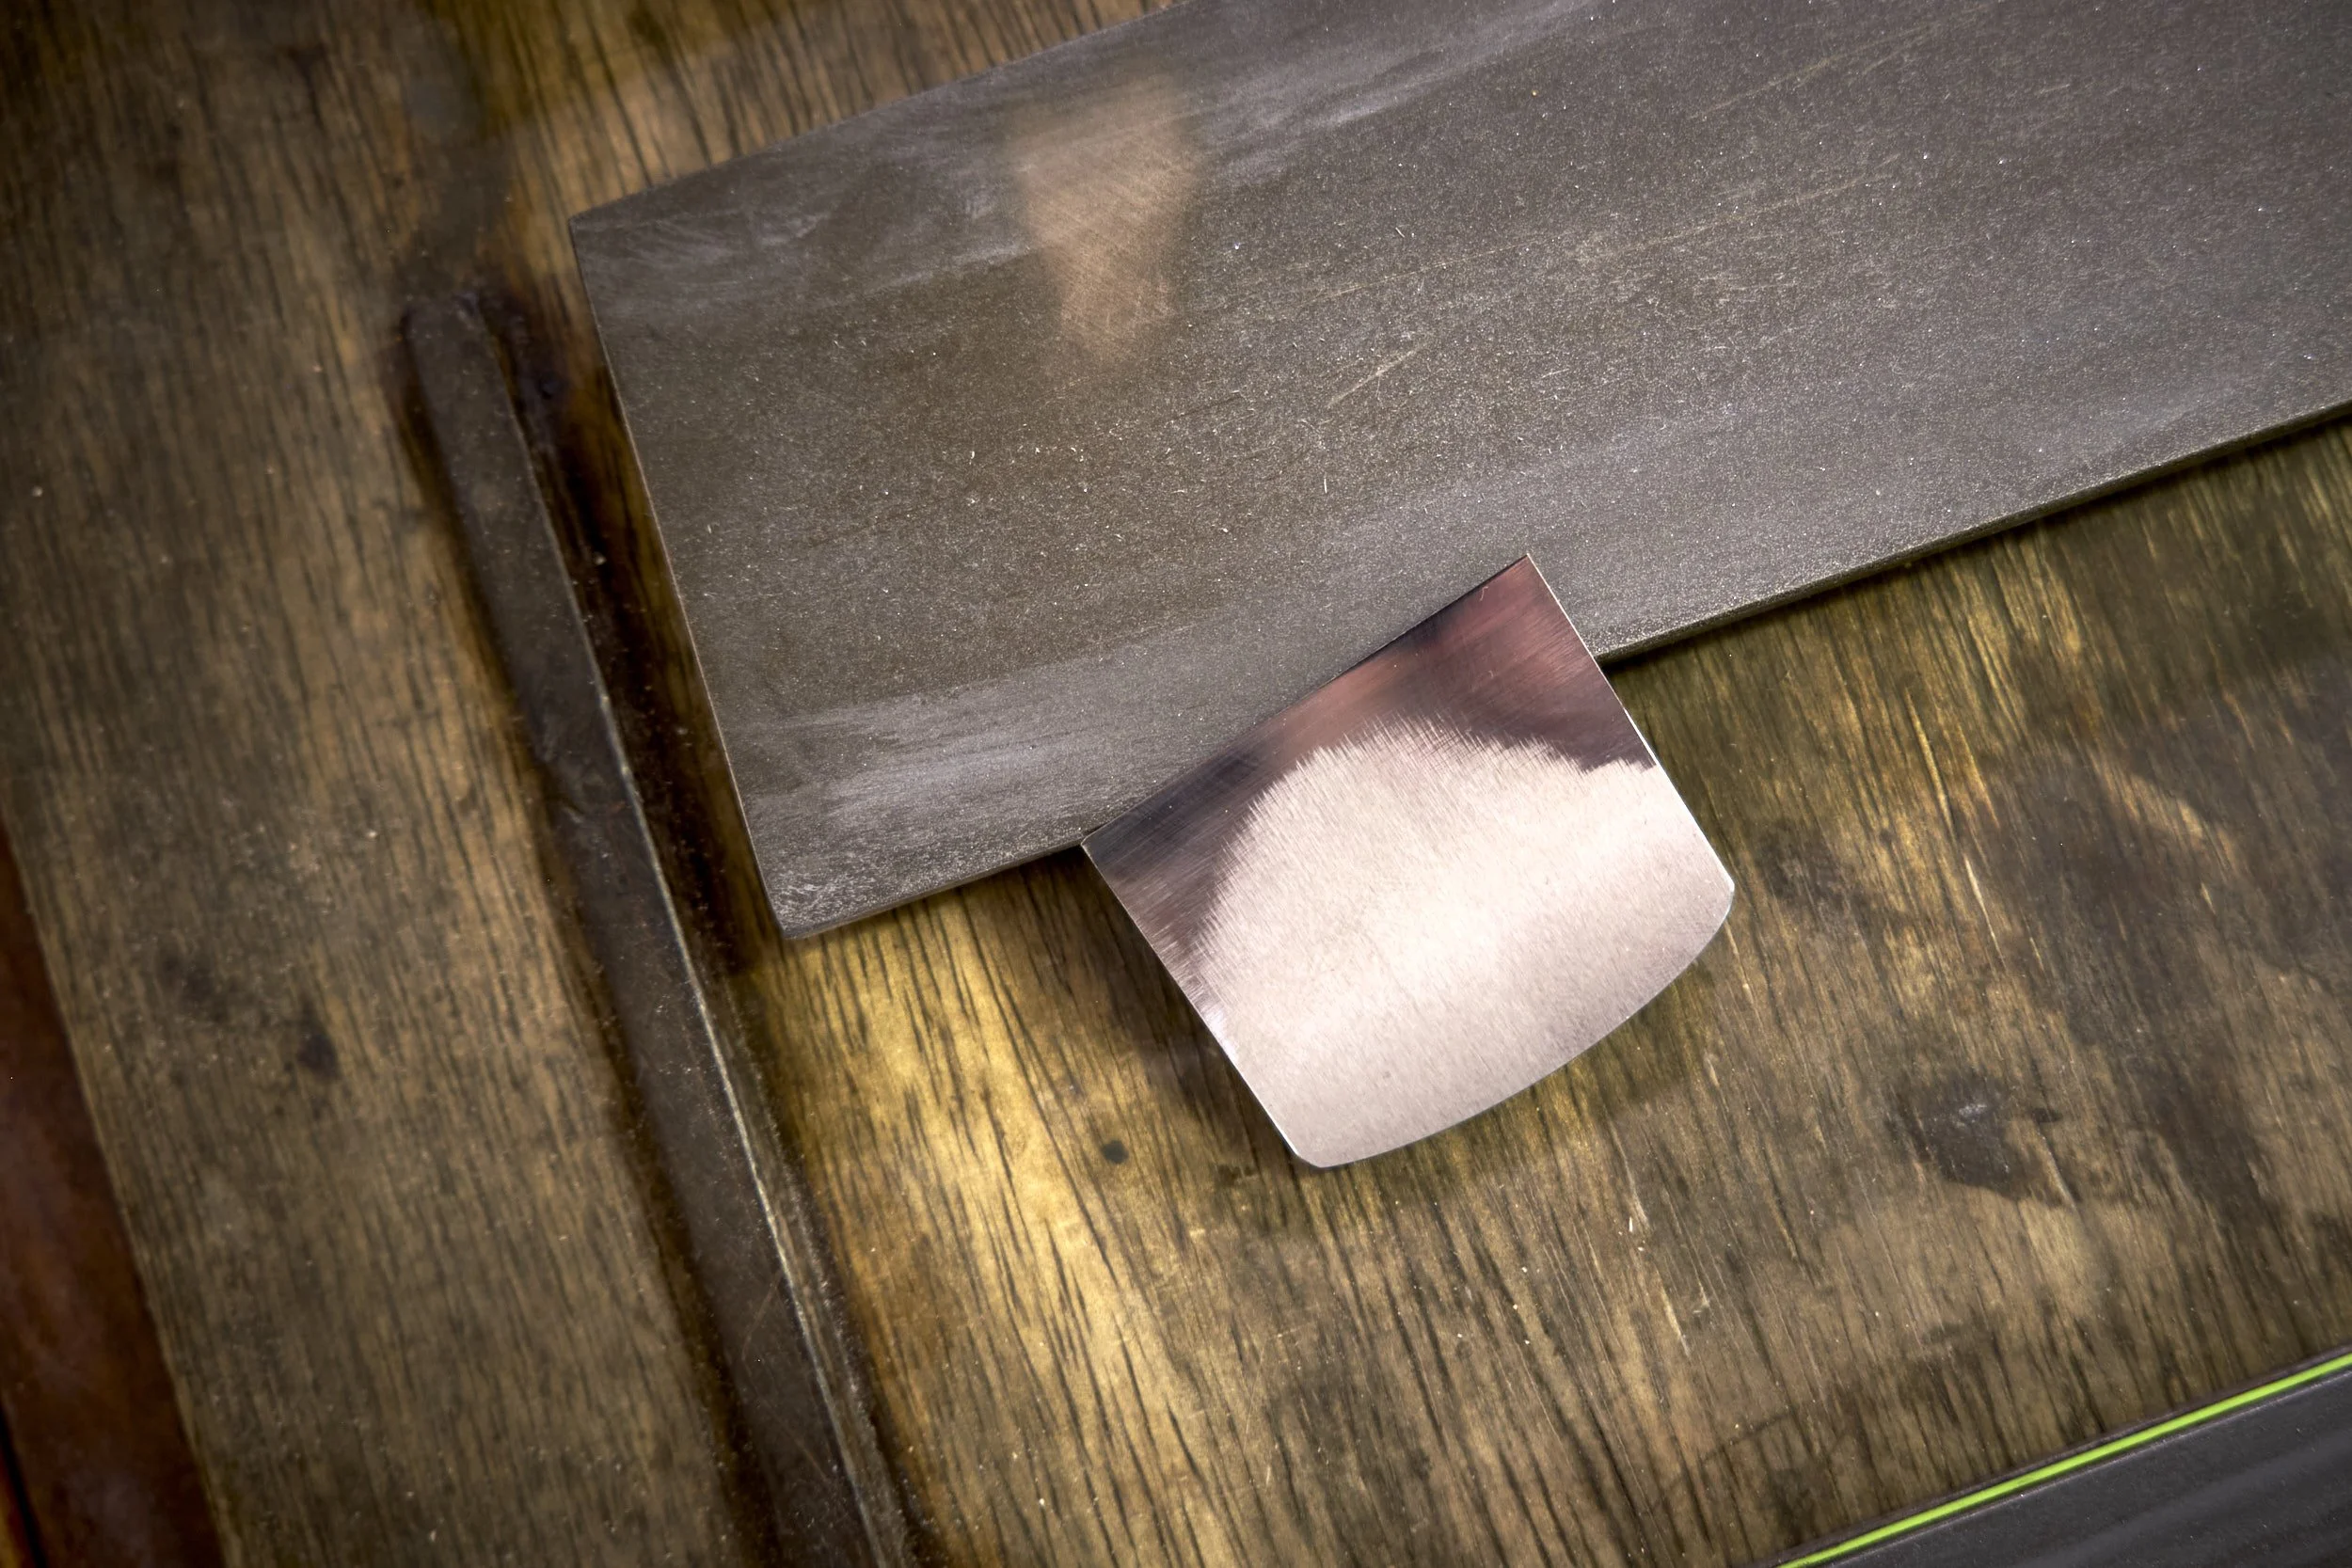
Lay the back of the blade on the coarsest abrasive surface of your preferred sharpening method in such a way that only a small portion of the blade is on the abrasive with the remainder of the blade hanging in the air. This ensures that only the very front area of the blade gets flattened.
Move the blade back and forth a few times and check the scratch pattern on the back of the blade. I do this step on the coarse stone to assess how much work would be required to get the back flat.
The scratch pattern will look different from the machine marks on a new blade or previous sharpening if you are working on an older blade.
If the scratch pattern is far from the front edge or uneven across the blade I will move over to the Extra-Extra-Course stone and prepare myself mentally for the long haul. If the pattern reaches the cutting edge you may be in for a short stint.
Keep going with this process on the coarsest abrasive until the scratch pattern reaches up to the cutting edge across the full width of the blade.
Wipe a finger perpendicularly to the cutting edge over the primary bevel and as soon as you feel a burr across the full width of the blade you can move on to the next grit of stone, sanding paper or whatever method you use to sharpen.
After each grit check that the previous scratch pattern has been completely removed all the way up to the cutting edge before moving on to the next grit.
Continue with this process through the grits up to the highest, in my case the strop, making sure the surface looks even up to the edge and all the way across.
Points to note.
You don’t need to flatten the whole back of the tool! It only needs to be flat around 2-3mm back from the cutting edge.
The flattening process only needs to be done once and then again after repeated blade sharpening moves the cutting edge backwards past the flattened area.
Use grits up to the highest grit that will be used to hone the cutting edge, this ensures that the bevel and the back meet one another as keenly as possible. Leaving a scratch pattern on the back of the blade from a coarser grit will cause the cutting edge to be serrated once sharpened and this may leave scratches on the planed surface. This is especially important when sharpening the blades that will be used in smoothing planes.
The reason for shaping the primary bevel before flattening the back is that the process of shaping the bevel will move the edge of the blade back and one of the most disheartening things to watch is the area you just spent an hour to flatten, disappear while working at the grinder to form the bevel!
Boy that was a mouth full but as mentioned if done right it will ensure the sharpest possible cutting edge later and only needs to be done once. It’s worth the effort to take your time on this step.
By the way, one way to shave some time off the process of flattening the back of the blade is by using the ruler trick. However this is not something I do personally and I cannot think of a reason why…….
Step 2 - Sharpen
Finally we can get into the job of getting the edge of the blade sharp and we do this by forming a secondary bevel to the existing 25 degree’ish primary bevel.
Secondary bevel
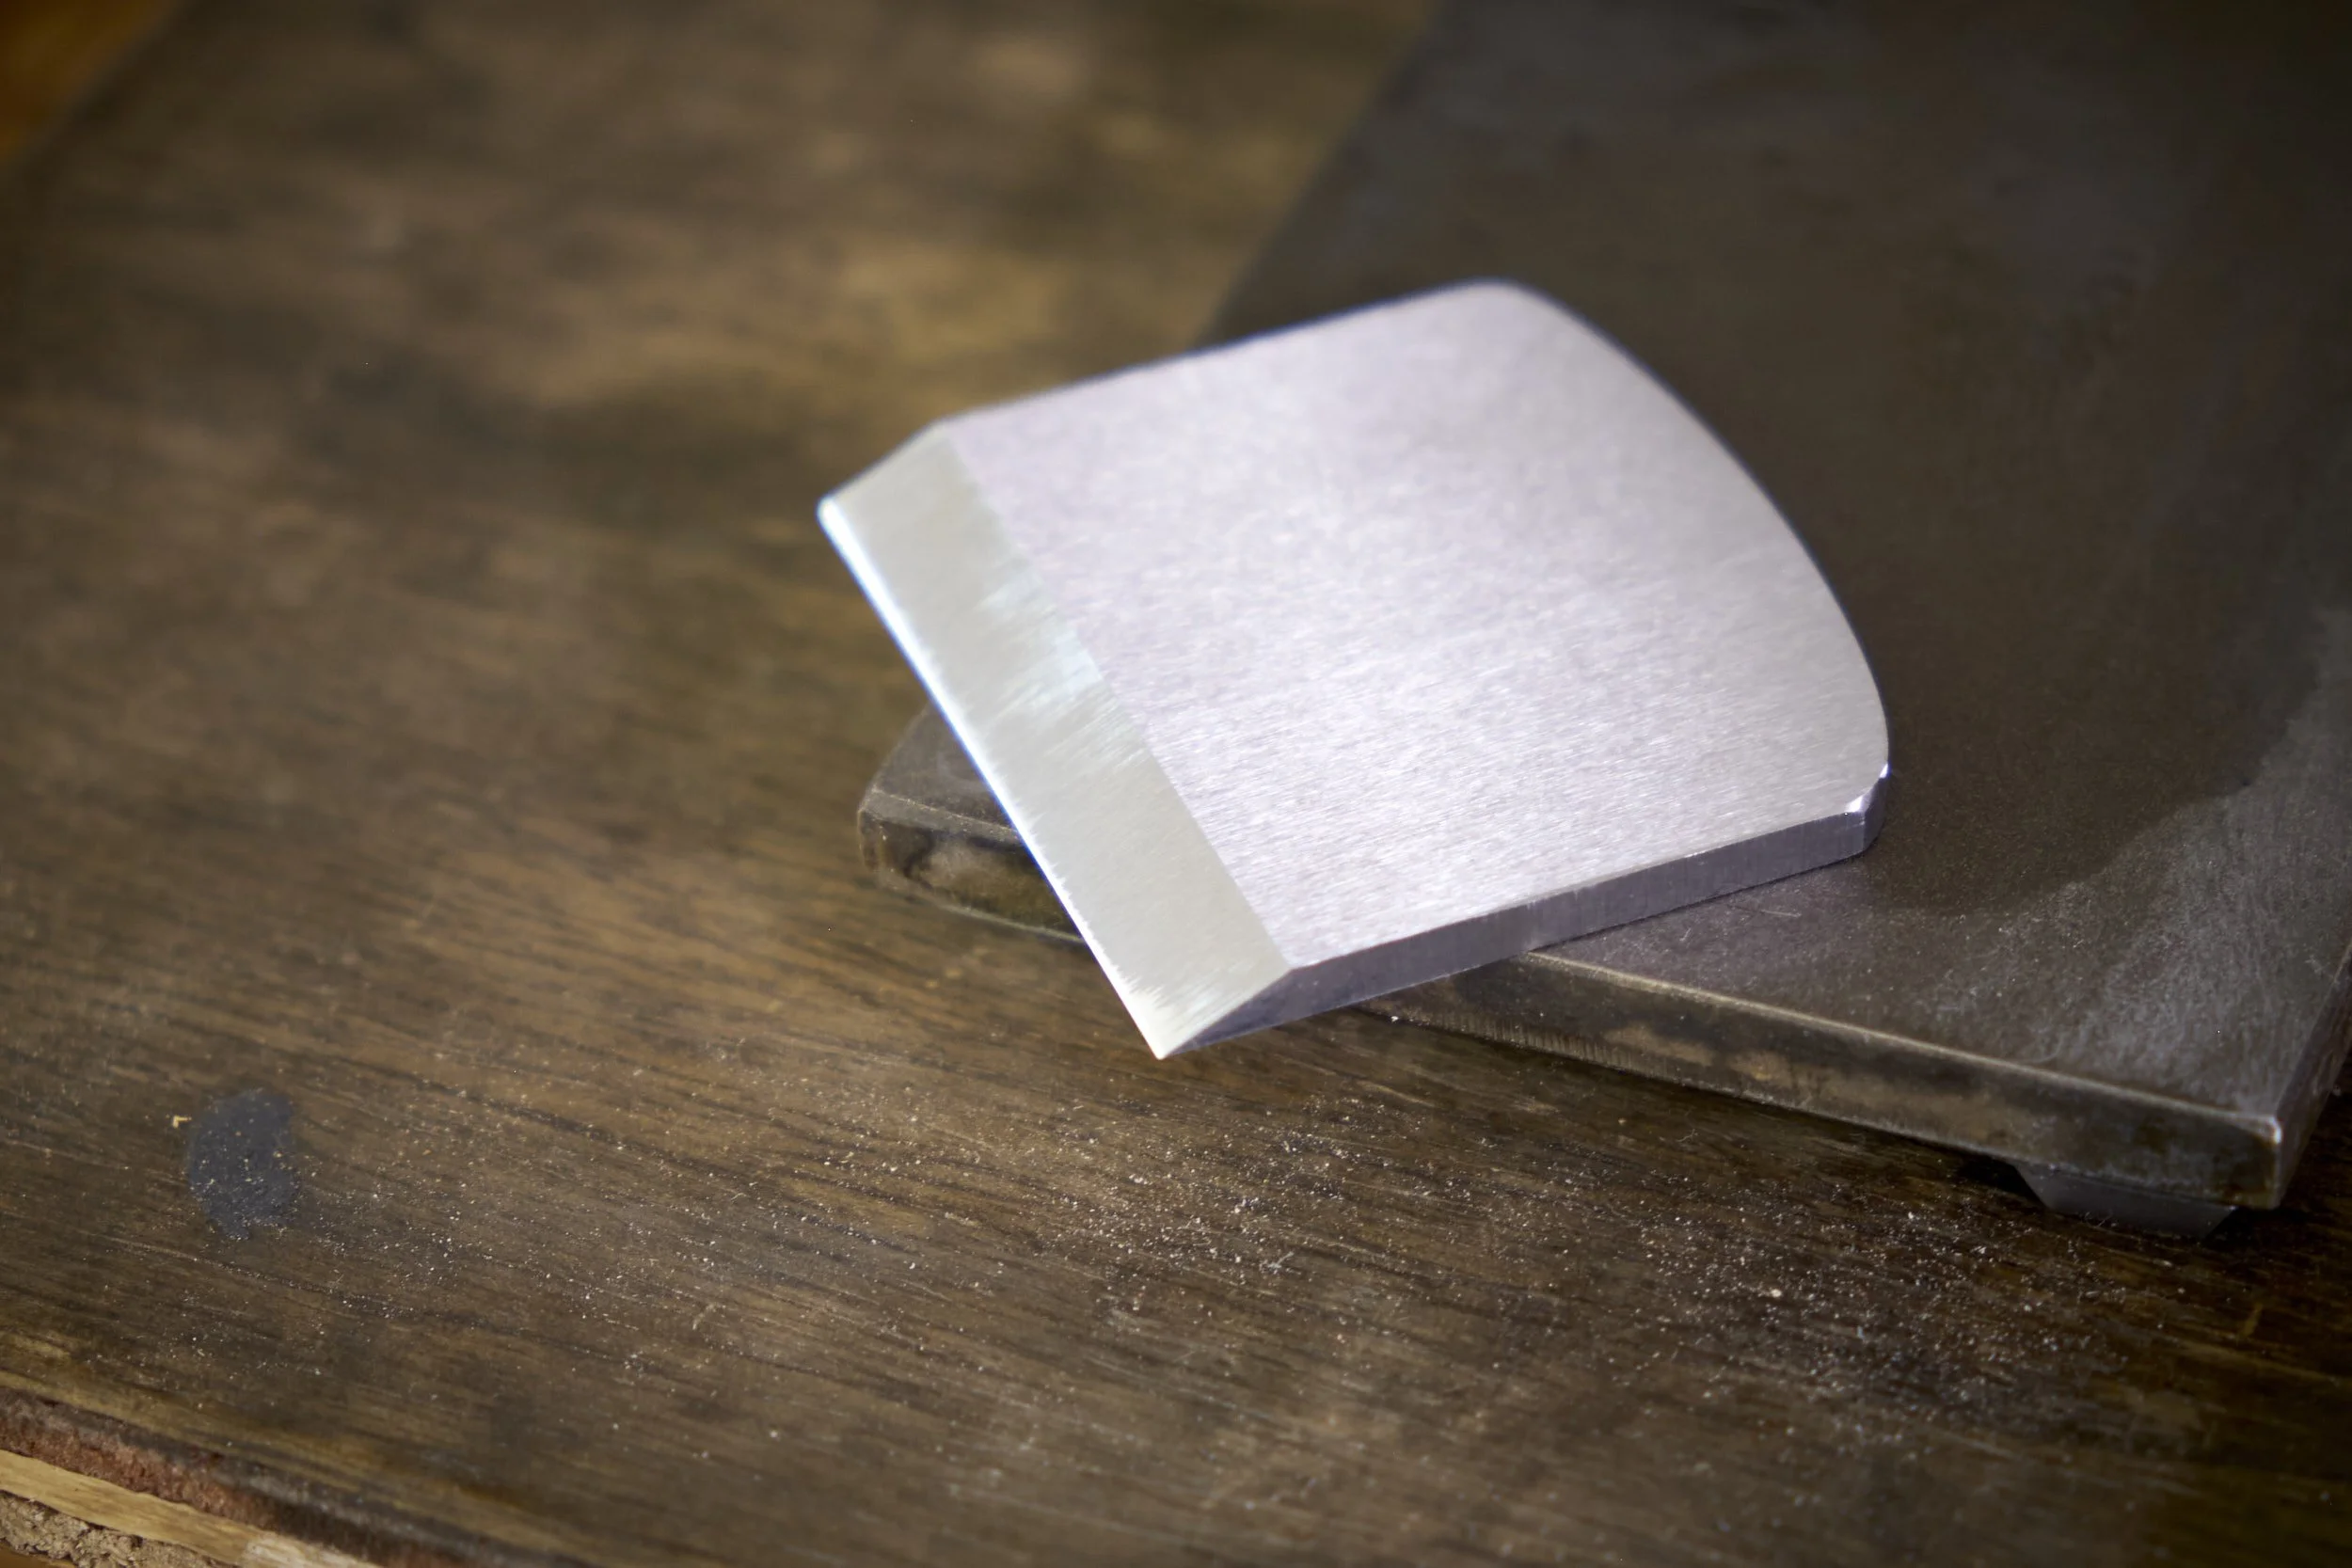
A secondary bevel is shaped at a steeper angle to the 25º primary bevel, in this case about 30º. The secondary bevel forms the final cutting edge.
Here are the steps.
Place the 25º primary bevel on the course abrasive surface of your chosen sharpening system. Not the Extra-Extra-Course stone that I use for fast material removal to flatten the back, but the coarse stone you use for routine sharpening.
If you sharpen by hand as I do you can rock the blade back and forth lightly infill you “find” the primary bevel of the blade against the abrasive surface. It is much easier to do this on thicker blades than older thinner blades as is commonly found on Stanley or Record planes. Now lift the blade very slightly at the back which will result in the cutting edge meeting the abrasive at a higher angle than 25º.
If you sharpen with a jig you need to set the blade position in the jig in a manner that will result in the cutting edge meeting the abrasive at a higher angle.
Once you have the blade in the position as described, move it back and forth over the abrasive surface a few times and check. You will start seeing the secondary bevel form across the width of the blade. If you used a grinder to establish the primary bevel it may not look like an even straight line along the full width of the cutting edge, this is not an issue, all you are looking for is that the secondary bevel stretches along the width of the blade without any gaps in between. You need to be constantly feeling the back of the blade for a burr, once you feel a burr along the full width of the blade, STOP.
Now move up through the grits to shape the secondary bevel, until just before you reach the final grit that the back of the blade was honed to.
More points to note.
This step should not take long and doesn’t require a lot of pressure on the blade.
If you are seeing the secondary bevel form but do not feel a burr along its full length it may be as a result of two reasons, the first is that you may need to work the secondary bevel a bit longer or the second may be that the back wasn’t flattened all the way to the very cutting edge of the blade, meaning you may need to go back to flattening before going on. Don’t be disheartened if you need to though, I still sometimes need to!
Do not make the bevel overly large, next time you sharpen you will need to remove more material to get a burr and that just wastes metal.
We move on to the final step - honing.
Step 3- Honing
I like providing my readers with accurate information and terminology. The latter, like few other things can cause a serious amount of confusion, especially to beginners.
To check the title I hit the net to check on the term “honing”. Big mistake. It seems as if the term is most commonly used in knife sharpening where the process of sharpening gets the blade sharp and honing is done on occasion on the edge in an effort to maintain sharpness. When the edge is re-established it is again called sharpening. In the world of woodworking the term of honing is used quite loosely to mean anything from the full sharpening process as started in step-1 of this how-to, to only getting the final polish on the edge of a blade. Some even include the final grit when flattening the back as honing and considering that I personally subscribe to honing as being the final polish of the cutting edge, I’ll give them that one at least.
The way I see it, by the time you have reached the before last grit of whatever sharpening system you use you have a sharp blade and it will cut wood. It may not be incredibly efficient in the cut, nor may the cut be sufficiently clean but I can guarantee that it will be quite sufficiently sharp enough to draw blood if not careful, case in point I am looking at a cut in my hand from a jointer knife I dropped between going from 100 grit to 220 grit while sharpening on sand paper! This is typically the level of sharpness that manufacturers sharpen their blades to when it arrives in the box. Therefore the warning on the box that the blade is sharp!
At least the consensus of the term honing is reasonably universal in that everyone generally suggests that blades on new tools need a final honing before use.
So here is my definition of honing a blade.
It is the final step of polishing the cutting edge to refine said edge to perfection and go from sharp to ridiculously sharp.
I do this on a leather strop loaded with a polishing compound, others may use very high grit abrasive papers or stones but the purpose remains the same. To polish the cutting edge to a level of perfection that is easier to reach than one may think.
Here are the steps if you happen to use a strop, at least it’s the way I like to do it. If you happen to be using an abrasive such as paper or a stone just continue with the procedure as stated in the sharpening section but with one change, more on that in a minute.
Position the blade at the upper edge of the strop with the primary bevel pointing downwards. Drop the back of the blade slightly lower than you think it should be before pulling the blade along the length of the strop.
Repeat about 15-20 times and check the secondary bevel. It should be developing a mirror shine along the cutting edge of the blade.
Turn the blade around and polish the back using a few strokes.
Put the blade into the tool it belongs in and test.
If you are not getting the cut you are expecting bring the blade back to the strop and repeat.
Some do not like strops because the leather gives a bit under the blade and they believe that this can roll the cutting edge over, resulting in a less acute angle where the secondary bevel and back of the blade meets, destroying the hard work you’ve done up to this point. This can happen and they do have a point.
This problem can be mitigated using the following three techniques:
By keeping the back of the blade slightly lower than you might be used to at this point in the process you ensure that the effect of the leather giving way under the pressure at the cutting edge has less of an effect on the geometry of the secondary bevel.
When pulling the blade along the length of the strop be careful not to lift the back of the blade as a result of body mechanics, this will result in the bevel being rounded over. Try to keep the movement of the blade along the strop as “flat” and even as possible.
Honing the back of the blade helps to bring the two planes of the cutting edge back into an acute angle.
A note on burrs.
During the sharpening process you want a burr to form at the cutting edge and the larger the burr the easier it is to feel or even see. You do not want to form a large burr though as it becomes hard to remove and once it breaks off you have an edge where the surfaces of the back and the bevel do not meet at the sharpest angle possible. I want the burr to be small and I want it to break off during the sharpening process and ideally I want it to happen at the very last stone before moving on to honing. If I can still feel a burr before honing I will move back and forth between sharpening the secondary bevel and working the back of the blade on the last stone until I can no longer feel the burr. Only then do I move on to the strop.
This process is commonly called “chasing the burr”.
You need experience to feel a small burr and have it break off at the right time, this will come in time, keep practicing.
There you have it, a well prepped and sharp blade that will provide solid performance for some time to come. It still needs to be sharpened and honed though but as far as prep goes you are done. At least when it comes to flattening the back which only needs to be looked at when the primary bevel moves past the area that has been flattened. The primary bevel as well needs maintenance as the secondary bevel gets larger with repeated sharpening and honing.
OK, the blade is going to need maintenance! All tools do, especially those that see a lot of work but it at least, won’t need flattening for a bit and if you have spent any time flattening a blade in bad shape ever before you can now let out a sigh of relief and I probably need to start writing a post on blade maintenance………
Go make shavings!
If you haven’t signed up for my newsletter yet, please consider doing so here. Members get access to a page of FREE jig plans and are also the first to hear of upcoming deals and special offers.
Now, you can go and make shavings. I’m off to process stock to start on an eight seater dining room table for a client.

What does it take to turn an idea into something that actually works? I share what 3D printing is teaching me about prototyping, from adapting designs and testing small parts to choosing materials, asking for help and staying organised.