
Build Your Own Wooden Hand Plane - Part 4
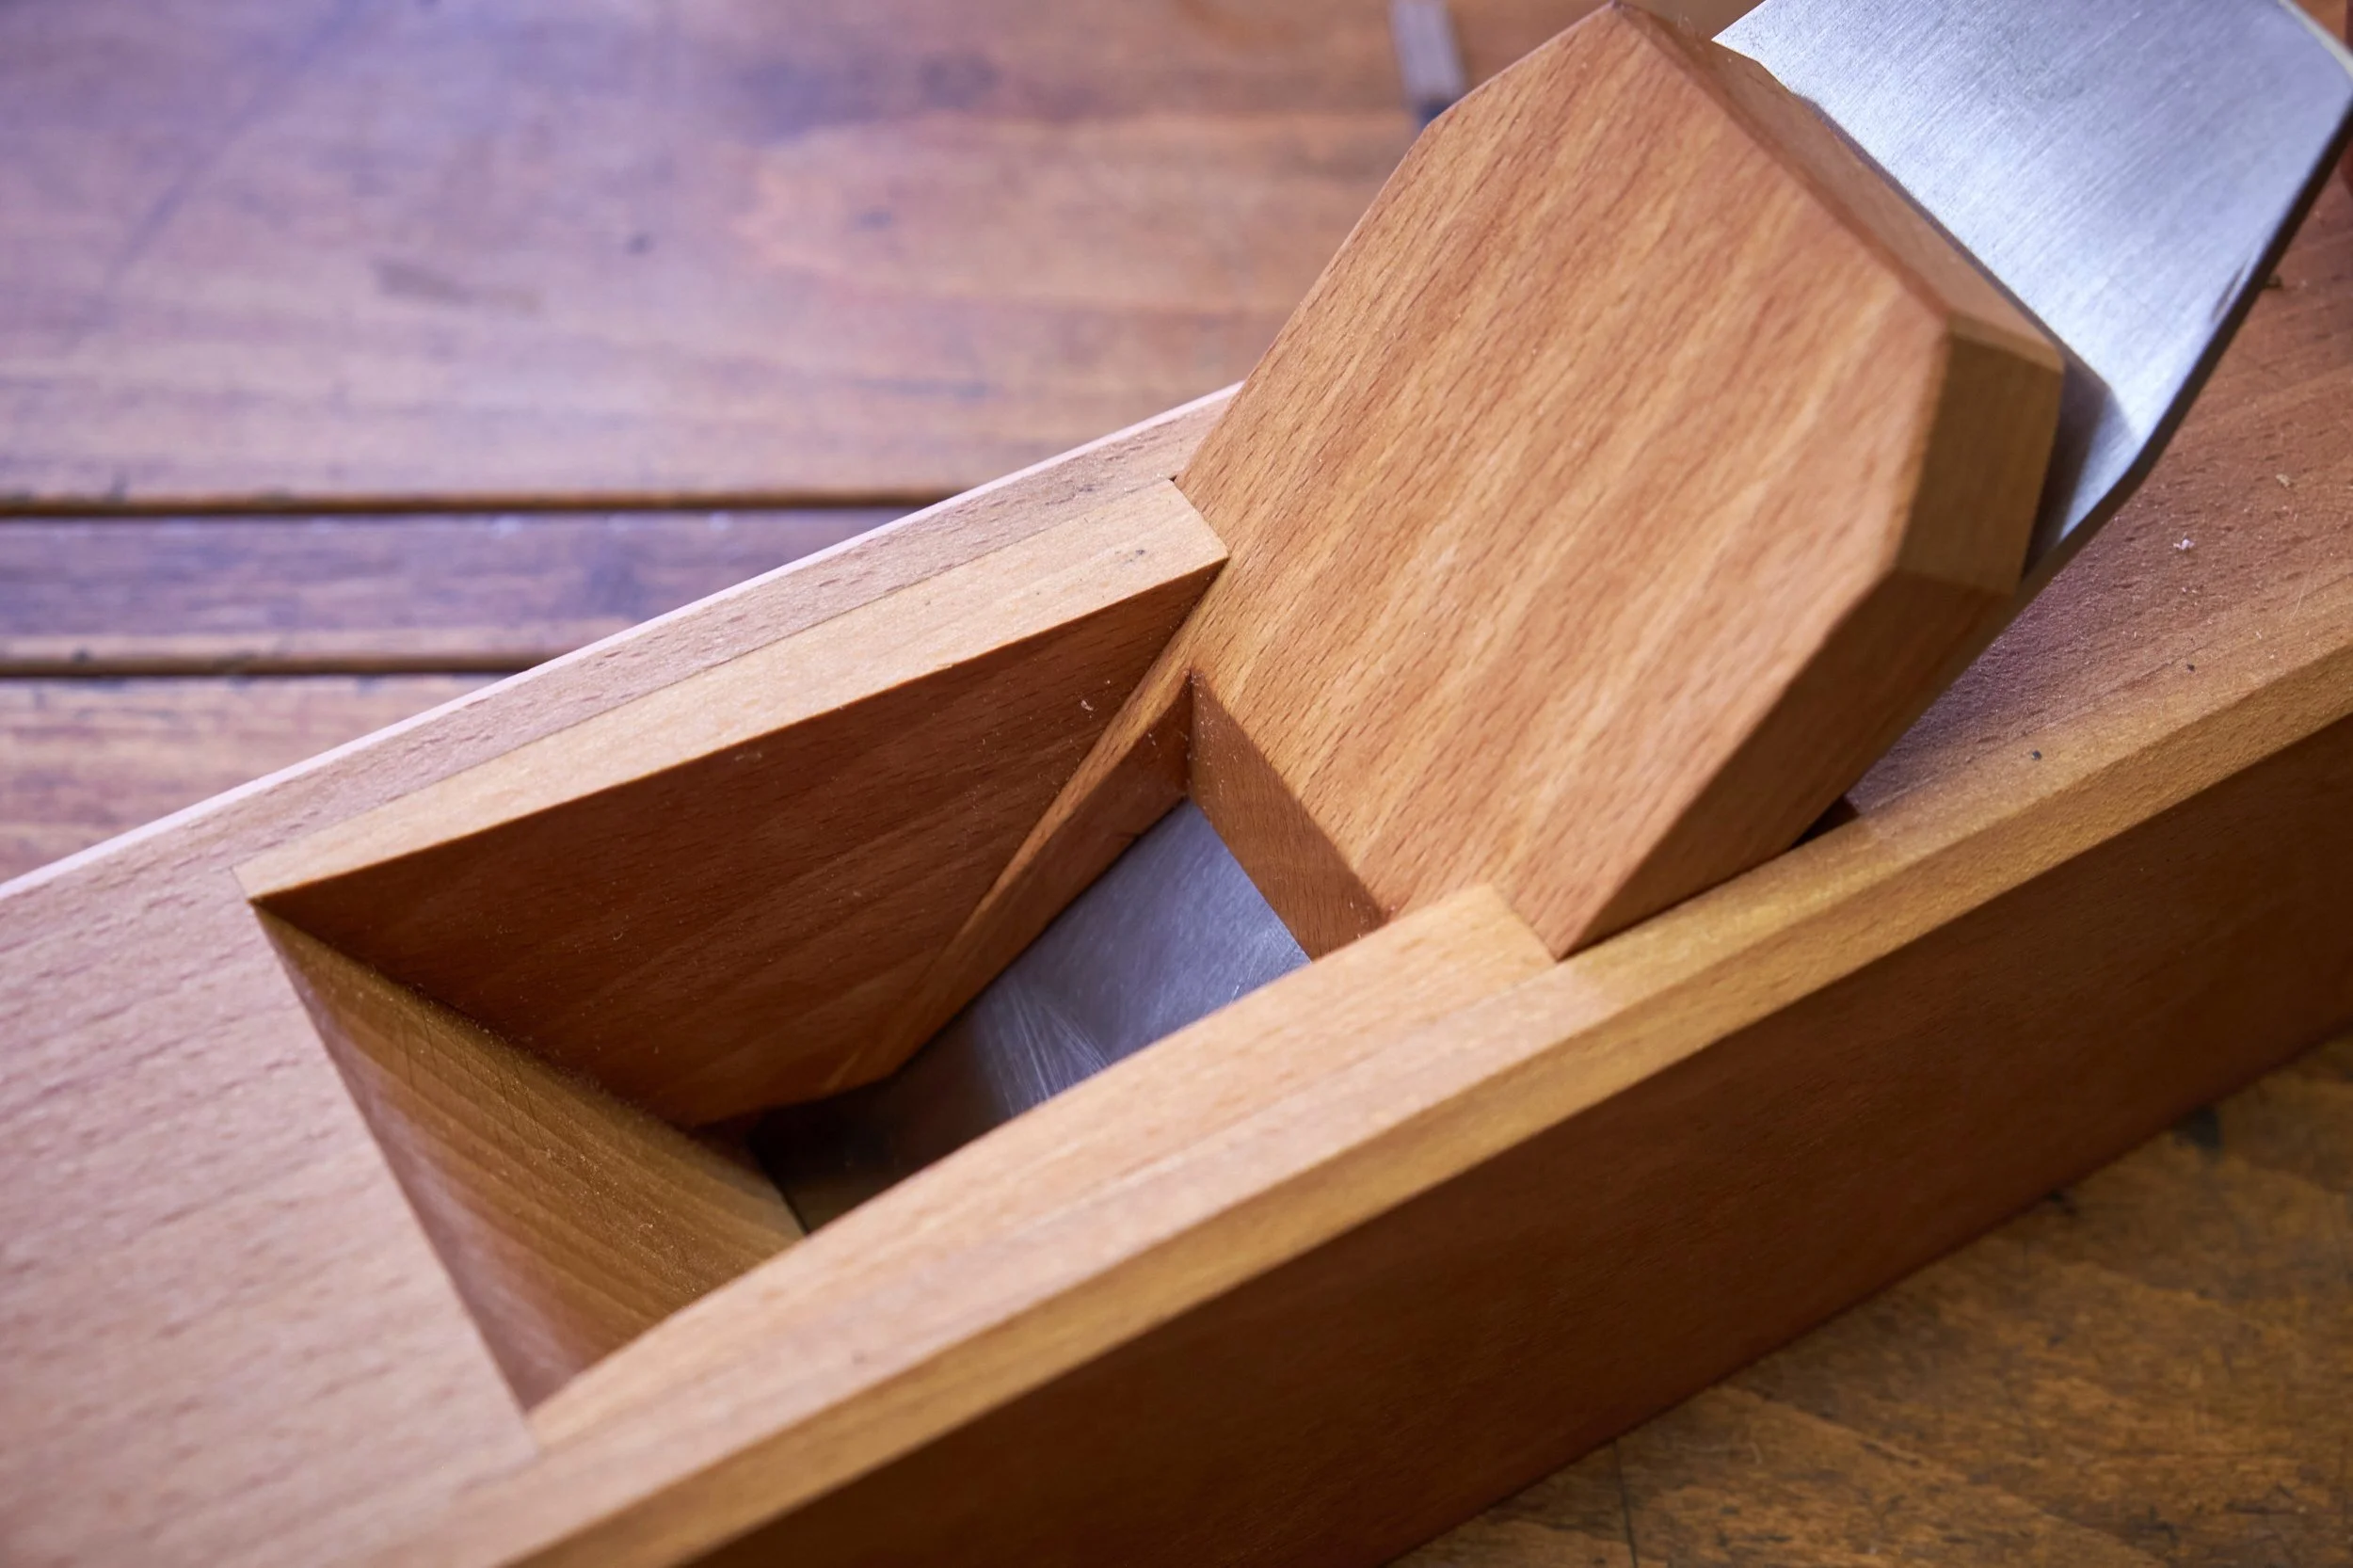
We are in the final stretch of our hand plane build and by my estimation we will be completely done by the end of Part 5.
Of course, I have been accused of rambling on occasion so we shall see.
Today I attempt to get the blade to stay put in the body so that I can finally test the thing and make sure that it actually takes shavings.
That’s the whole point after all isn’t it?
In the world of wooden hand planes the holding the blade in place part is achieved through two main mechanisms the first and the easiest to implement is the retaining pin method and the second and arguably more traditional looking is through the use of abutments.
Both implement the use of a wedge to jam the blade in place and keep it where you’ve set it but even here there are differences in how the wedge is made. Almost all traditional wooden hand planes of a certain age you are likely to come across in the wild will implement some form of abutment for the wedge to jam against and these were carved out of the mouth during the making process. Considering that we are already cutting corners by laminating the plane body together why stop there? So the same can be done by glueing the abutments into the mouth of the plane body.
Personally I find the use of a retaining pin to be the simpler method of the two to use but considering that I prefer the classic look of abutments and the fact that I am a sucker for punishment I will be detailing the process of making and installing abutments as the method of choice for today’s article. That and the fact that I don’t have any pictures detailing the process of installing a pin.
We start with the wedge.
Step 1: Make The Wedge
A note on wood choice, try to use straight grained wood in the species you’ve decided to make the plane from. Try to avoid knots and weird grain, it may look great but this part will take a lot of abuse and you want the strongest section of stock you have available to you.
You also want it to be flat, square and straight.
The dimensions of the blank will be dictated by the hand plane you are building. Width wise it should be wide enough to go into the mouth. Measure the width of the inside of the mouth and make the blank about 1-2mm narrower. Its length should be longer than the plane blade, I prefer to have the wedge somewhat longer which will make it easier to hold the blank down during the shaping process. Thickness? It depends on the size of the hand plane and the thickness of the blade, I generally start at 10-15mm and work from there.
The best slope or angle of the wedge is generally considered to be around 7º to 10º, any shallower and the wedge will push too deep between the blade and the pin or abutment, making it hard to remove when adjusting the hand plane, any steeper will result in the wedge popping out during use.
Steps to make the wedge:
Cut the wedge blank to size and make sure it is flat and straight, the sides should be square to the flat surface and the faces need to be parallel to one another.
Pick the surface that will be the bottom of the wedge and mark it with a face mark.
Make a mark 3-4mm up from the surface of the bottom face on the end that will be pushed into the mouth (this dimension is somewhat arbitrary and is determined by the size of the plane you are building and can be worked down if needed so start thicker rather than thinner).
Set a bevel gauge to 7º (I like 7º) and mark a line from the mark made in the previous step to the top surface of the blank, be sure to mark the angled line on both edges of the workpiece.
Join the lines square across the top of the blank.
Cut the waste from the wedge, keeping to the waste side of the line.
Keep the waste for later.
Use a hand plane or a belt sander to clean up the sloped surface of the wedge.
Tips:
I use a bandsaw to make this cut and I make sure the blank is well secured during the procedure.
Don’t cut the wedge to length yet you will need the extra material to hold on to it later on.
Make sure the angled surface of the wedge is flat along its width and length, use the 7º lines on the edges to get it as accurately as you can.
Step 2: Mark Out For And Shape The Abutments
Things are about to get tricky but it will make more sense as we go along.
To make the abutments you need to prepare a blank that is about 150-200mm long and about as wide as the mouth of your hand plane is deep. The thickness of the stock is somewhat dependent on the size of your hand plane but aim for between 4 and 5mm.
The abutment has a compound angle with the wedge sloping down from the rear to the front as well as from the top to bottom.

The abutments are shaped as mirror images of one another on opposite ends of a single blank.
Next steps:
Place the blade into the plane making sure the back is flush against the bed with the cutting edge resting in the mouth.
Put the wedge on top of the blade with the newly shaped, sloped surface against the blade.
Place pressure with a finger onto the assembly to keep the wedge in place.
Slide the wedge down into the mouth so that the bottom edge comes to rest about 15-20mm up from the bottom of the mouth.
Make a mark on the top edge of the cheeks where the front/top surface of the wedge enters the mouth.
Remove the blade and the wedge.
Measure from the top edge of the fore block back to the mark you have just made and add about 1-2mm to the measurement, this is the length of each abutment.
On either end of the blank you’ve prepped for the abutments draw an angled line from the top corner to the lower edge. The angle of the line needs to be the same as the angle that the fore block was cut at.
From the top corner where the angled line starts measure back the distance determined in step 7 and make a mark.
Add the angle of your wedge to the angle of the bed and set a bevel gauge to this. Let’s say the bed is set at 45º and the wedge was cut at 7º the gauge needs to be set at 52º.
Now strike a line from the distance mark in step 9 down to the bottom edge of the blank, you should end up with an upside down triangle.
Cut the fore block angle on either end of the blank.
Use a hand plane or a belt sander to remove material from the abutment to around 3-4mm at it’s thinnest edges, that will be the edges indicated by the red arrows while avoiding to remove material around the area of the second angled mark at the black arrow.
Do this on both ends.
If you have removed the marks indicated by the black arrow redraw them onto the surface of the blank.
Once both abutments are shaped they can be cut free from the blank.
Use a chisel to slope about 5mm of the bottom corner of the abutment at a steeper angle, this will help clear shavings during use (bottom red arrow).
Tips:
The angled cuts can be made using a handsaw or a table saw, make sure the cut is safe when using a table saw.
Don’t skimp on having the extra material on the blank, it helps a lot to hold on to while shaping the abutments.
I like using a block plane to shape the abutments.
Take your time making the abutments.
Step 3: Shape The Wedge
I do the final cutout and shaping of the wedge once I have an idea of how thick the abutment is going to be.
To proceed you’re going to need the waste that was cut away when making the wedge as well as a hand saw and a chisel.
You will also need 15 hands!

The dimensions needed to form and shape the wedge are determined by the dimensions of the hand plane you are building.
The image at the end might give some idea of the “latitude” allowed when making a wedge.
As long as the wedge sits flush to the abutments and doesn’t block the path of shavings you are good!
Steps:
Place the wedge and blade into the mouth of the plane and position the wedge depth to line up with the marks made in Step 2.
Eyeball a distance of roughly ½ of the plane height up the wedge and make a mark on the wedge, this will be the bottom edge of the relief angle that will be cut into the wedge (red double arrow).
Loosely position the abutments into the mouth so that their front and back edges resister against the fore block and wedge as they would do once glued in place.
Draw a line onto the wedge along the edges of the abutments where they meet the wedge.
Remove the abutments, blade and wedge.
Make a mark square across the wedge at the height mark just eyeballed.
Measure roughly 20mm up from this mark and strike another line square across the top of the wedge.
Use the lines drawn along the abutments to mark a straight line from top to bottom along the edge of the wedge (red arrows).
Saw out middle of the wedge using a handsaw.
Use the waste wedge (black arrow) under the wedge to secure the blank flat against your work surface and shape the relief angle between the top and bottom horizontal lines across the wedge.
Knock off the corner of the bottom edge of the relief to protect the edge from breakage.
Use the chisel to angle the bottom of the legs inward towards the middle of the wedge.
Tips:
I realise the measurements needed to make the wedge might seem vague and this is mainly as a result of the fact that the dimensions of the plane you will be making will determine the size and the cutouts of the wedge.
All the corners and flat surfaces that are angled during the process of making the wedge are to ease the exit of shavings in use.
Do not cut the wedge to final length yet.
You may notice at this point that when the abutments are placed into the mouth with the wedge and blade that their top edges are proud of the plane body, this is correct and they will be made flush with the top of the plane during the clean up step.
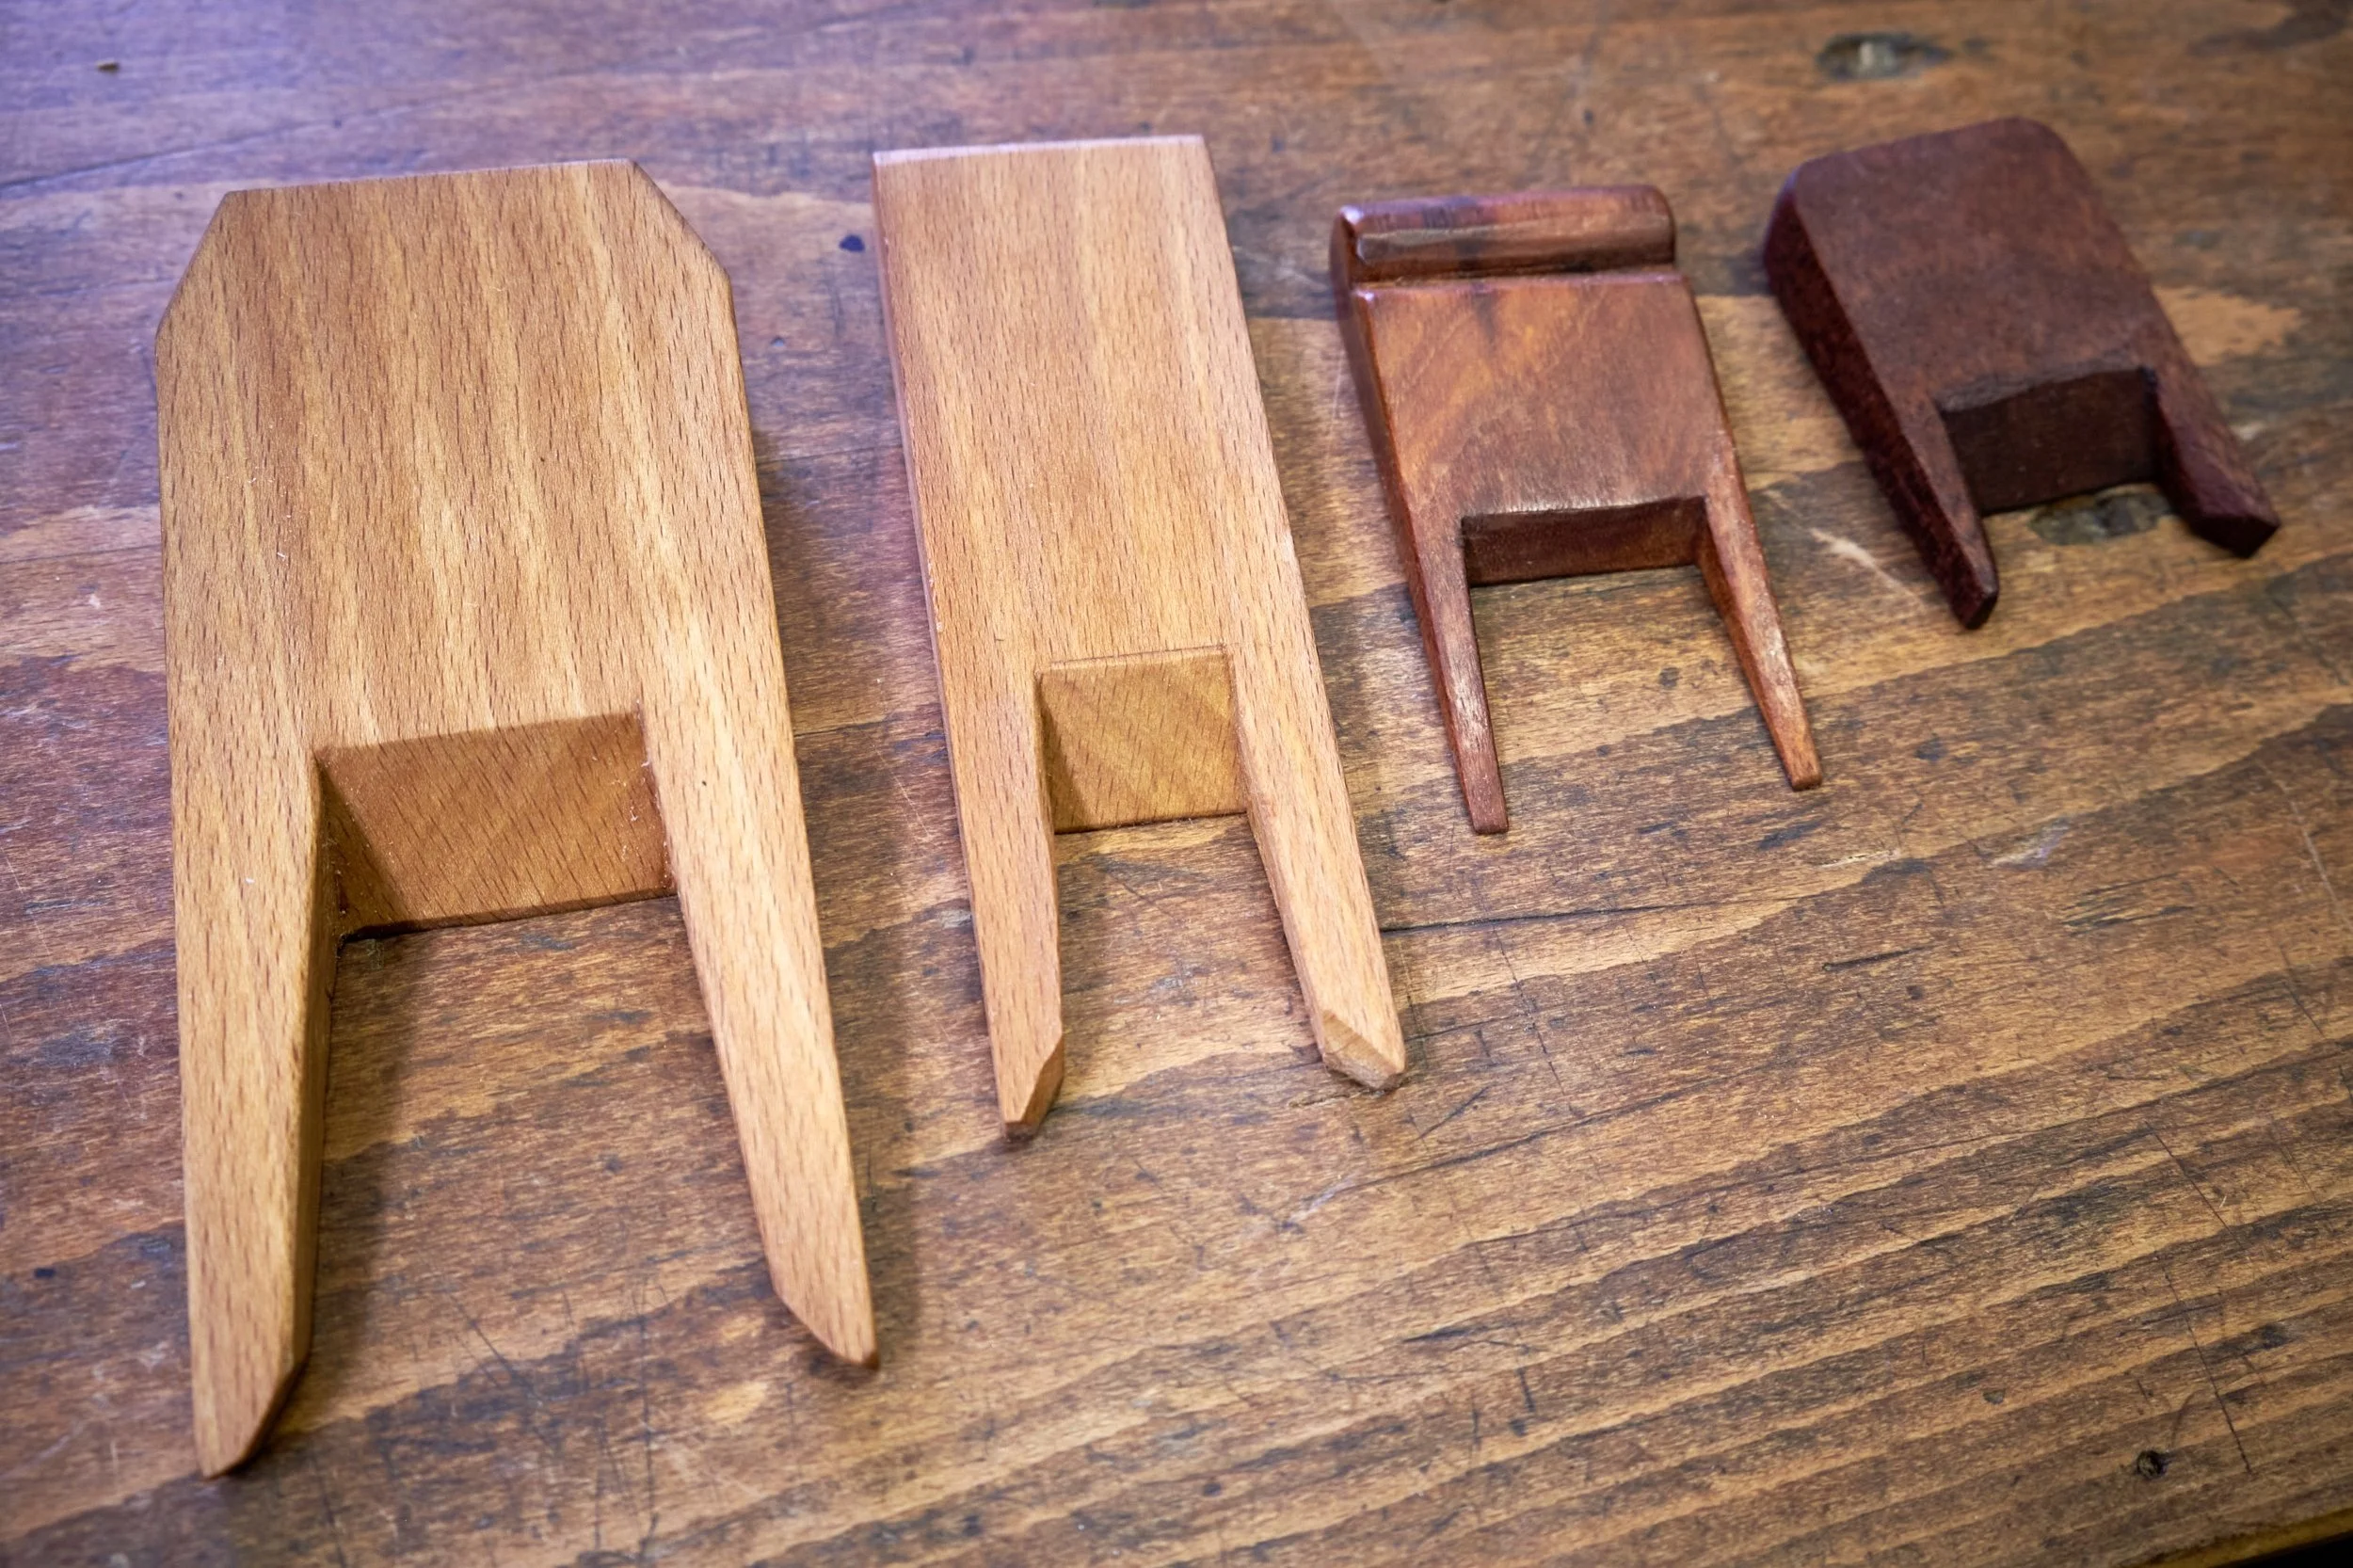
Wooden hand plane wedges come in all kinds of shapes and sizes!
As long as they keep the blade in it’s place and don’t obstruct the mouth you are golden.
They don’t even need to be pretty……..
Step 4: Fit And Glue The Abutments
We are almost there and now we need to make sure that the edges of the abutments sit flush with the wedge, this step is critical to make the blade easy to set and keep it in place during use.
The process isn’t hard but you need to take your time and make small adjustments.
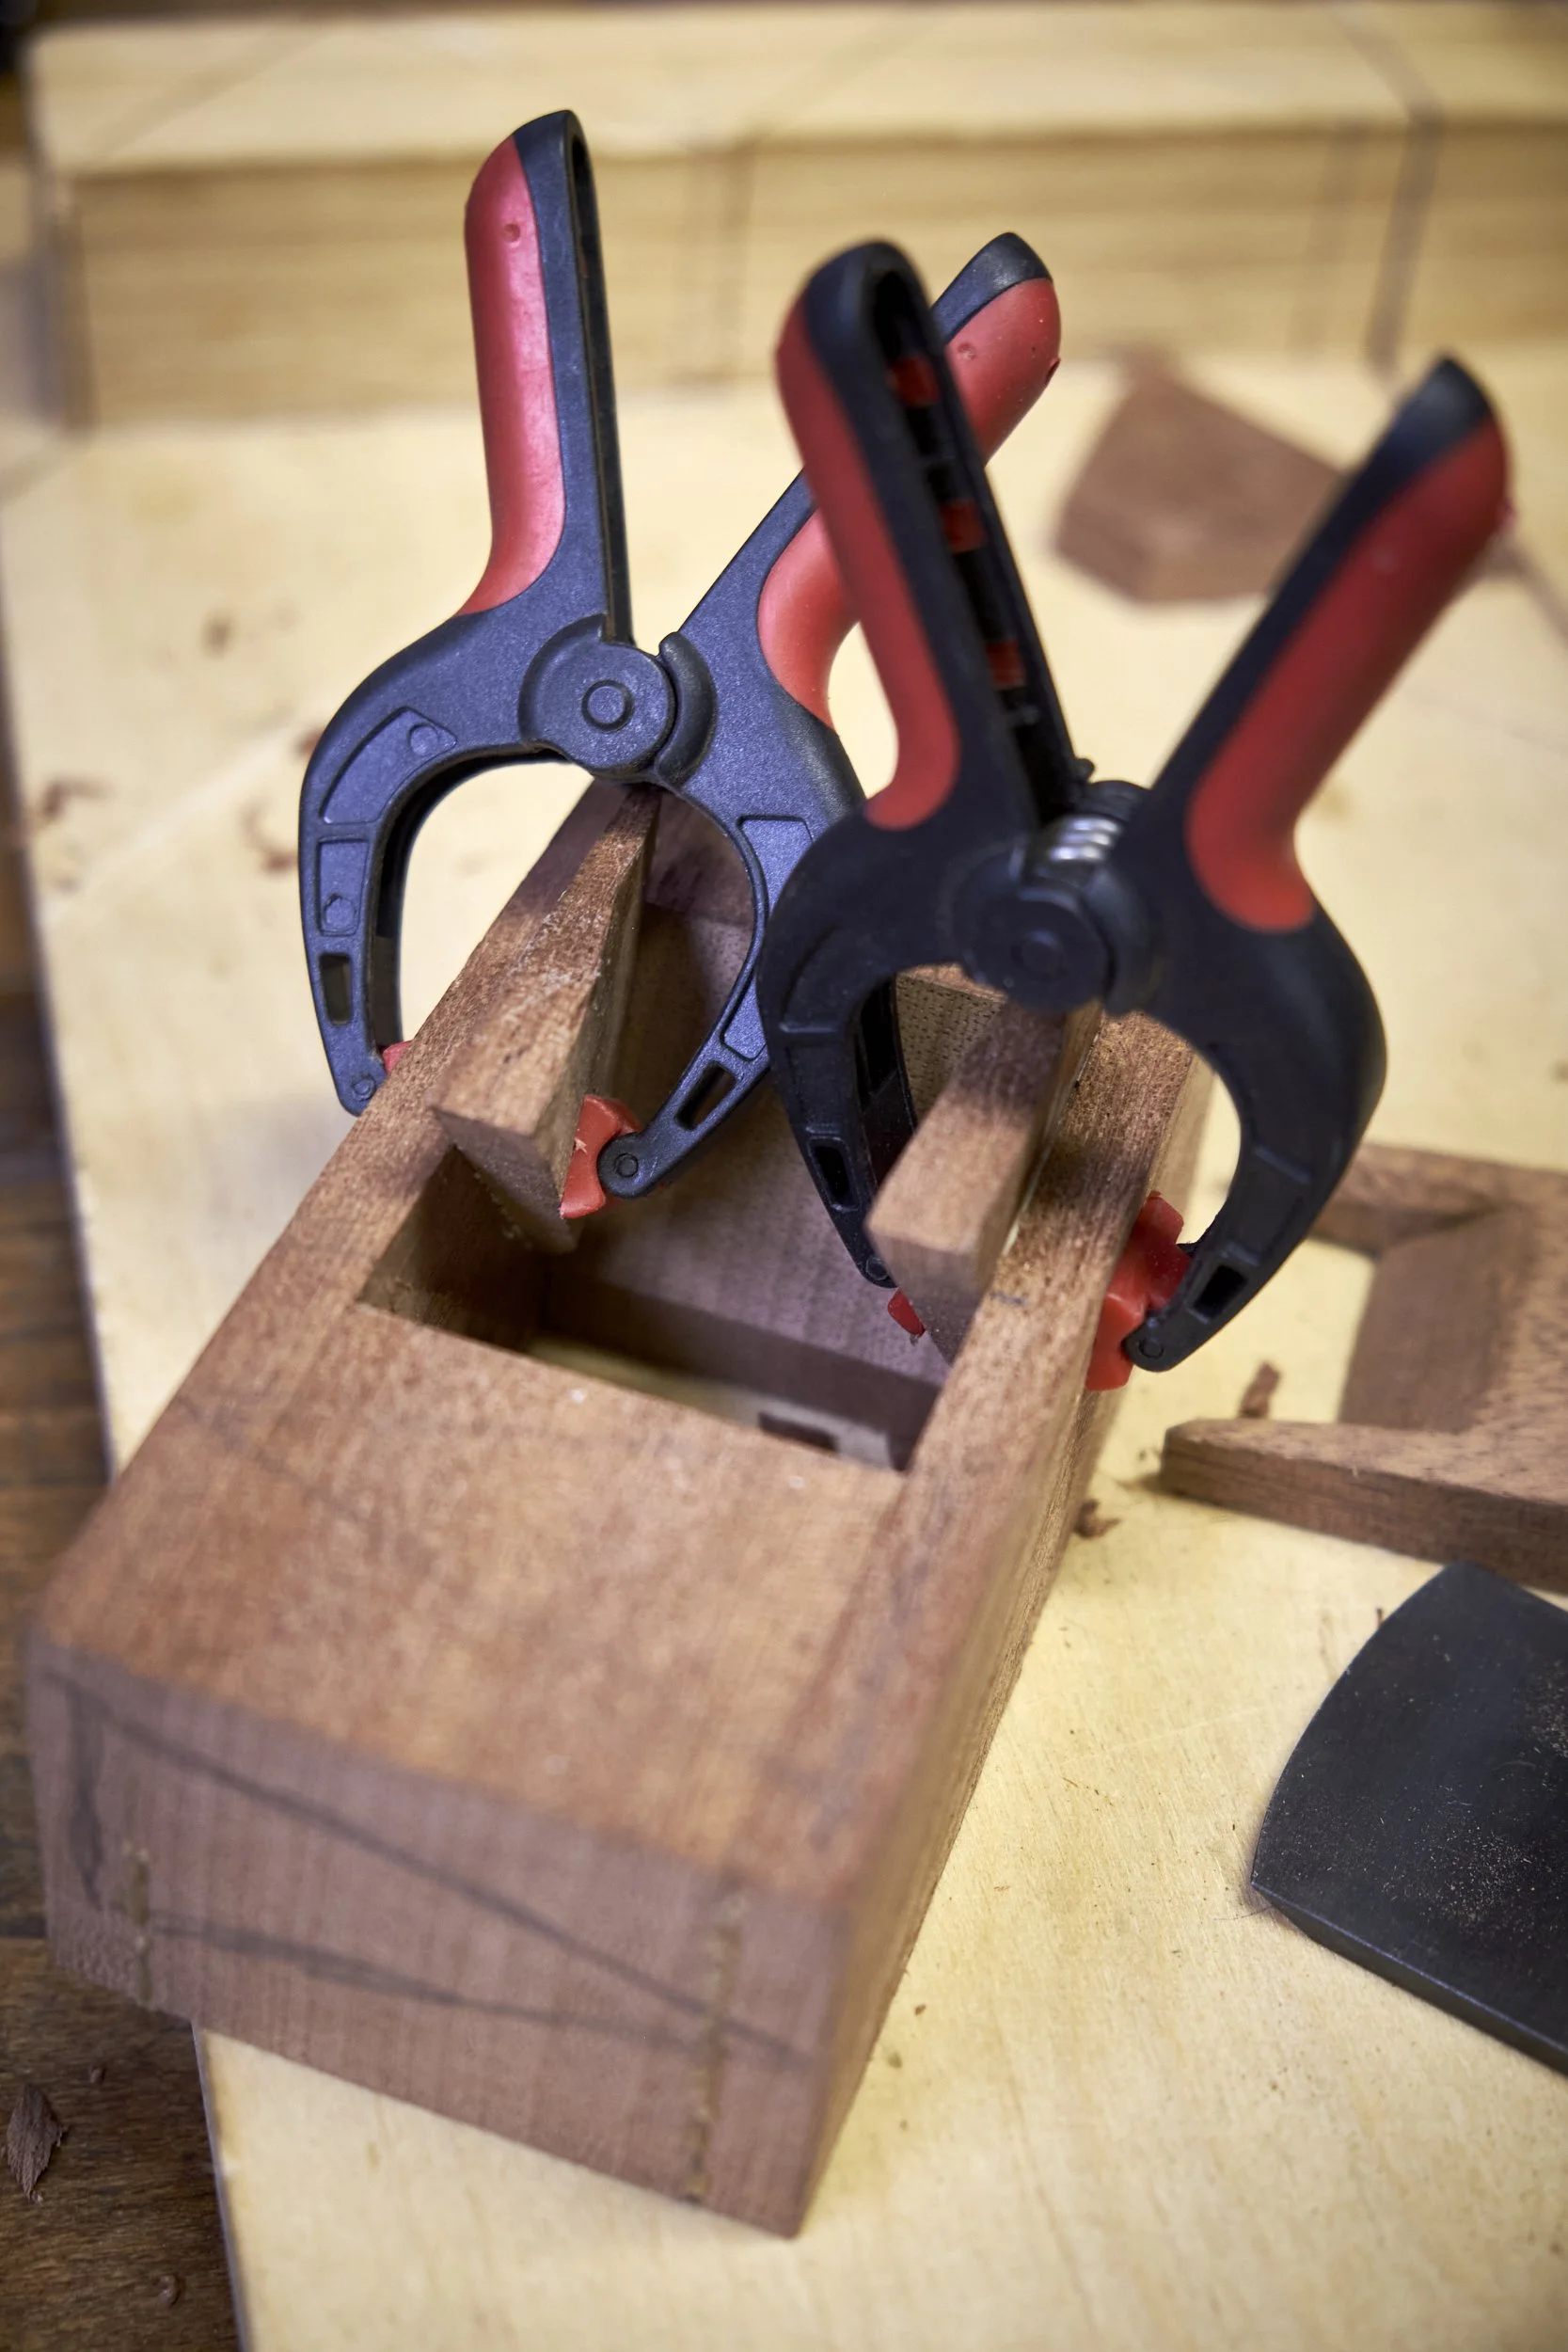
Steps:
Place the blade and wedge back into the plane and make sure the wedge lines up with the marks made earlier to measure the length of the abutments.
Starting with one side of the plane - you can decide which - place the abutment into the mouth and push it up against the cheek that it will be glued onto.
Check that the front and back edges of the abutment sit flush from top to bottom against their respective faces, the fore block at the front and the wedge at the rear.
If the edges are flush with no gaps you can move on to check the abutment on the other side.
If there are gaps mark the area where material needs to be removed and proceed to remove this in small increments with either a sharp chisel, block plane or a belt sander.
Test fit again and go back and forth adjusting the abutment until it fits well agains the fore block and wedge.
Move on to the abutment on the other side and once both are fitting well you can glue them in place.
Keep the blade and wedge in position during the glue up, this will stop the abutments from being pushed too deep into the mouth during the process.
Apply glue to the flat surface and the fore block side edge of the abutment and position each in turn onto the inside of their respective cheeks.
Clamp the abutments in place and after a few minutes the blade and wedge can be removed making sure the abutments do not shift.
Tips:
Spring clamps work especially well to clamp the abutments in place during drying.
The abutments will take a lot of strain when the blade and wedge is installed so I like to leave the glue to set for at least 12 hours before I test the plane.
Step 5: Cleanup And Test
The moment of truth is nigh!
Steps:
Clean excess clue from all the corners, especially where the wedge will be installed.
Make the abutments flush with the top of the plane body, this can be done with another hand plane or a flush cut saw.
Place the plane body, sole down onto your work surface and install the blade and wedge.
Use the palm of your hand to push the wedge down into the mouth so that it places pressure onto the blade.
Check that the edge of the abutment still registers flush against the wedge.
If it does not, note where the gaps are and use your blunt chisel from Part 2 (I think it was Part 2) to remove material from the upper surface of the legs to get them and the abutments flush with one another.
Mark where you would like the top of the wedge to be, this can be done to taste but the top of the wedge needs to be below the top edge of the blade to allow the use of a hammer to set the blade depth and angle.
Cut the wedge to length and shape the top to taste.
Install the blade and wedge, set the blade and have at it!
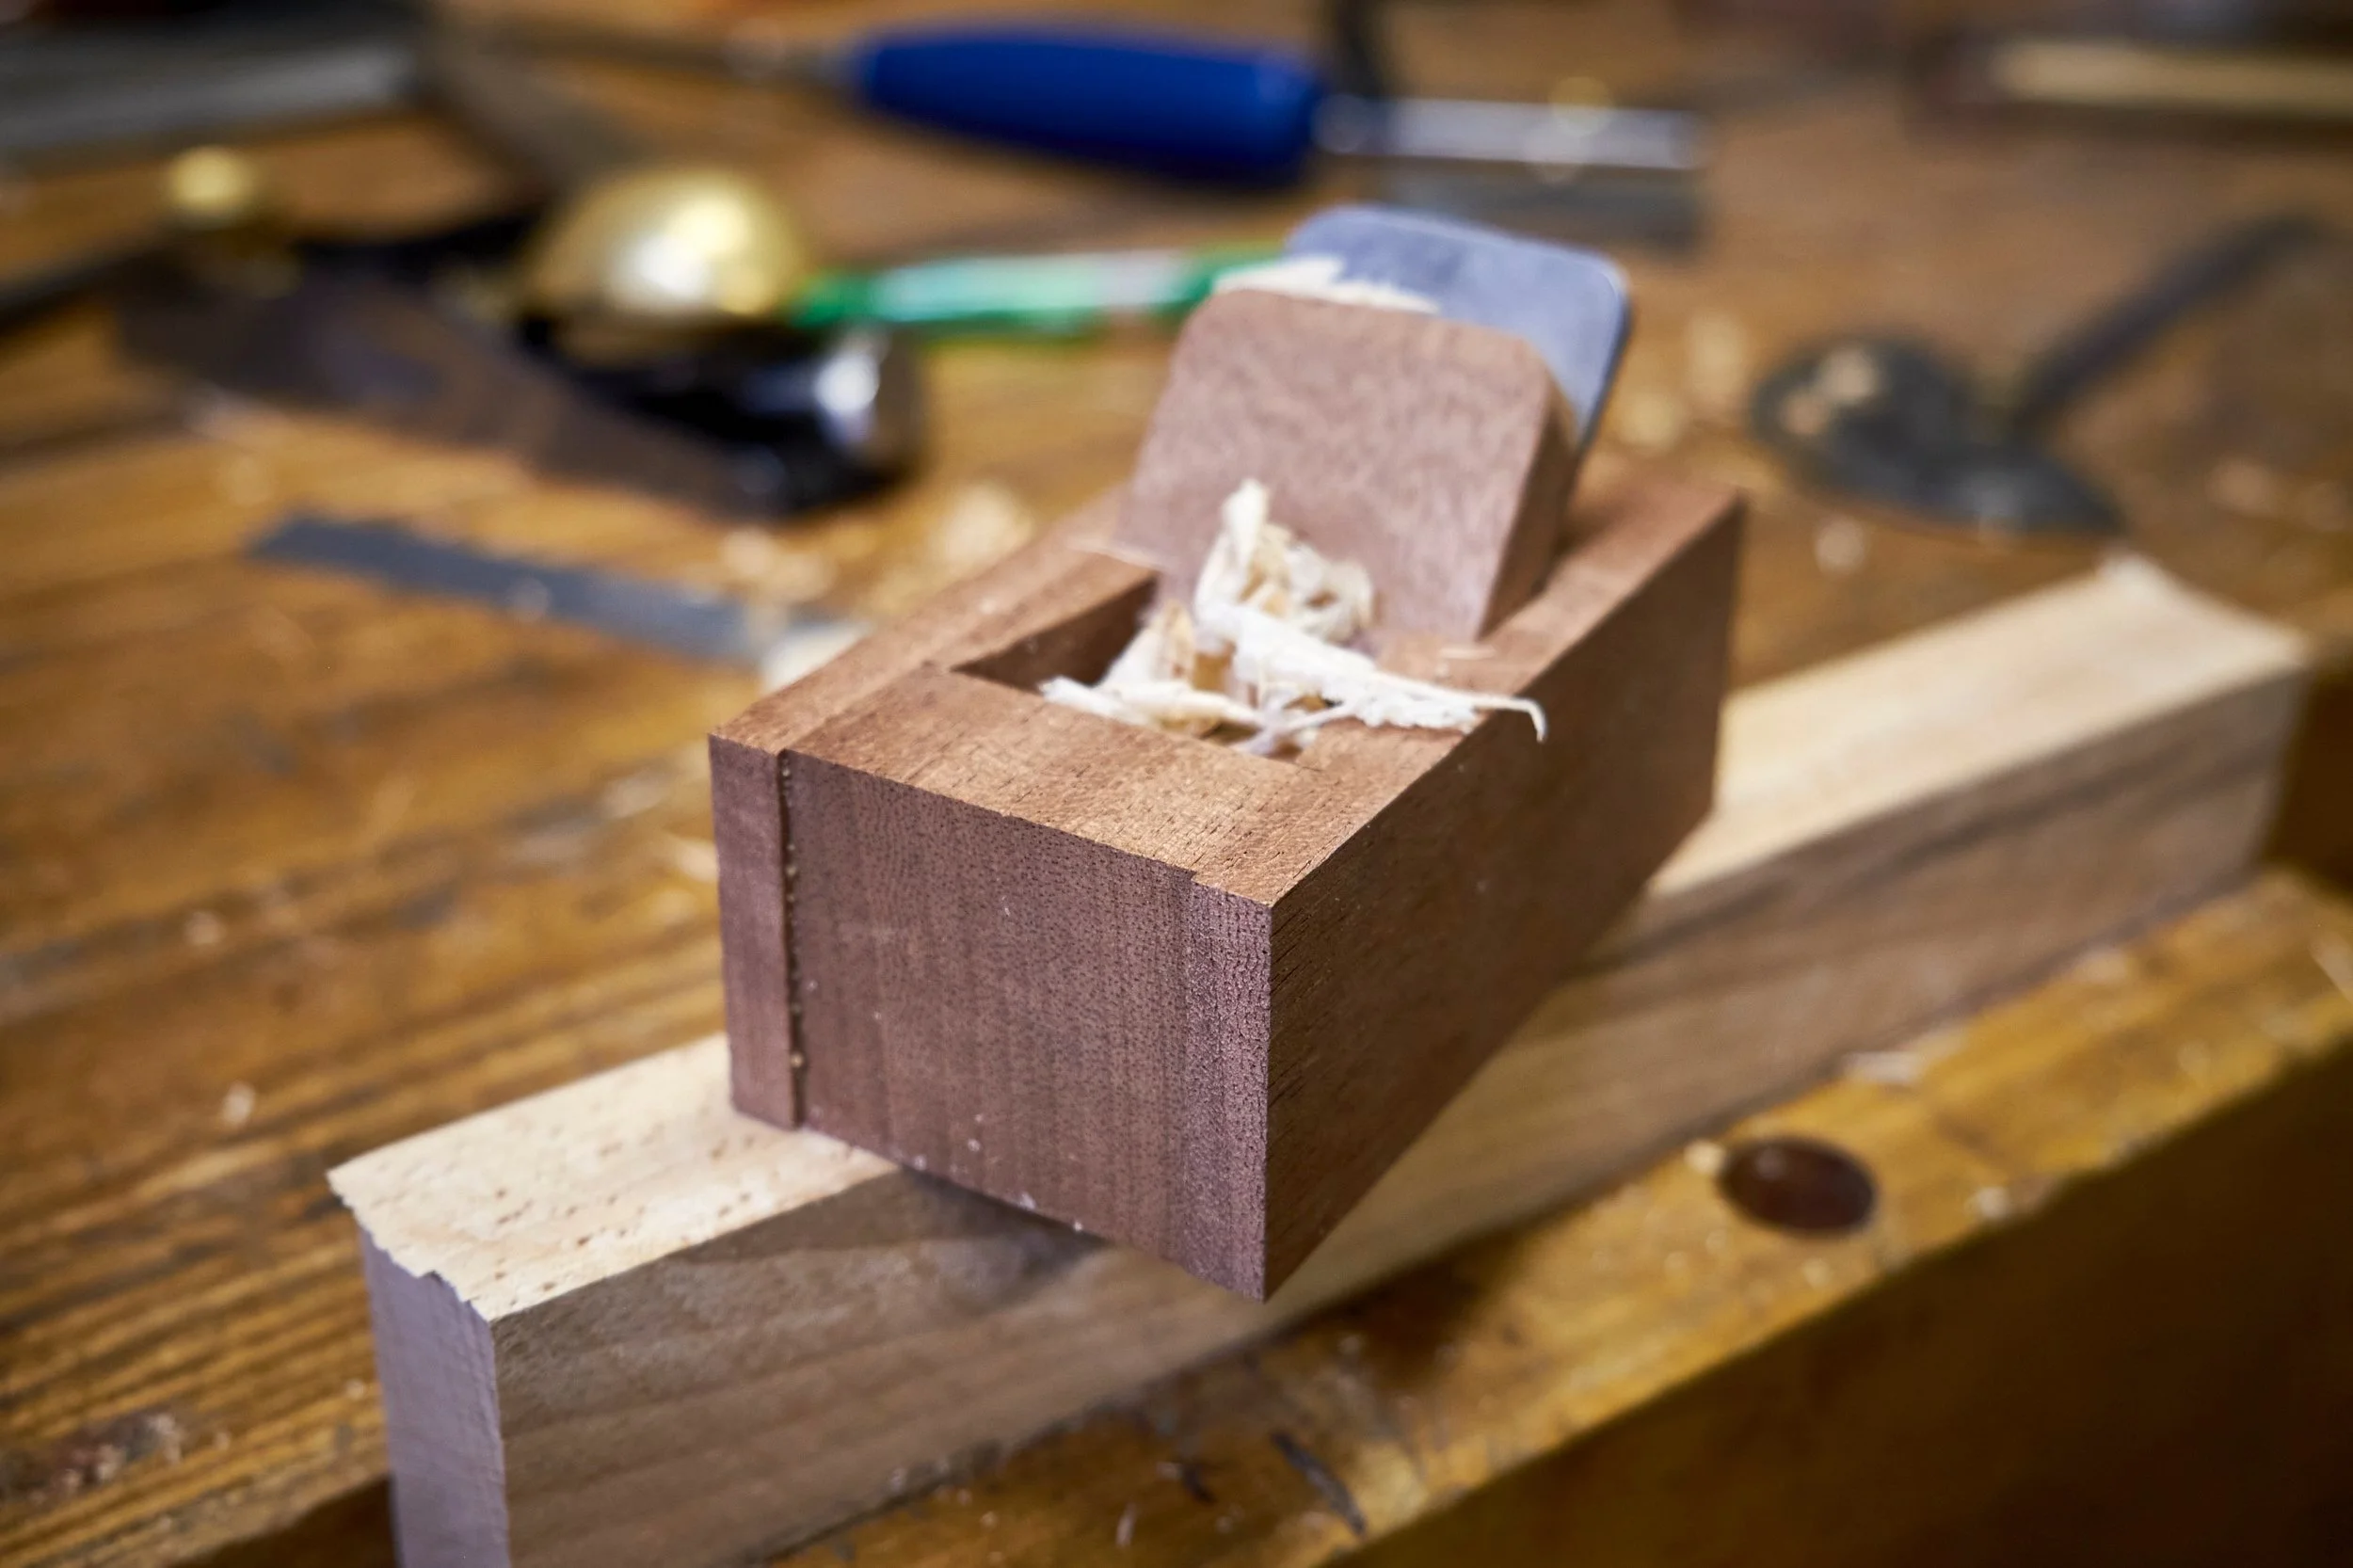
And that ladies and gentlemen is it, you now have an operational hand plane in hand. You don’t even need a handle, the proper name is a tote! Just shape the body as James did and start using your new hand plane. Or you could bear with me for another 2000 or so words and I’ll tell you how to install a handle.
Until then though make as many shavings as you like, I usually cant wait to install the handle and as soon as the blade is in I’ll test the plane. The photo above and this video will attest of my impatience, but a handle does round the build off nicely so until next time enjoy your new toy!


Almost done! I continue from Part 4 and in this final instalment I install the handle, shape the plane, add hardware and round it off by applying my favourite finish. Make sure to catch up by reading Parts 1 to 4 and also be sure to check out the blade making article at the very beginning that kicked all of this off.