
Build Your Own Wooden Hand Plane - Part 3
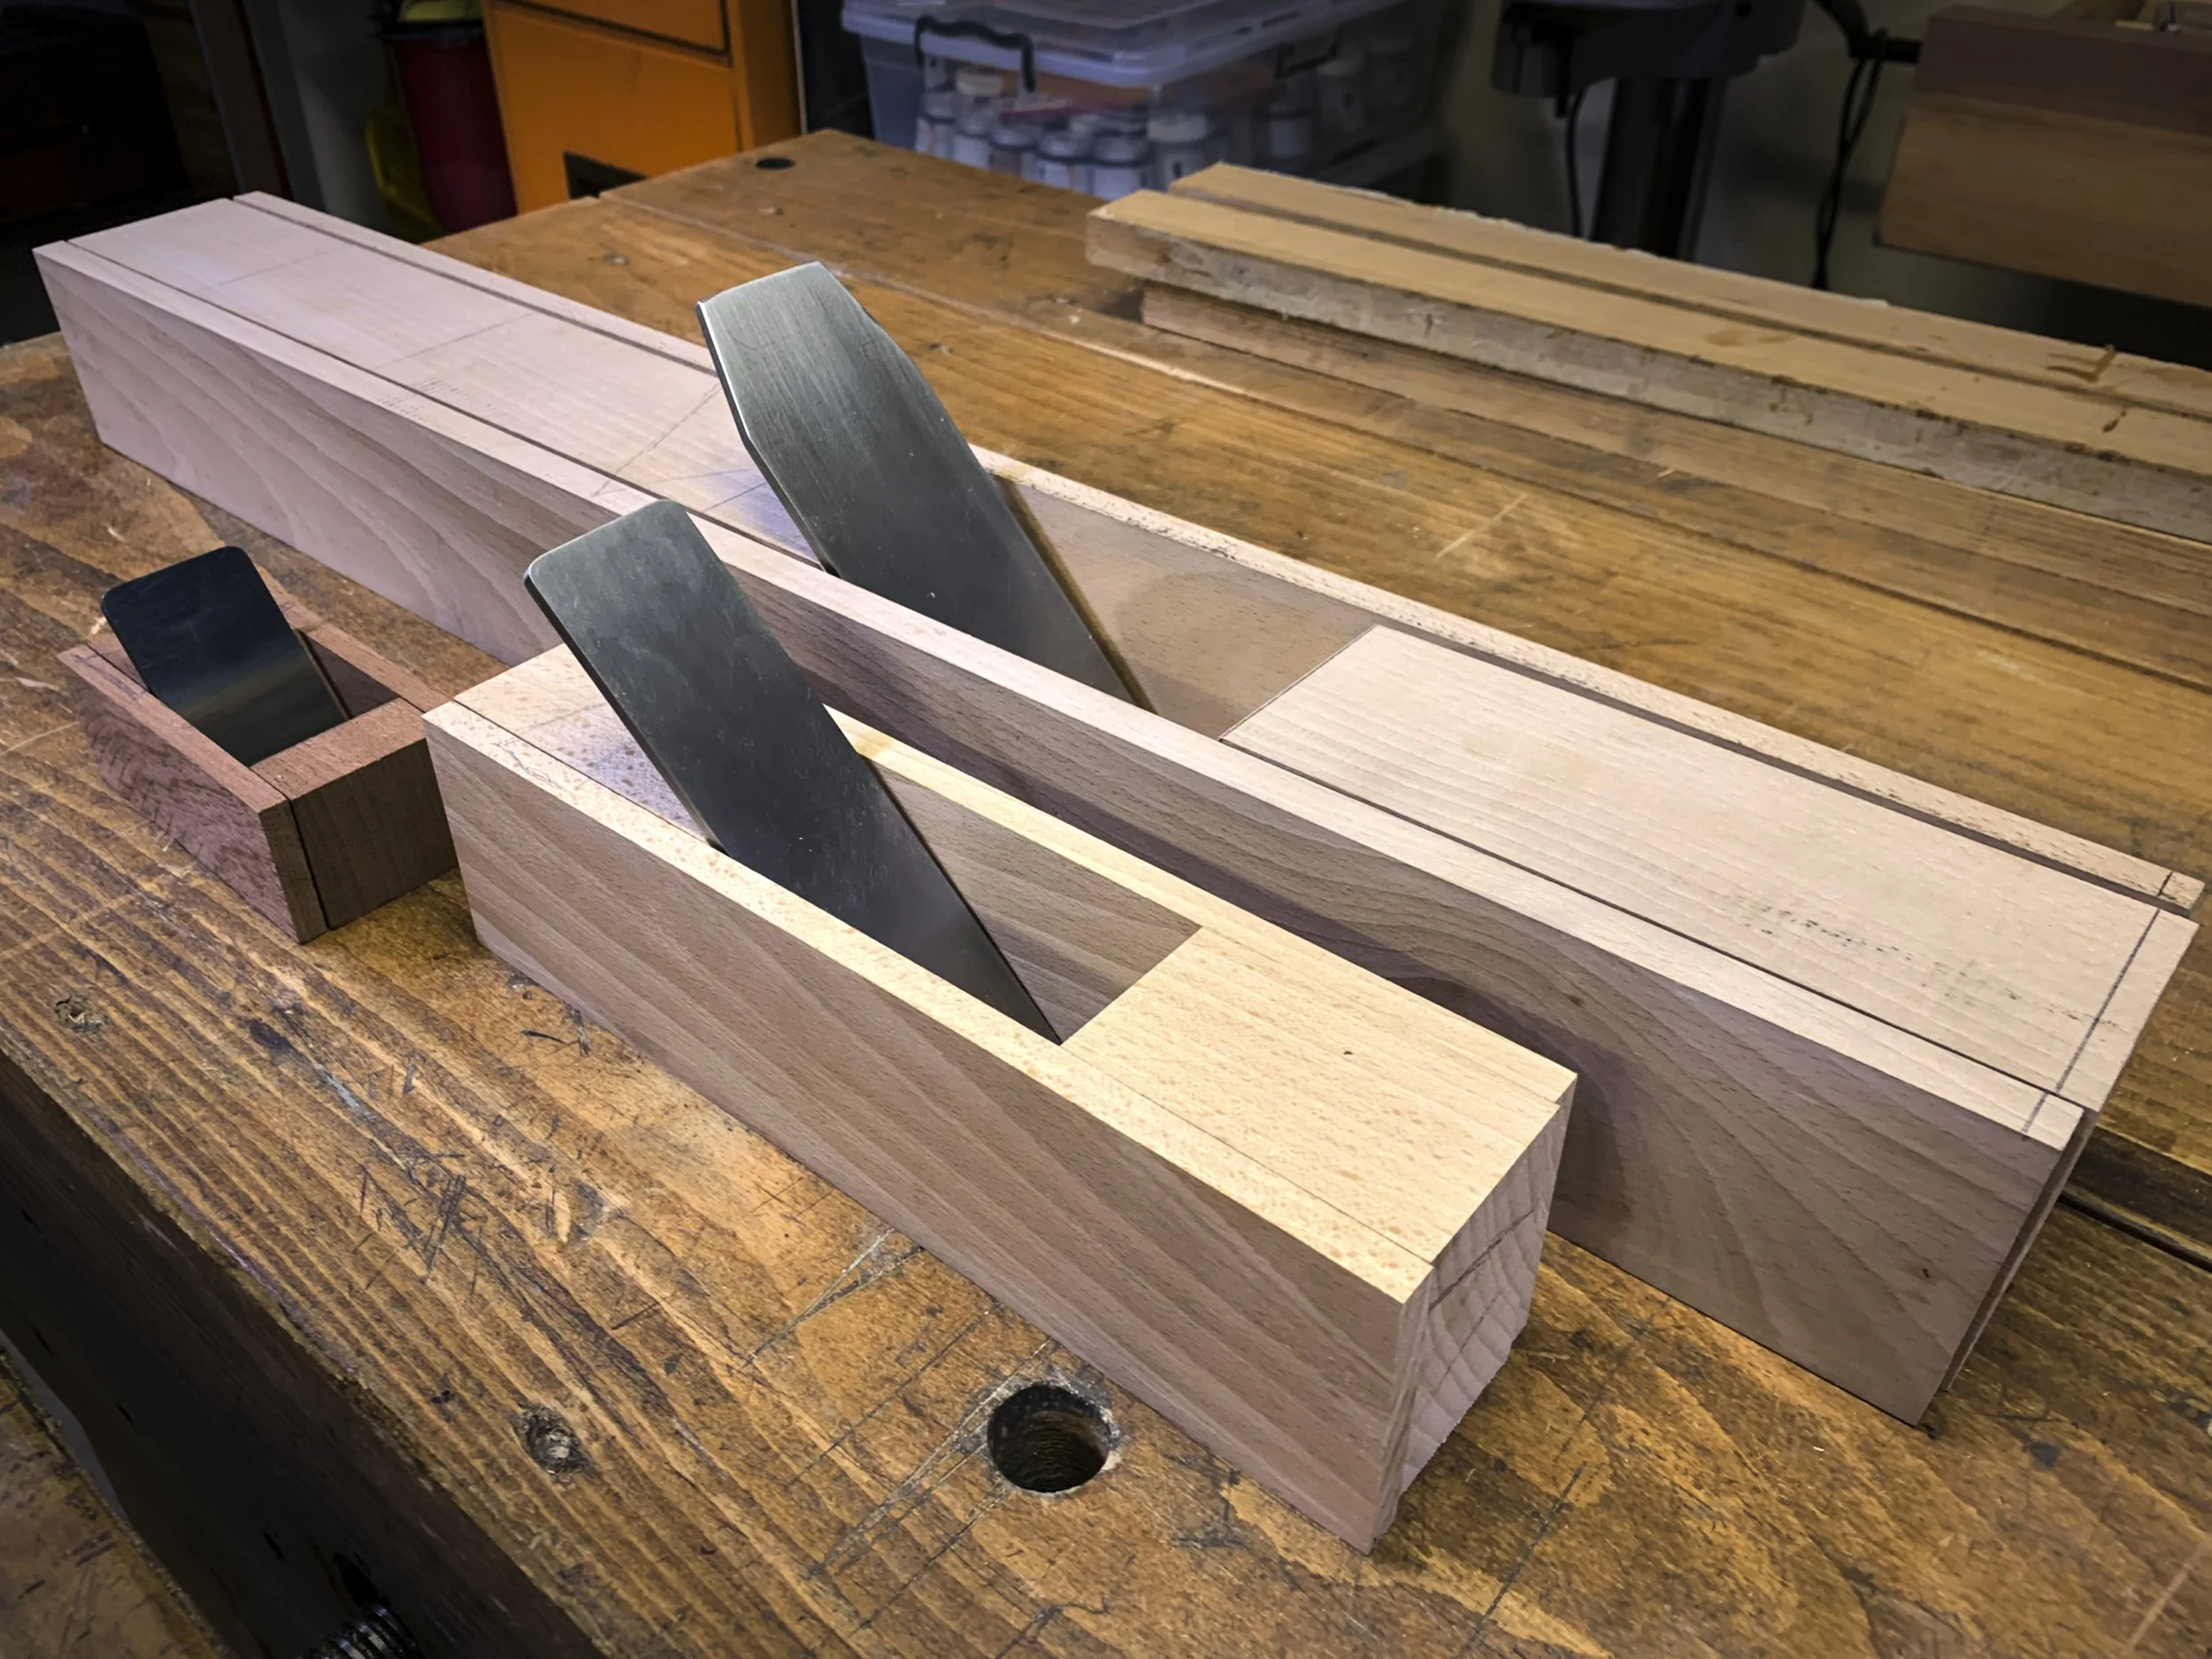
In Part 2 of this series we were cutting pieces apart in Part 3 we start bringing them back together.
At this point of the series we will be glueing the cheeks to the core sections followed by a cleanup before we go into securing the blade in Part 4.
Before we commit glue to the project we need to have a quick chat about mouth openings. You may or may not be aware that the mouth opening of a hand plane is somewhat important when it comes the thickness of the shavings you want to remove from the surface being planed. This opening in relation to the cutting edge of the blade actually has more to do with the amount of tear out during the planing process and this in turn has a bearing on the quality of the surface left by the hand plane when in use.
Basically the rule of thumb is that if a hand plane is to be used as a smoother or if it is used to tackle difficult grain that one should be using a hand plane with a narrow mouth opening to help fight tear out which ultimately results in a better finish.
I don’t subscribe to narrow mouth openings.
Not that it doesn’t work, it does, and there is lot of research out there that prove the usefulness of narrow mouth settings and the set up of the chip break to manage tear out. I just don’t depend much on the width of the mouth to manage tearout.
I do however, subscribe to the use of high planing angles and back bevels on my blades (York pitch) to help control tear out. I believe my preference to using techniques other than the mouth opening, to be as a result of cutting my planing teeth so to speak on the standard Bailey pattern hand planes and the fact that I found setting a useful mouth opening for finishing cuts to be a hit and miss affair, having to constantly remove and reinstall the blade and chip break during the mouth adjustment process. If I had started my journey with Bedrock pattern planes where the mouth opening can be set with the blade in situ I might have had a different opinion on the matter.
Making a wooden hand plane with a high angle bedding angle or adding a back bevel to a blade is much easier in my opinion than the frustrating process of making adjustments to my Bailey patterns. I have to add that the chip break setup is also an important factor when it comes to managing tear out but this article is not about metal hand plane setup.
Saying all of this I do need to mention that making a hand plane with a narrow mouth is quite easy and setting the mouth opening is where we start!
Step 1: Set The Mouth Opening
Something I should have mentioned earlier is that at this point we will be going to some trouble to limit the slippage of parts during the glue up. Parts sliding around under clamping pressure can be one of the most frustrating parts of building a plane and if allowed to get out of hand can at best result in a lot of cleanup required and at worst in having a new paper weight.
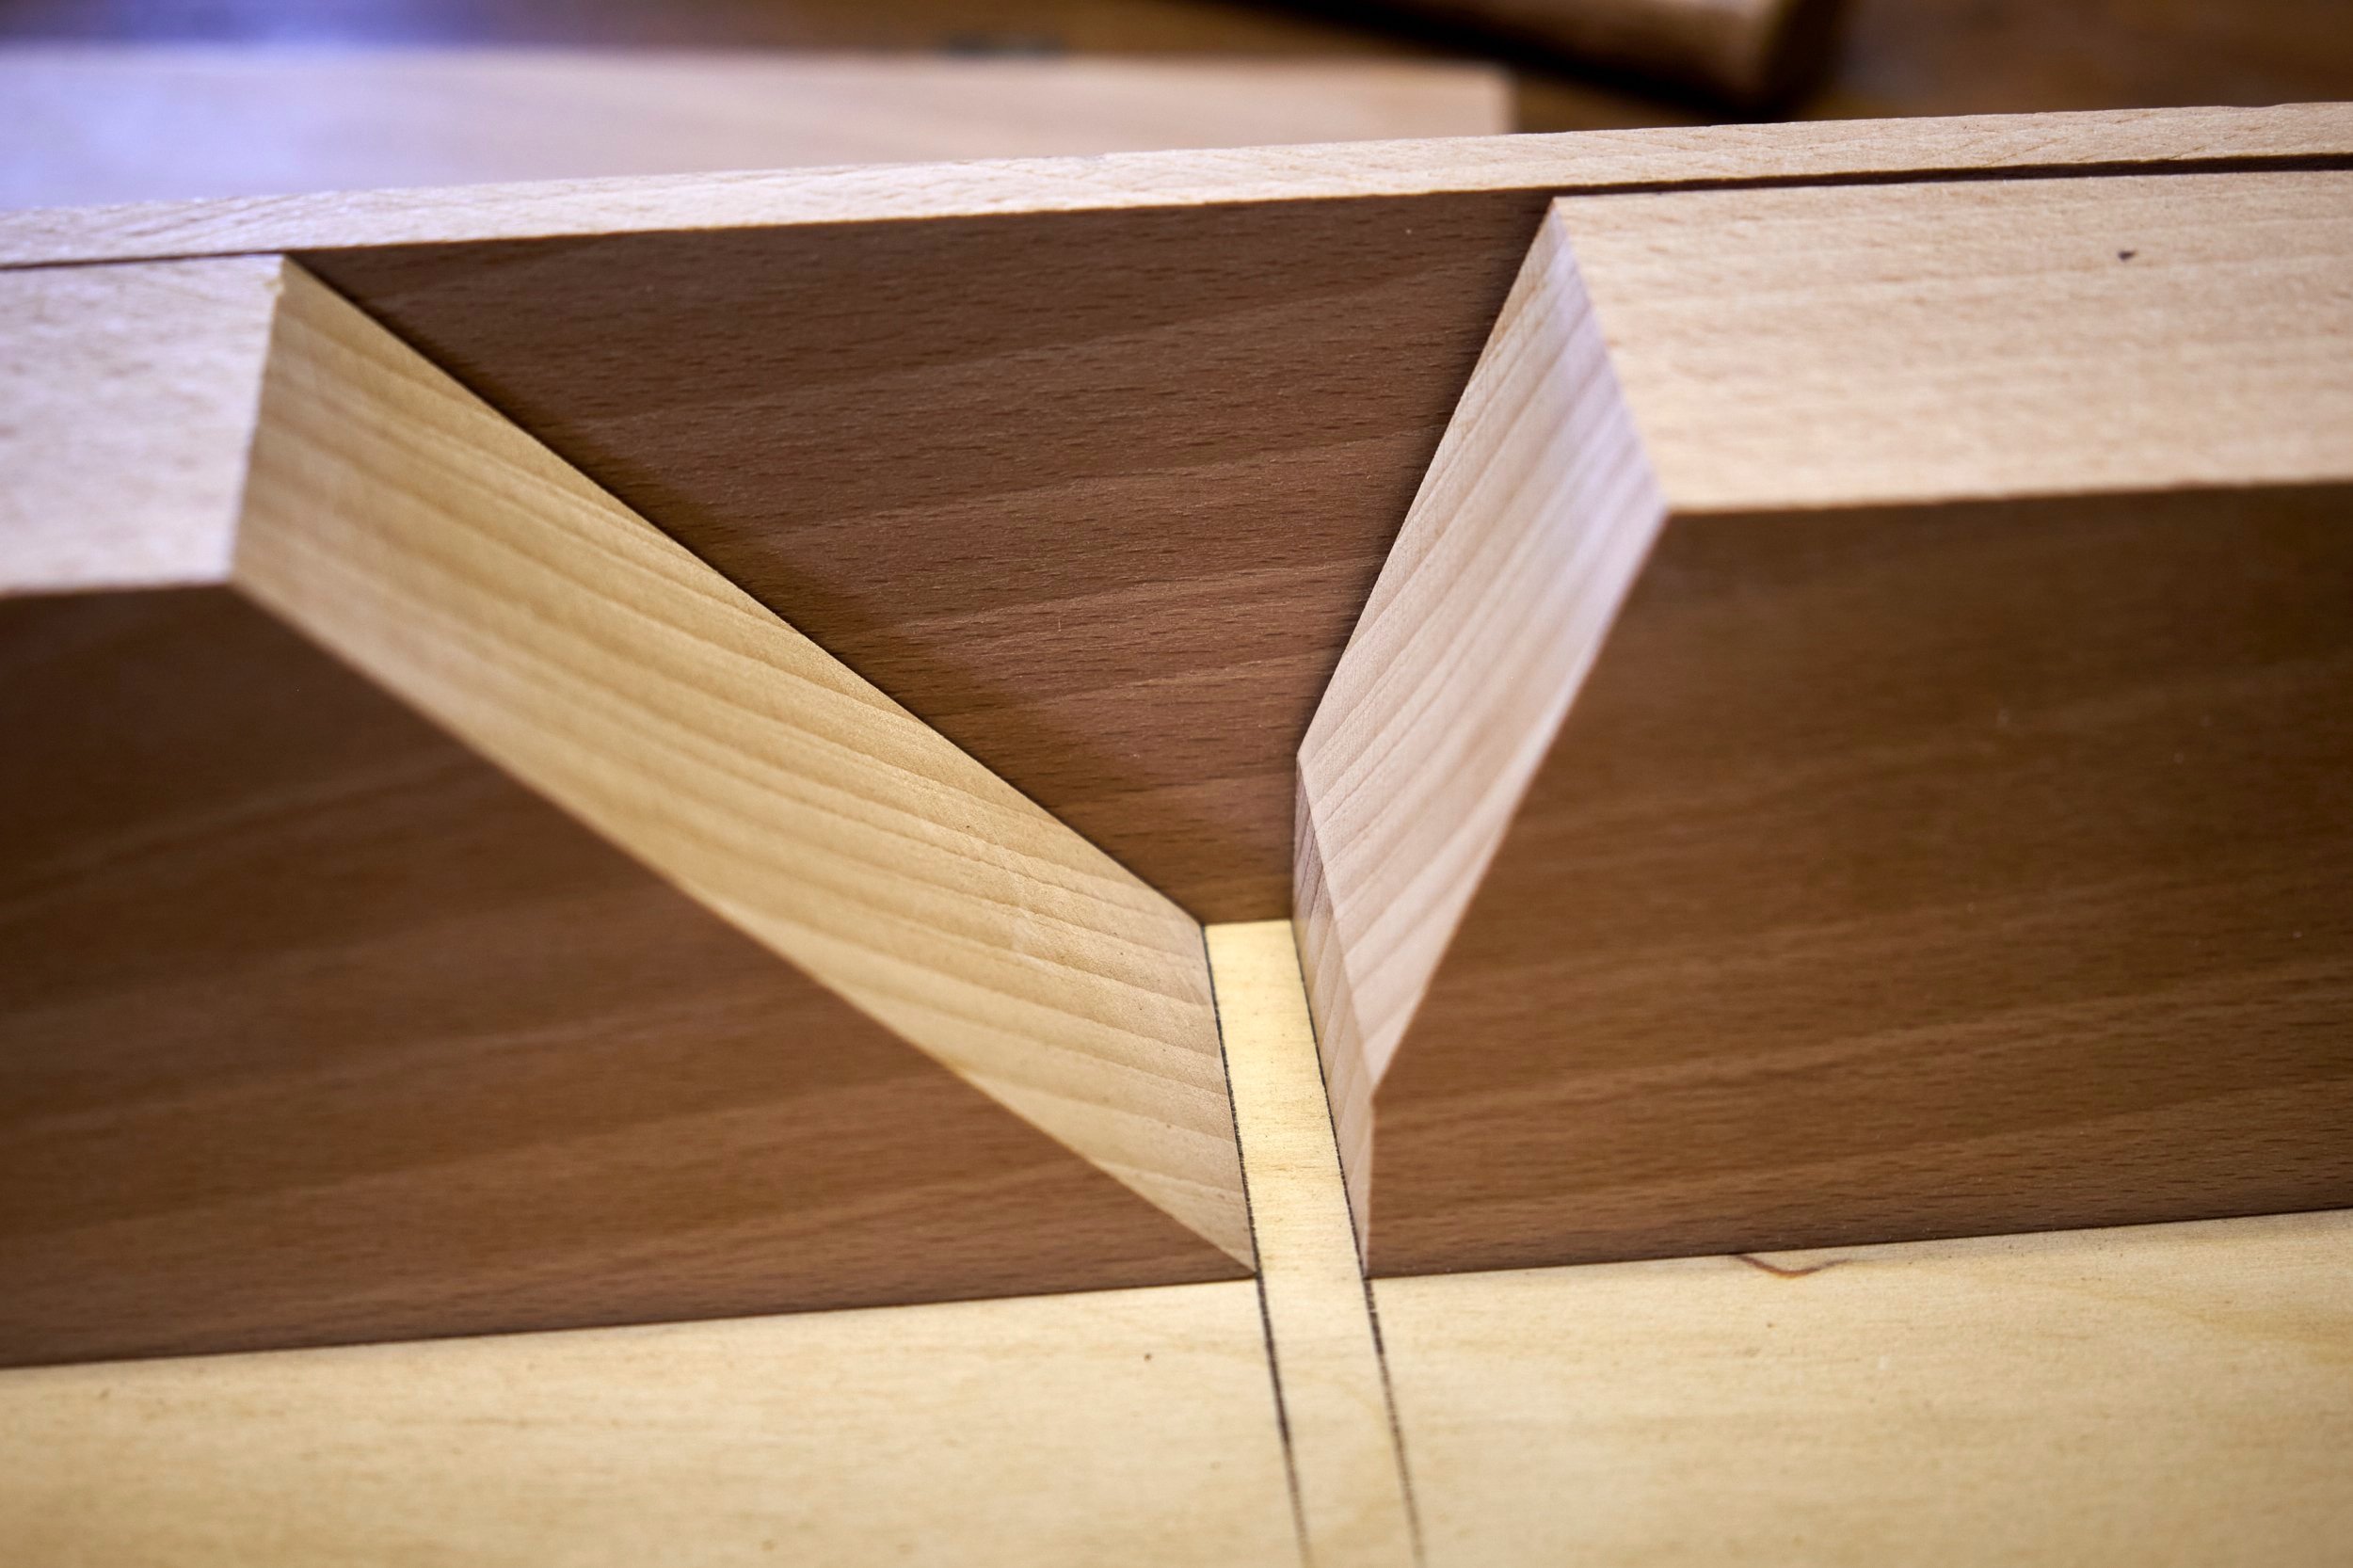
But before we manage sliding parts we need to decide how wide the mouth is going to be and this is the way I go about it.
Steps to set the mouth:
Make a base from plywood or other flat sheet goods to be the same width as the completed hand plane and slightly longer that it’s total length.
Leaving space on either side of the core block for the cheeks clamp the rear section of the core to the middle (lengthwise) of the base.
Place the fore block in front of the clamped piece and butt the edge of what will become the front of the mouth against the edge of the rear of the mouth, the mouth is now completely closed.
Get the blade that will be going into the plane and place it on the bedding surface of the rear block and let the cutting edge rest on the sloped surface of the fore block.
Using slight pressure from one hand keep the blade in place while moving the fore block away from the rear block, opening the space between the front and rear edges of the mouth.
Let the blade slide down on the bed until the edge bites into the sloped surface of the fore block again. You will note that the position of the cutting edge of the blade is now lower on the fore block or closer to the top surface of the base.
Follow steps 5 and 6 again but this time move the fore block far enough forward so that the edge of the blade comes to rest against the fore block, about 1mm from the top of the base.
Clamp the fore block into position without moving it and remove the blade.
Tips:
I prefer NOT to move the fore block forward to the point where the blade edge rests on the surface of the base. I want to open the mouth fully after the glue up and I find that if I have the blade protruding between the bedding and fore blocks at this point that the mouth ends up too wide after flattening the sole.
Remember you are building a bevel down hand plane so the 25º primary bevel of the blade needs to be pointing down towards the base, if you can see the top of the bevel the blade is the wrong way up.
Keep the pieces clamped to the base for the next step, it is also a good idea to mark the positions of the back and the front of the mouth onto the base just in case something moves.
Next we prep for and do the glue up.
Step 2: Glue Up
Many roads lead to Rome and in the same way there are many ways to keep parts in place during the glue up. This is the one I like but I’ll mention one or two more below.
Steps to prep for glue:
With the core block parts clamped to the base position the cheeks on either side of the core making sure that they are orientated according to the marks made at the start of the build.
Move the cheeks forward and back in relation to the core to get the neatest joint while making sure you have them positioned in a way that will allow the plane to be cut to final length.
Clamp the cheeks to the core and unclamp the core from the base making sure nothing moves.
Turn the plane upside down.
Apply masking tape along the bottom edges of the plane making sure that the joint line is well covered and the cheeks are secured to the core.
With a sharp pencil make a light mark along the sloping angles of the core blocks onto the inside of the cheeks.
Remove the clamps.
Place the taped up hand plane down on its side on your working surface.
Flip the uppermost cheek open like a book to reveal the sides of the core blocks.
Apply your preferred glue to both the inside surface of the cheek and both core blocks making sure to avoid the area marked out in step 6, this will be the side of the mouth and needs to remain free of glue to ease clean up later.
Close the “book” and while applying hand pressure flip the plane over to apply glue to the other side.
Close up and clamp the assembly making sure that the joints close flush all around.
Tips:
Use a wide masking tape and rub it down onto the surface when taping it all together it keeps the joint more stable.
If anything moves during the prep just go back to the marks indicating the mouth position on the base and start again.
Place a support under the cheek being opened up this will make applying glue easier and places less strain on the taped joint. The triangular cutout from the core is perfect for this.
Have lots of clamps at hand, for some reason my hand planes swallow many during glue up.
You don’t need much glue, a thin coat on both surfaces will suffice but don’t skimp either, you don’t want your new tool to delaminate in use.
Leave the assembly in clamps overnight or for at least 12 hours.
Using the method above might result in some movement of parts during glue up but if done right it should be very little and easily corrected during clean up.
There are other techniques that one can implement to limit sliding during the glue up:
Dowels
With the plane body clamped to the base, drill holes through the cheek and into the core blocks.
The hole does not need to go through the whole plane but should be deep enough to install a dowel size of your choice to almost full depth.
Apply glue, install the dowels and clamp.
I prefer to have my plane sides as clean as possible apart from the blade retaining dowel so I don’t use this method.
This is one of the best solutions if you are building your first plane.
Clamping Cauls
Keep the core sections clamped to the base and apply glue to the core and sides and bring the parts together.
Clamp the cheeks to the core and place cauls over the top of the plane making sure they span all the parts.
Clamp the cauls and leave to dry.
This does not stop the cheeks from shifting along the length of the plane but this shift is usually vey small.
Make sure the base is waxed before the glue up so that you don’t glue the plane to it!


Step 3: Cleanup

Remove it!
Remove the masking tape just as the glue sets up, it’s really hard to remove once the glue dries. Also make sure to clean the excess glue from the inside of the mouth.
Keep the body in the clamps during this process!
I complete the first two steps below just as the glue sets up but before it dries completely .
Cleanup Steps:
Clean any excess glue from the inside corners of the mouth.
Remove the tape before the glue dries it to the wood.
After the 12 hour minimum take the plane body from the clamps.
Flatten the sole using a plane or a belt sander, make sure the cheeks and the core are flush to one another.
Make the sides square to the sole, again using another hand plane or a belt sander.
Cut the hand plane to length by sawing off the waste on the front and back, make the ends square to the sole and sides.
Clean up the top and make this surface square to the sides.
Flip the plane body over so that the sole is pointing up.
Use an accurate square and strike a line with a marking knife roughly 1mm back towards the rear of the hand plane. Be sure to strike the line on the core block only and not across the full width of the plane.
Use a sharp chisel to cut away the rear part of the mouth at a steeper angle than the bed. This will protect the rear of the mouth from chipping out or breaking away in use.
Place the blade (remember the bevel should be pointing down) into the plane and make sure its back surface registers fully against the bed.
Let the blade slide down until the edge engages with the slope of the fore block. If the lamination went well the blade should not drop through the mouth but be stopped by the fore block in roughly the same place when you first positioned the blocks on the base in step 1.
Keep a finger on the blade to keep it in position before turning the plane over to have another look at the sole with the blade in position.
Eyeball the position of the blade’s cutting edge against the fore block and remove the blade from the plane body.
Using your guesstimate use your square to strike a line forward of the mouth towards the nose of the plane with the marking knife.
Chop the waste away with a sharp chisel, again at a steeper angle than the fore block angle.
Check again with the blade in position as in steps 13 and 14.
Repeat if necessary until the cutting edge of the blade protrudes through the mouth.
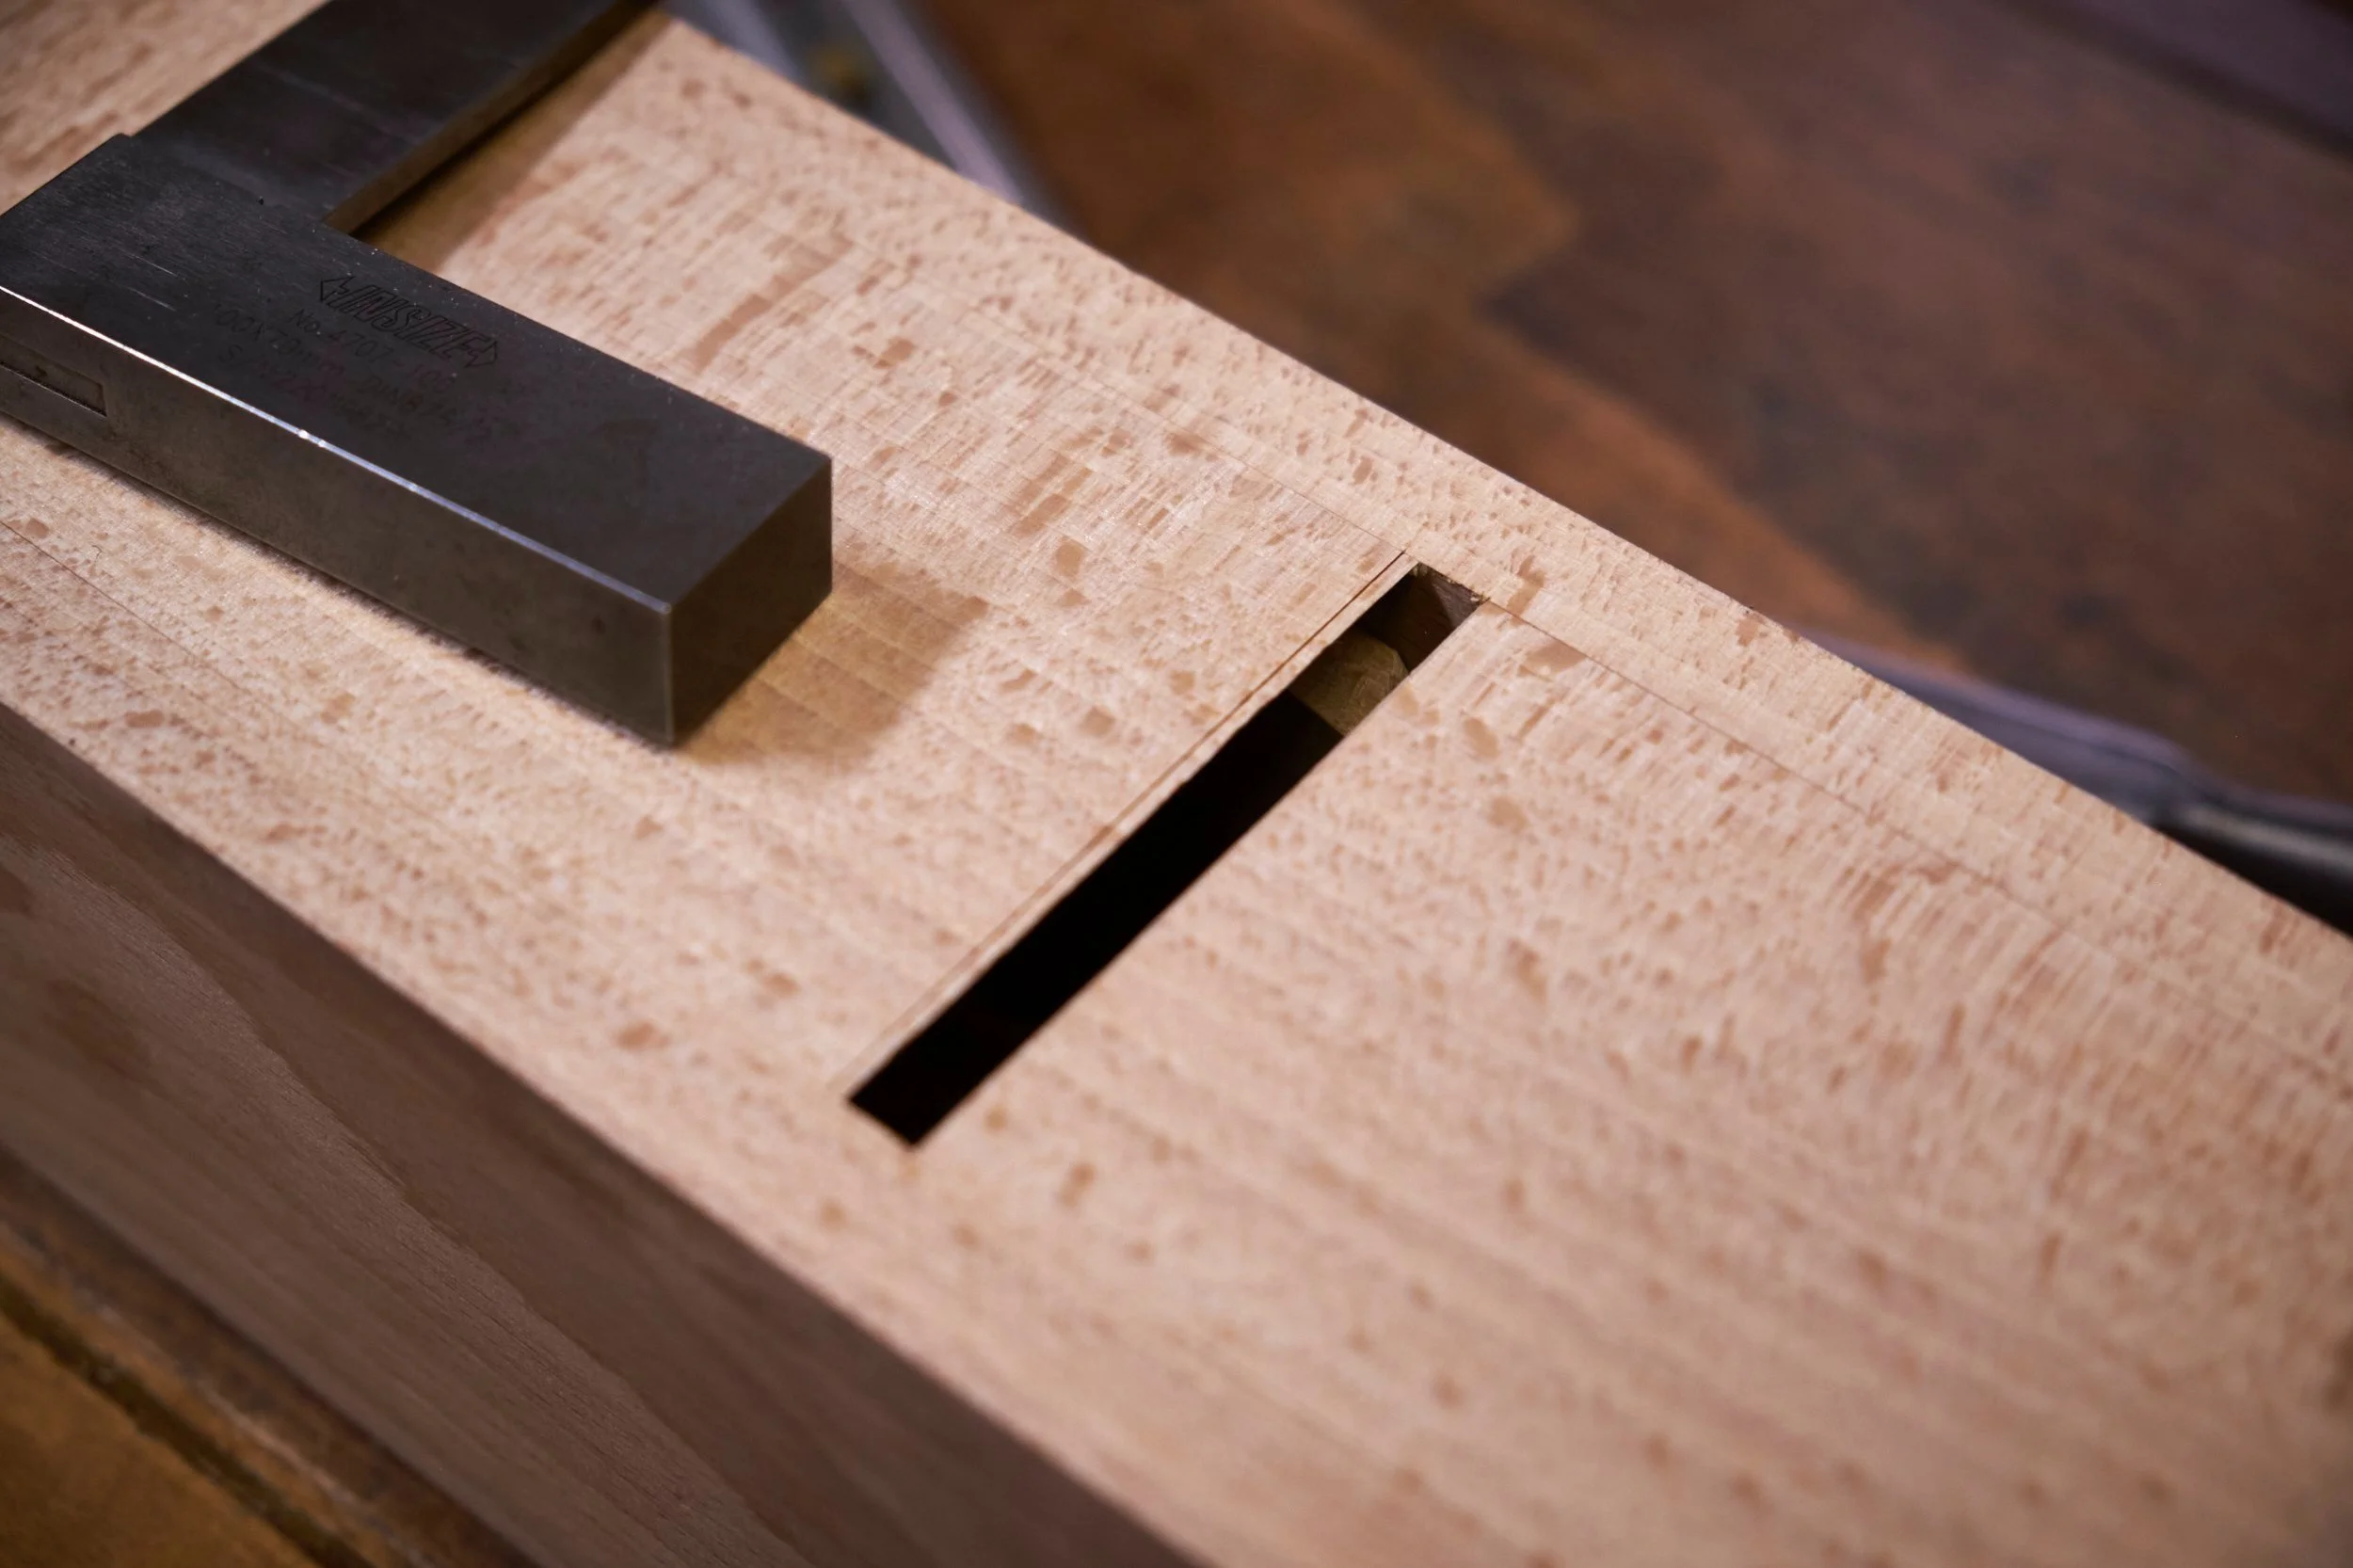
Open the mouth.
Use an accurate square to firs mark the back of the mouth and open it up at this line with a sharp chisel. Be careful when doing the same on the front of the mouth so that it doesn't become too wide.
This step can also be done after the blade is secured in Part 4.
Tips:
When flattening the sole and making the sides square to it be sure not to taper any surfaces. The sides and the top and bottom should remain parallel to one another along the full length of the plane.
Twist in the body can result form the components not being square during the prep stage but it is also possible to plane a twist into the body during clean up, this is more likely to occur in longer bodied planes.
Use winding sticks to check for twist (check out my closing comments at the end).
Take your time opening the mouth, rather er on the side of caution when working on the front edge of the mouth and remove material in small increments.
If you want the mouth to be as “closed” as possible, open the front of the mouth up to the point where the blade is just about to come through the mouth and then use a plane or a belt sander to remove material from the sole bit by bit whilst constantly checking to see if the blade pokes through.
Keep in mind that the process of cleaning up the sole will remove material and WILL open the mouth further, this means that if you start with a wide open mouth that it will open up even more during cleanup.
If you do not have a hand plane or belt sander available, you can stick a strip of sand paper to a flat surface and work the plane body back and forth on this.
Don’t drop your blade! Keep pressure on it when turning the plane over.
As soon as the blade pokes through the mouth you are done with Part 3 and I’m over my 2000 word limit!
I have to tell you about my “twisted” experience before I let you go.
I prefer using hand planes to flatten hand planes, at least the wooden types - hard to do the metal on metal thing. So as soon as my new jointer came out of the clamps I used my metal jointer to clean and flatten the wooden version. After I got the sole nicely cleaned up and flat it was time to move on to squaring the sides.

Square in hand I checked the sides and got a bit of a shock.
The sides were out of square by some margin and my first thought was that it would be an easy fix to remove more material from the sides to sort it out. Before I took the jointer to the sides I decided it was time for a coffee break to mull over my current predicament. Mulling done I decided that it might be a good idea to check the sole of my new jointer with a set of winding sticks and to my surprise I discovered that there was a bad twist in the body of the plane. This meant that simply “fixing” the sides would be a waste of time so I went back to the sole with the jointer and got it out of twist with the help of the winding sticks.
As soon as the twist was out I re-checked the sides with the square and they were much more square with the bottom and only needed a few swipes with the jointer to get them where I wanted.
The only blowback on this whole whoopsie is that I removed so much material from the sole that the mouth was left slightly more open than I would have liked, thus we learn.
In the next instalment we secure the blade into the plane using a wedge and by the end you will have a working hand plane!
See you in Part 4.


Some useful tools in the workshop come from outside of the world of woodworking. I list my top 5 favourite such items and one or two might come as a surprise.